Operation Title facts for kids
Quick facts for kids Operation Title |
|||||||
|---|---|---|---|---|---|---|---|
| Part of the Second World War | |||||||
|
|||||||
| Belligerents | |||||||
| Commanders and leaders | |||||||
| Strength | |||||||
| 2 Chariot manned torpedoes 1 trawler |
1 battleship Anti-aircraft batteries and ships |
||||||
| Casualties and losses | |||||||
| 1 man murdered 2 Chariot manned torpedoes 1 trawler |
None | ||||||
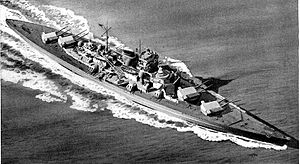
Operation Title was a secret mission during World War II. It was an attempt by the Allied forces to attack the powerful German battleship Tirpitz. This happened in Norway between October 26 and November 5, 1942.
The plan involved two special British mini-submarines, called Chariot manned torpedos. A Norwegian fishing boat secretly carried them close to where Tirpitz was anchored. The attack had to be called off because both mini-submarines were accidentally lost.
The mission was planned after Royal Air Force bombers failed to damage Tirpitz. Two British Chariot crews, along with British support staff and Norwegian resistance fighters, took part. They traveled to Norway on a fishing boat that was changed to hide the mini-submarines. The boat had engine problems, which caused delays.
Both Chariots broke free from the fishing boat during a storm on October 31. This happened just before the attack was supposed to start. The mission was then stopped. The Allied team tried to escape by walking overland to neutral Sweden. Most of them reached Sweden safely. However, one British soldier was captured and sadly killed by German forces. Historians believe Operation Title was a clever plan that failed due to bad luck and some equipment issues.
Contents
Why Tirpitz Was a Target
Before World War II, the German Navy, called the Kriegsmarine, planned to attack Allied merchant ships if war broke out. They thought large warships like battleships and cruisers were very important for this. The Scharnhorst and Bismarck battleships were built for long-range attacks in the Atlantic Ocean. Tirpitz was the second Bismarck-class ship. It was launched in April 1939 and joined the navy in February 1941.
In early 1941, German battleships attacked Allied convoys in the Atlantic. The German battleship|Gneisenau||2 and German battleship|Scharnhorst||2 sailed from Germany, attacked ships, and returned to occupied France. Another attack in May involved the battleship Bismarck and the heavy cruiser Prinz Eugen. Bismarck sank the British battlecruiser HMS Hood on May 24. But Bismarck was then badly damaged by planes from the British aircraft carrier HMS Ark Royal. It sank on May 27 after being attacked by several British battleships. After Bismarck was lost, Tirpitz became Germany's only large battleship.
After Germany invaded the Soviet Union in June 1941, the Allies started sending supply convoys to northern Russia. These Arctic convoys sailed through the Norwegian Sea and Arctic Ocean. In late 1941 and early 1942, these convoys faced little opposition. But the harsh weather, with extreme cold and strong winds, made naval and air operations very difficult for everyone.
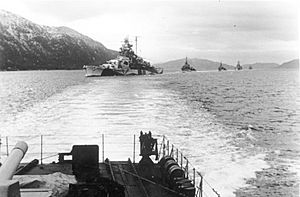
In December 1941, Germany moved many naval ships and aircraft to northern Norway. They had occupied Norway since early 1940. These forces were meant to attack the Arctic convoys and defend Norway from invasion. German leader Adolf Hitler wrongly believed the Allies planned to invade Norway. On January 12, 1942, Hitler ordered Tirpitz to move from Germany to Fættenfjord in Norway, near Trondheim. The battleship arrived on January 16. It was to be the main ship of a strong battle group.
The Allies learned about Tirpitz arriving in Trondheim on January 17. They got this information by decoding German radio signals. British photo reconnaissance planes found the battleship there on January 23. They regularly flew over Trondheim to watch it. Tirpitz was a big threat to Allied convoys. British Prime Minister Winston Churchill said on January 25 that destroying or damaging this ship was "the greatest event at sea at the present time." On January 28/29, 16 Royal Air Force (RAF) heavy bombers attacked Tirpitz at Fættenfjord. But they caused no damage.
On March 6, 1942, Tirpitz and three escorting destroyers left Fættenfjord. They went to attack two Allied convoys in the Norwegian Sea. Planes from the British aircraft carrier HMS Victorious attacked Tirpitz on March 9, but failed. After this, Hitler ordered that Tirpitz should not attack convoys unless no aircraft carriers were nearby.
The RAF attacked Tirpitz at Fættenfjord many times in March and April 1942. Raids happened on the nights of March 30/31, April 27/28, and April 28/29. None of these caused any damage to the battleship. Twelve British planes were lost. These attacks had to be at night because German air defences made daytime attacks too dangerous. As spring brought longer daylight hours, they decided to stop heavy bomber attacks until autumn.
On July 2, 1942, Tirpitz and other German warships sailed to Altenfjord in northern Norway. They were ready to attack Convoy PQ-17. The head of the Royal Navy, Admiral Dudley Pound, ordered the convoy ships to scatter and go to the USSR alone. This was because he knew the German force was there. Tirpitz sailed out on July 5, but Hitler ordered it back to Narvik the next day. A British aircraft carrier had been spotted. German planes and submarines caused heavy losses to the ships from PQ-17; 24 were destroyed.
Planning the Attack
Chariot Mini-Submarines
After Convoy PQ-17 was destroyed, the Allies were even more determined to stop Tirpitz. Since RAF air raids had failed, the Admiralty (the Royal Navy's leaders) decided to try attacking the battleship with small submarines. Full-sized submarines could not be used because Fættenfjord was too shallow. They would likely be found before they could attack.
At this time, the Royal Navy was developing two types of small submarines. These were the Chariot manned torpedo and the X-class midget submarines. Work on both types began in 1940. Italy's navy had used manned torpedoes to damage three British battleships in Egypt in December 1941. After this, Churchill asked what was being done to do something similar. By early February 1942, the Royal Navy's submarine commander, Rear Admiral Max Horton, was planning to use manned torpedoes and midget submarines.
Tests of the first Chariot mini-submarine began in April 1942. Volunteers to operate Chariots and midget submarines were also asked for in early 1942. The request said volunteers would do "hazardous service" but did not say what it was, to keep it secret. By April 1942, 30 men had joined.
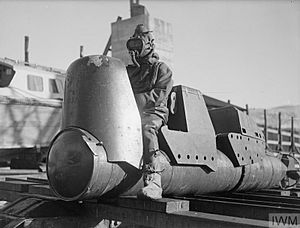
A Chariot had a crew of two: a commander and a second person. It was about 22 feet long and weighed 3,500 pounds. Its single propeller was powered by an electric battery. This gave it a maximum range of 18 miles. The Chariots carried a detachable warhead with 600 pounds of explosives. The idea was for a ship to carry the Chariots close to their target. The crew would then get past enemy defenses, like anti-submarine nets. The second crew member would attach the warhead to the target ship's hull using magnets. The crew would then try to escape. Since the Chariot could not go back to its mother ship, they would head for shore and travel overland to a neutral country. Many tests and improvements were made in 1942 to perfect the Chariot's design and how to use them in battle. The crews also went through very tough training. Despite the difficulty and danger, few volunteers quit.
The Attack Plan
Planning to attack Tirpitz at Fættenfjord with Chariots started in mid-June 1942. Captain Edward Gibson and Lieutenant Colonel John Wilson developed the plan. Wilson was in charge of the Norwegian Section of the Special Operations Executive (SOE). The SOE was a secret British group that carried out sabotage attacks in occupied Europe. They quickly realized that the Norwegian resistance would need to help.
They thought about dropping the Chariots and their crews from the air. One idea was to drop them from Handley Page Halifax bombers. But this was too hard because the crew would struggle to find their Chariot after parachuting into the sea at night. Another idea was to use Short Sunderland flying boats to land the craft. Five of these planes were changed for this purpose. But the Sunderland idea was later dropped. It was thought that these large planes would likely be spotted before reaching Fættenfjord.
The final plan was to transport the Chariots and their crews by sea. They would go to Frøya island, west of Trondheimsfjorden. From there, the Chariots would be attached underwater to a boat provided by the Norwegian resistance. This boat would pretend to be a normal fishing boat to get past German defenses in Trondheimsfjorden. It would sail to Tautra island, north of Fættenfjord. The Chariot crews would then get into their mini-submarines near Tautra and attack Tirpitz. Admiral Pound approved this plan on June 26. The attack was named Operation Title and was set for October 1942.
The Attack Mission
Getting Ready
After the plan was approved, contact was made with the resistance in Trondheim. A Norwegian diplomat in Sweden helped. A resistance agent named Arne Christiansen went to Trondheim. He asked the local resistance network for information about German security and how to avoid it. Christiansen also tried to find a fishing boat captain at Frøya who would help carry the Chariots.
Meanwhile, the Chariot teams continued training in Scotland. In late August, seven Chariots practiced attacking the British battleship HMS Howe. The battleship was protected by nets and a patrol boat. Four of the seven Chariot teams successfully placed practice explosives on the battleship. Another practice attack the next night was also successful. One Chariot crew member died in an accident during a third practice. But the exercises showed the teams were ready for combat.
Tirpitz stayed at Bogen Bay near Narvik after the convoy operation. In September, it was decided to move her back to Fættenfjord for maintenance. The British believed Tirpitz would return to Fættenfjord because the anti-aircraft guns there were still in place.
Christiansen could not convince any fishermen at Frøya to provide a boat. One man refused because he feared German revenge on his family. Lieutenant Colonel Wilson decided to use ships and people from the Shetland Bus force instead. These ships carried people and supplies between Norway and the UK. The very experienced Shetland Bus captain Leif Larsen agreed to join. He recruited a crew of three: engineer Palmer Bjørnøy, deckhand Kohannes Kalve, and radio operator Roald Strand. Larsen could not tell them the mission's true nature. But he warned them it might cost their lives.
Larsen chose his boat, the Arthur, for the mission. It was changed to carry two Chariots. The mini-submarines would be on deck for the first part of the trip. Then they would be towed underwater for the last 100 miles to Fættenfjord. Larsen personally put two large metal loops on the boat's hull. The Chariots' noses would be attached to these loops with steel cables while being towed underwater. A secret compartment was also added. This was to hide the four Chariot crewmen and two support operators from any Germans who might inspect the boat in Norwegian waters. The Norwegian resistance gave information on the papers Larsen would need to enter Fættenfjord. They also provided copies of some of these documents. Arthur was disguised as a similar boat known to operate in Norway. The crew got fake documents.
The final plan said Larsen would sink Arthur after releasing the Chariots. The four Norwegians and two British support staff would then row to shore. They would hide in a hay truck. Norwegian resistance members would pick up Arthur's crew and the surviving Chariot operators. They would drive them to the Swedish border.
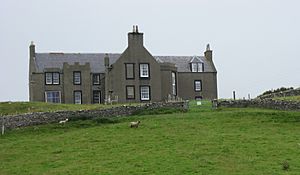
Two Chariot operator teams were chosen. One team was Sub-Lieutenant William Brewster and Able Seaman A. Brown. The other was Sergeant Don Craig (a British Army soldier) and Able Seaman Bob Evans. The two other operators on Arthur, Able Seamen Billy Tebb and Malcolm Causer, would help the Chariot crews with their diving suits. They would also be spare crewmen if needed. In the first week of October, Arthur and the two Chariot teams did a final practice attack on the battleship HMS Nelson. This was successful. The Chariot teams cut through the nets around the battleship, attached their charges, and escaped without being seen. The attack force then went to Lunna House in the Shetland Islands to wait for orders.
Fake papers for Arthur and its crew were prepared in October. This was done just before the ship left. This made sure the fake signatures were from the German officers in charge of the area the attack force would pass through. The papers made Arthur look like a cargo ship. A cargo of peat was loaded. During the trip to Norway, the Chariots' warheads were hidden in the peat.
Tirpitz returned to Fættenfjord on October 23. An RAF photo reconnaissance plane saw it there the next day. On October 25, Admiral Horton ordered Operation Title to begin. The attack was set for October 31.
Journey to Trondheimsfjorden
Arthur sailed at 9 am on October 26. The weather was bad the whole way to Norway. Several sailors got seasickness because of the rough seas. Mountains near the village of Bud in Norway were seen at midday on October 28. The ship's engine broke down that afternoon. The crew had to put up a sail while it was fixed. The engine restarted in the late afternoon. Arthur then went to Edøya island. The cover story for the boat's trip was that it was carrying peat from the island. Arthur reached Edøya on the morning of October 29. The crew anchored there.
The plan was to attach the Chariots' warheads, unload them from Arthur, and secure them to the boat at Edøya. Attempts to do this in the morning were stopped by several German aircraft flying low to inspect the ship. All work had to stop each time, and the British crew had to hide below deck. The warheads were fitted to the Chariots after the German planes stopped patrolling. But rough seas caused Arthur to drag its anchor. This made unloading the Chariots impossible. The crew decided to find a better place to anchor. This took the rest of the day.
Work to unload the Chariots started again at 5 am on October 30. Both Chariots were unloaded and secured to the bottom of Arthur's hull. They used ropes tied to cleats on the boat's deck. Soon after, an old Norwegian civilian came to the ship in a rowboat. He asked questions about the ropes and Chariots under Arthur. Larson said the ropes were for fishing nets, and the Chariots were for minesweeping for the Germans. The old man asked for butter and was given some. Larson then angrily threatened to kill the man and his daughter if he told anyone what he had seen. This made the old man quickly row away. The work to secure the Chariots and delays from the old man meant Arthur could not reach the attack position that night. Arthur continued its journey shortly after midday. The crew threw the radio and other British items overboard.
Before reaching Trondheimsfjorden, Larsen planned to visit the small town of Hestvik. He wanted to meet storekeeper Nils Strøm, who would give information on German activities. During the trip there, Arthur's engine started making loud knocking noises. Bjørnøy checked the engine and found a damaged piston. It needed urgent repair. Arthur reached Hestvik at 11 pm that night. Larsen told Bjørnøy to fix the engine while he met Strøm. The Norwegian shopkeeper gave information on German security procedures. Bjørnøy could not fix the engine because the piston was cracked. It needed to be replaced or repaired with better tools than were on the boat. Strøm arranged for a trusted local blacksmith to be woken up. The blacksmith let Bjørnøy use his forge to repair the piston. After two hours, Bjørnøy put the engine back together. He thought it would last long enough to get the boat to Fættenfjord.
In Trondheimsfjorden
Arthur left Hestvik at 9 am on October 31 for the last part of its journey to Fættenfjord. The waters between the town and Trondheimsfjorden were regularly patrolled by German security boats. Arthur was expected to be stopped for questions. So, the British crew hid below deck with a machine gun ready. The Norwegians had pistols. A German patrol boat was seen at 10 am but did not stop Arthur.
A German armed trawler stopped the Norwegian boat for questioning as it entered Trondheimsfjorden, near the fortress at Agdenes. A young German sailor seemed to spot the Chariots. But Kalve distracted him by throwing a rope. A German officer boarded Arthur. He carefully checked the crew's papers and questioned Larsen. He also briefly checked the peat cargo but did not find the hidden British crew or the Chariots. The German officer left after about 15 minutes. Arthur was then allowed to go into Trondheimsfjorden. Arthur passed Trondheim five hours later. This put it about 20 miles from Tautra island, where the Chariots were to be launched. The British crew came on deck briefly. Then they slowly started dressing the attack crews in their diving suits. Craig and Evans were dressed first, followed by Brewster and Brown.
As the British crew dressed, Arthur met rough seas that turned into a storm. This made the Chariots swing and hit the boat's hull. Larsen slowed Arthur to reduce the Chariots' movement. But he could not stop the boat, or it would be inspected again by the Germans. He hoped the storm would end quickly, as storms often did. As Brewster and Brown finished dressing, they heard a "loud, grinding tearing noise." The boat then shook. It seemed something had tangled its propeller. They thought one of the Chariots had broken free. Larsen steered Arthur close to shore to find calm water. Evans then went into the water and found that both Chariots were gone. At that moment, Arthur was only 10 miles from Tirpitz.
The Escape
Losing the Chariots meant Operation Title had to be stopped. The original escape plan was no longer possible. It was twelve hours before the attack team was supposed to meet the local resistance. It was not possible to sink Arthur near the shore because the Germans would probably see it. Bjørnøy also said the engine was about to fail again. Larsen suggested they go east along Trondheimsfjorden. They would find a quiet place to sink the boat and then try to reach the Swedish border. The British crew agreed. The Allied team started preparing the ship for sinking. They gathered food and weapons for their escape. The men did not have warm clothing for the terrain. This was supposed to be given to them by the Norwegian resistance after the attack.
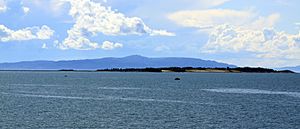
Around 1 am on November 1, Arthur was sunk in the channel between Tautra and the Frosta peninsula. The tired Allied crew rowed ashore. They only had maps, pistols, and a small amount of food. The Norwegians expected to be shot if captured. But the British believed they would be treated as prisoners of war because they wore military uniforms. The British crew did not know about the Commando Order issued by Hitler on October 18, 1942. This order said that all Allied special forces captured were to be killed after being questioned.
After coming ashore, the group walked east together. Larsen told them to stop and rest after the sun rose. At midday, they set off again, now split into two groups of five. Larsen led one group with Craig, Evans, Tebb, and Strand. Brewster led the other group, which included Brown, Causer, Kalve, and Bjørnøy. Each group would take a different route to the Swedish border, about 50 miles to the east. Brewster's group would follow the shore of Trondheimsfjorden. Larsen's group would take an inland route. They hoped that splitting into two small groups would be safer than traveling as one large group. The men first needed to get through the heavily defended area around Trondheimsfjorden. Then they would pass a farming area and finally climb over a 6,000-foot plateau.
Larsen's group avoided being caught during a difficult trip near the Swedish border. As they got close to the border, they met a German military policeman and a member of the Norwegian Hirden force (who worked with the Germans). The Allied team was arrested. But Tebb quickly pulled out his hidden pistol and fired. The German was killed, and the Norwegian escaped. Evans was wounded in the incident. Since German troops were nearby, the Allied team decided to leave Evans behind. They believed Evans would be treated as a prisoner of war because he was still wearing a naval uniform. The rest of Larsen's group crossed the border soon after and surrendered to the Swedish police.
Brewster's group made good progress on November 1. They saw the German cruiser Admiral Scheer at its well-hidden anchorage in Lofjord. They did not meet any Germans except a small group of sailors out for a walk. That night, they slept in an abandoned hut. The next night, a Norwegian farmer gave them shelter and a meal. The night after, they slept in a hunting cabin. Brewster's group crossed the Swedish border soon after Larsen's on November 5. They turned themselves in to a police station. Causer had frostbite and needed to go to the hospital. The other group members were generally healthy.
The nine Allied personnel who crossed into Sweden were kept in a house for two days. Then they were taken to a camp near Stockholm. After ten days there, they were given to the British embassy in Stockholm. They were flown back to the UK soon after. Larsen received the Conspicuous Gallantry Medal. Brewster received the Distinguished Service Cross.
After Arthur was sunk, it settled on the fjord floor with its masts sticking out of the water. The Germans found it and raised it. They investigated the boat. After finding its secret compartments, they correctly guessed what its purpose had been.
What Happened Next
The Fate of Evans
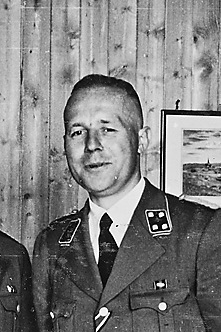
Evans was captured soon after Larsen's group left him. He received medical treatment. Then he was handed over to Gerhard Flesch, the head of the Gestapo (German secret police) in Trondheim. Flesch transferred Evans to senior German Navy officers. They questioned him about Operation Title. When they finished, the officers returned Evans to Flesch. They knew the Gestapo would likely kill him. Evans was then taken to Oslo. On January 19, 1943, he was shot as a saboteur.
The killing of Evans was personally approved by Field Marshal Wilhelm Keitel. He was the chief of the Oberkommando der Wehrmacht (the German military's high command). The killing of Evans was one of the reasons Keitel and Flesch were tried separately after the war. Both were found guilty of war crimes and executed.
Why the Mission Failed
Historians see Operation Title as a clever but unlucky attack. In 1956, British historian Stephen Roskill wrote that the operation was "most original and gallant, though unsuccessful." C.E.T. Warren and James Benson had a similar view in 1953. They noted that if the Chariots "had only hung on for less than another hour [after the storm], Tirpitz would have probably been destroyed."
In 2012, Patrick Bishop said that Tirpitz was "spared by a lucky change in weather and faulty workmanship." He wrote that despite the "great ingenuity and technical skill" in the plan and the risks taken by many Norwegians, it failed. This was due to the faulty way the Chariots were attached to Arthur. As a result, "a great opportunity was squandered." In 2019, Angus Konstam wrote that if Arthur had not met the storm on October 31, "the course of the naval war might have been altered." He called the attack a "very well-conceived and monumentally courageous operation" that still failed.
Later Attacks on Tirpitz
In September 1943, the Royal Navy launched a second attack on Tirpitz. This time, they used midget submarines. In Operation Source, six X-class submarines were sent to attack the battleship and two other large German warships. They were anchored at Kaafjord in northern Norway. The attack happened on September 22. Two of the midget submarine crews placed explosives under Tirpitz. These caused serious damage to the battleship. The damage could not be fully repaired, and Tirpitz was never fully ready for battle again.
The Royal Navy's Fleet Air Arm attacked Tirpitz several times in 1944. The first, Operation Tungsten, was on April 3, 1944. This was as repairs from Operation Source were almost finished. It caused a lot of damage. Other attacks were not effective. Operation Mascot on July 17 caused no damage. The Operation Goodwood attacks in August only caused minor damage. After Operation Goodwood failed, the task of attacking the battleship went to RAF Bomber Command. The first heavy bomber raid on Kaafjord (Operation Paravane) was on September 15, 1944. The bombers flew from bases in northern Russia. This attack caused damage to Tirpitz that could not be fixed. It was moved south to the Tromsø area of Norway to be used as a stationary coastal defense battery. The battleship was sunk there with many lives lost by another Bomber Command raid on November 12.
|


