The Hardest Day facts for kids
Quick facts for kids The Hardest Day |
|||||
|---|---|---|---|---|---|
| Part of the Battle of Britain | |||||
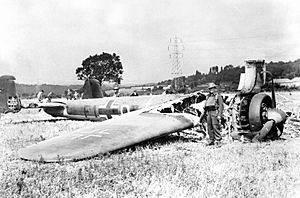 A Dornier Do 17Z bomber shot down near RAF Biggin Hill on 18 August 1940. |
|||||
|
|||||
| Belligerents | |||||
| Commanders and leaders | |||||
| Casualties and losses | |||||
| 27–34 fighters destroyed 39 fighters damaged 29 aircraft destroyed (ground) including eight fighters 23 aircraft damaged (ground) 10 killed 8 lightly wounded 11 severely wounded |
69–71 aircraft destroyed 31 aircraft damaged 94 killed 40 captured 25 wounded |
||||
The Hardest Day was a major air battle during World War II. It happened on 18 August 1940. This battle was part of the Battle of Britain. The German Air Force, called the Luftwaffe, fought against the British Royal Air Force (RAF).
On this day, Germany tried its hardest to destroy the RAF's Fighter Command. This part of the RAF protected Britain from air attacks. The air fights were some of the biggest ever seen at that time. Both sides lost many planes. Britain shot down twice as many German planes in the air as they lost. But, many RAF planes were destroyed on the ground. This made the total losses for both sides about the same.
Even though other big battles happened later, 18 August 1940 saw the most planes lost by both sides combined. This is why it became known as "the Hardest Day" in Britain.
After Britain refused peace offers in June 1940, Adolf Hitler planned to invade the United Kingdom. This plan was called Operation Sea Lion. But first, Germany needed to control the skies. This would stop the RAF from attacking the invasion ships. It would also prevent the RAF from protecting the British Navy. Hitler ordered Hermann Göring, the Luftwaffe's leader, to get ready for this.
The main goal was to destroy RAF Fighter Command. In July 1940, Germany started attacking the RAF. They targeted ships in the English Channel and sometimes RAF airfields. On 13 August, Germany launched a huge attack called Adlertag (Eagle Day). It failed to destroy RAF airfields. But Germany kept attacking, and five days later came "the Hardest Day."
Contents
Why the Battle Happened
The Luftwaffe wanted to destroy Britain's fighter planes. This would make it easier for Germany to invade Britain. German leaders hoped that if they destroyed the RAF, Britain would give up. Then, the risky sea invasion might not be needed.
Britain's navy was much stronger than Germany's. Crossing the English Channel would be very dangerous for German ships. Also, the Luftwaffe had lost many planes in earlier battles. They had to wait until they had enough planes before attacking the RAF in August 1940.
Early Attacks on Shipping
Before attacking mainland Britain, Germany first targeted British ships in the Channel. These attacks happened from 10 July to 8 August 1940. They were not very successful. Only a small amount of shipping was sunk. Laying mines from planes worked better.
These attacks did not hurt RAF Fighter Command much. The RAF lost some pilots, but their overall strength grew. However, the attacks did force Britain to stop using the Channel for convoys. Ships had to go to ports in northern Britain instead. After this, the Luftwaffe began attacking RAF airfields in Britain.
Escalation of Air Combat
August saw more intense air battles. Germany focused on attacking Fighter Command. The first big raid on RAF airfields happened on 12 August. Germany increased its attacks quickly. They did not achieve as much success as they hoped.
Still, Germany believed they were hurting Fighter Command. So, they planned a huge attack for 13 August, called Adlertag. On this day, most of Germany's bombers and fighter planes were ready. But the day went badly for Germany. They failed to damage Fighter Command's bases or control system. This was partly because German spies did not know which airfields belonged to Fighter Command.
Germany continued its attacks on 15 August, losing many planes. Undeterred, they planned another large attack on RAF bases for 18 August.
Germany's Battle Plan
German intelligence thought the RAF had only 300 working fighter planes on 17 August 1940. In reality, Britain had 855 working planes. They also had many more in storage or training. This was twice as many as they had in early July. Thinking the RAF was weak, Germany planned a big attack on RAF Sector Stations for 18 August.
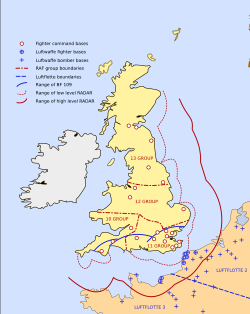
The Luftwaffe's plan was simple. German bombers would hit RAF airfields in southeast England. The most important airfields were RAF Kenley, Biggin Hill, Hornchurch, North Weald, Northolt, Tangmere and Debden. These airfields were vital. Each one had two to three squadrons and its own control room. From these rooms, fighters were sent into battle.
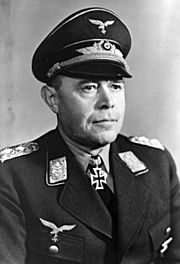
Even after earlier failures, Albert Kesselring, a German commander, convinced Hermann Göring to keep sending bombers with strong fighter escorts. Kesselring also wanted German fighters to fly ahead of the bombers. This would force British fighters into big air battles. The goal was to destroy RAF planes in the air.
Kesselring decided to focus attacks on fewer targets. He chose RAF Kenley, North Weald, Hornchurch, and Biggin Hill as the main targets.
Britain's Defenses
RAF Fighter Tactics
Before the war, Britain thought German bombers would attack from far away. They believed bombers would fly beyond the range of their own fighter planes. This would make the bombers easy targets. They also thought air combat between fighters was not practical.
This belief led to poor tactics for RAF Fighter Command. Pilots were trained to fly in tight, difficult formations. They were supposed to attack bombers from long range and then break away. These tactics were useless against fast German fighters.
When flying in tight groups, RAF pilots worried more about staying in formation than watching for the enemy. This made them easy targets for surprise attacks by German Messerschmitt Bf 109s. Even if they reached the bombers, the tight formations made it hard to attack effectively. Pilots also gave too much respect to bomber defenses. They broke off attacks too early, causing little damage. These problems were clear in battles over Belgium and France.
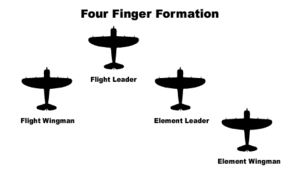
German fighter tactics were more flexible. In the Spanish Civil War, German pilot Werner Mölders developed new tactics. German fighters often flew in pairs, called Rotte. Each pilot could cover the other's blind spots. If an enemy attacked, the other pilot could move in to protect their partner. These pairs could form larger groups called Schwarm (Flight). This formation, called "Finger-four", offered good protection. All pilots could look for threats and targets.
Command, Communication, and Control
Britain's fighter defenses were very advanced. The RAF's strength came not just from its planes. Its "eyes and ears" were just as important. This system gathered information and sent it to the fighters.
By summer 1940, Chain Home radar stations along the British coast could track incoming planes. They could see aircraft over 100 miles away at 20,000 feet. A system called IFF helped tell German planes from British ones.
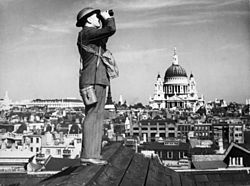
Radar was not perfect. It struggled to measure height above 25,000 feet. It also could not tell how many planes were in a group. Radar only looked out to sea. Tracking planes over land was the job of the Royal Observer Corps. Thousands of volunteers across Britain tracked German formations over land. They sent information in real time to airfields.
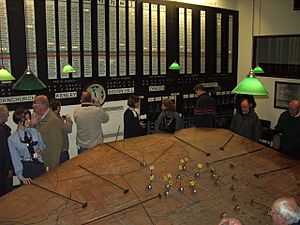
Here is how the system worked:
- Radar spots enemy planes.
- Radar information goes to the filter room at Fighter Command Headquarters.
- At the filter room, enemy planes are identified.
- Hostile planes are sent to fighter group or Sector operations rooms.
- At RAF Uxbridge, the No. 11 Group operations room tracked all raids. It also knew the status of RAF squadrons (refueling, in combat, etc.).
- Fighter controllers at Sector operations rooms decided which squadrons to send.
- Squadron leaders then took their planes into battle.
- Squadrons were spread out to prevent the enemy from slipping through.
Anti-Aircraft Defenses
Britain also used anti-aircraft guns. The main types were 4.5-inch and 3.7-inch guns. These were modern and effective above 26,000 feet. Older 3-inch guns were only good up to 14,000 feet. Guns were usually placed in groups of four. They used range-finders to predict where enemy planes would be.
The higher a shell went, the less accurate it became. German bombers usually tried to fly around heavy gun areas. If they had to fly through, they flew at about 15,000 feet.
Most heavy anti-aircraft guns were around London and the Thames Estuary. Others were near Dover, Folkestone, and major ports. For low-level defense, the Bofors 40 mm cannon was used. It fired 120 rounds a minute. These shells could make a big hole in a plane. But there were very few Bofors guns available.
One unusual weapon at Kenley on 18 August was the parachute-and-cable. Rockets fired these vertically. A parachute would open, holding a 480-foot steel cable. If a plane hit the cable, a second parachute would open, tangling the device around the plane. This could make the plane crash. This device had not been used before 18 August 1940. Barrage balloons with cutting cables were also used.
The Lunchtime Attacks
German Preparations
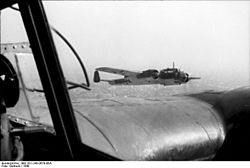
The morning of 18 August was clear and sunny, perfect for flying. From his headquarters in Brussels, Albert Kesselring ordered attacks on Biggin Hill and Kenley. German bombers, including Heinkel He 111s and Dornier Do 17s, were sent. Fighter planes like Messerschmitt Bf 109s and Messerschmitt Bf 110s provided escort.
These airfields were chosen because they were known to house RAF fighters. The Germans did not know about the secret underground control rooms. If these rooms were hit, it would severely damage Britain's air defense system.
One German squadron, 9 Staffel KG 76, was ordered to attack Kenley at low level. They had done this successfully in France. Nine Do 17s were to fly low across the Channel. They would follow a railway line to the airfield. Their bombs were designed to explode even if dropped from a low height.
The attack on Kenley was planned as a pincer movement. High-flying bombers would attack first. Then, 9 Staffel would go in low to finish off any remaining buildings. This was a bold plan. If it worked, Kenley would be destroyed. The low-flying bombers had to use stealth to avoid being seen.
The operation was delayed by haze. Later, German bomber formations took off. The weather made it hard for them to stay together. They lost valuable time reforming their groups. This delay would cause problems for 9 Staffel KG 76.
German fighters flew ahead to clear the skies. Behind them came the bombers and their escorts. In total, the German force included 108 bombers and 150 fighters. Meanwhile, 9 Staffel was flying very low, hoping to sneak under British radar.
British Response
The British knew about most of the approaching German planes. Only the low-flying 9 Staffel was a surprise. Radar stations reported many German planes gathering. British plotters estimated 350 aircraft, more than the actual number.
At RAF Uxbridge, Keith Park, the commander of No. 11 Group RAF, sent squadrons to meet the threat. Within minutes, many British fighters were in the air. They included Hawker Hurricanes and Supermarine Spitfires. Some squadrons went to patrol the coast. Others positioned themselves above Kenley and Biggin Hill. In total, 97 RAF fighters were sent to meet the attack. Park kept some planes in reserve for later attacks.
9 Staffel KG 76 Attacks Kenley
As German fighters crossed the coast, they saw RAF Hurricanes. They attacked, shooting down four Hurricanes and wounding pilots.
The high-flying German bombers encountered anti-aircraft fire as they crossed Dover. They flew east of Canterbury, avoiding most British fighters. They were now close to Biggin Hill.
As 9 Staffel crossed the coast, they were fired at by British patrol boats. This fire was not effective. However, a Royal Observer Corps post spotted the low-flying Dorniers. They immediately called a warning to RAF Kenley. The commander at Kenley saw the planes on his map. They seemed to be heading west. He was unsure of their target.
The Observer Corps kept sending reports. British controllers realized a coordinated attack was happening. The squadrons sent to meet the high-altitude attack could not be redirected. No fighters had been ordered to attack 9 Staffel. The only squadron on the ground nearby was No. 111 Squadron RAF at RAF Croydon. Controllers ordered all their planes into the air. Even damaged planes were flown away to avoid being hit on the ground.
No. 111 Squadron got into position above Kenley. They hoped to intercept 9 Staffel. Biggin Hill also sent all its fighters into the air. At 13:10, the German bombers were near a BBC radio transmitter. It was shut down to prevent Germans from using it to guide their planes.
Using railway lines, the lead Do 17 of 9 Staffel found Kenley from the south. They were only six miles away.
The German pilot, Joachim Roth, had navigated perfectly. His unit reached the target without being seen. But as they neared the airfield, they saw no smoke or damage. They expected to finish off a damaged base. As the Dorniers flew over the airfield, they were met with intense anti-aircraft fire.
Some of No. 111 Squadron dived on the Dorniers. One Hurricane was shot down, possibly by friendly fire. The rest pulled away to avoid hitting their own ground defenses. They flew to the north side of the airfield to catch the Germans as they left. Two Hurricanes from No. 615 Squadron were taking off during the attack.
Within minutes, all the Dorniers were hit. One Do 17 caught fire. Another had an engine knocked out. Its pilot, Günter Unger, dropped his bombs on hangars. Three hangars were destroyed. Unger's plane was hit again and started smoking. An RAF pilot, Harry Newton, attacked Unger's plane. Newton was shot down but damaged the Dornier. Another German pilot, Hermann Magin, was hit and died later. His navigator saved the crew.
As the bombers attacked, a British airman, D. Roberts, fired parachute-and-cable launchers. One Do 17, already on fire, hit a cable and crashed. All five crewmen died. Another Do 17, carrying Joachim Roth, was hit by ground fire. It caught fire and crash-landed. Roth was killed, but the pilot survived with burns.
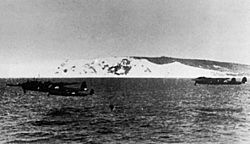
Of the nine Do 17s, four were lost, and two were badly damaged. Two more crashed in the sea, and two crash-landed in France. The German crews were rescued. One German navigator received a medal for saving his crew.
9 Staffel destroyed at least three hangars and damaged other buildings. They also destroyed eight Hurricanes on the ground. Some sources say 10 hangars were destroyed. The airfield was out of action for two hours. In return, 9 Staffel lost four Do 17s. After "the Hardest Day," low-level attacks were mostly stopped.
Attacks on Kenley, Biggin Hill, and West Malling
British squadrons were waiting for the high-altitude German force near Biggin Hill. But the German escort fighters were flying much higher and surprised them. German Bf 109s attacked No. 615 Squadron, shooting down three Hurricanes. This attack, however, kept the German fighters busy. This allowed No. 32 Squadron to attack the German bombers without fighter interference.
German Bf 110s tried to help, but failed. No. 32 Squadron attacked head-on, shooting down one Do 17 and damaging others. The bombers had to swerve, making it hard to aim. They missed their targets and dropped bombs on railway tracks or residential areas. Some turned back without dropping bombs.
No. 32 Squadron attacked again. This time, Bf 110s got between the bombers and the British fighters. One Bf 110 was damaged. Then, No. 64 Squadron's Spitfires arrived and attacked the Dorniers. Confusing dogfights broke out.
German Ju 88s arrived over Kenley to find smoke everywhere. They could not dive-bomb. They were then attacked by British Spitfires and Hurricanes. One Ju 88 was lost. The Ju 88s turned to attack RAF West Malling instead.
Meanwhile, KG 1's He 111s had a clear path to Biggin Hill. Most of the battles had drawn away the RAF fighters. British No. 615 Squadron tried to stop KG 1 but was blocked by many Bf 109s. The German fighters successfully protected their bombers. Most people at Biggin Hill had time to take cover. KG 1 lost only one He 111 and damaged another. They failed to damage Biggin Hill.
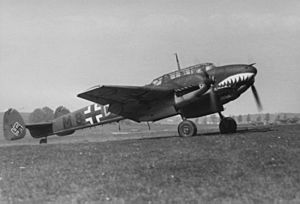
The German fighters had done well so far. But withdrawing under attack was the hardest part. German fighters were low on fuel. Damaged bombers lagged behind and were easy targets. The German forces were now heading in different directions. British squadrons were moving in to meet them.
RAF controllers faced problems. Thick haze made it hard for the Observer Corps to track German planes. Instead of keeping fighters in one big group, Park ordered them to spread out. This paid off.
British fighters found German Bf 110s and attacked. In short, fierce fights, many Bf 110s were shot down or damaged. The Bf 110 suffered heavy losses on "the Hardest Day." Production could not keep up with the losses.
British squadrons also suffered losses. Many Hurricanes and Spitfires were destroyed or damaged. Several pilots were killed or wounded.
More combat happened as German commanders sent more Bf 109s to protect the retreating bombers. These fighters engaged RAF planes near the Isle of Wight. Both sides lost more planes in these battles.
Ju 87 Dive Bomber Operations
German Attack Plans
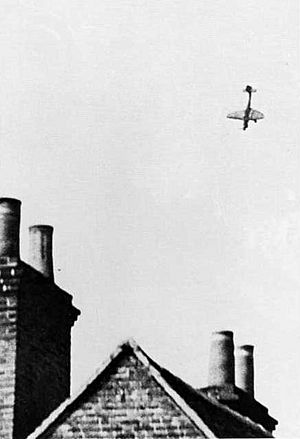
Another German commander, Hugo Sperrle, ordered dive bombers to attack radar stations and airfields on England's south coast. Targets included RAF Ford, RAF Thorney Island, and Gosport. These were mostly naval or coastal airfields, not fighter bases. The radar station at Poling, West Sussex was also a target.
German spies mistakenly thought these were fighter airfields. The German Sturzkampfgeschwader 77 (StG 77), or Dive Bombing Wing 77, sent 109 Junkers Ju 87 Stuka dive-bombers. This was the largest group of Stukas to attack Britain so far. Another unit, StG 3, sent 22 Stukas to attack Gosport.
These dive-bombers were protected by 157 Bf 109 fighters. The Stukas moved to airfields closer to the Channel coast. They refueled and loaded bombs. Each Ju 87 carried large bombs under its body and smaller bombs under its wings. The Bf 109s took off later, catching up to the slower Stukas.
British Response
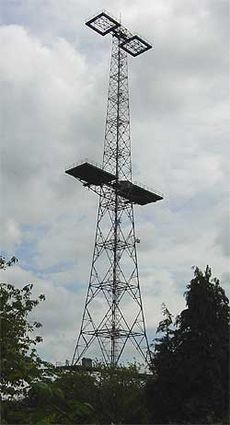
At 13:59, the Poling radar station detected the German formations. It reported about 80 planes. Smaller groups of German fighters followed. The British estimated 150 German aircraft, but it was actually twice that number. British Fighter Groups sent more squadrons to meet the threat.
The RAF sent 68 Spitfires and Hurricanes. This meant one RAF fighter for every four German planes. Even if controllers knew the true size of the raid, they had few other planes available. Many fighters were refueling after the morning attacks.
During the British scramble, German Bf 109s surprised RAF fighters at RAF Manston. Twelve Bf 109s attacked while British planes were refueling. The Germans claimed many planes destroyed. In reality, two Spitfires were destroyed, and several Hurricanes were damaged but repairable.
Ju 87s Attack
As the Ju 87s reached the coast, they split up to hit their targets. Bf 109s caught up and flew around the dive-bombers. The Stukas attacked Poling radar station. They bombed very accurately. Poling was badly damaged and out of action for the rest of August. Luckily, Britain had mobile radar stations to fill the gap.
While Poling was attacked, other Stuka units hit Ford and Gosport. At Ford, only six machine guns were defending. Bombs hit huts, hangars, and oil tanks, causing huge fires. Gosport also suffered large-scale damage with no air opposition.
As the Ju 87s attacked, Spitfires from No. 234 Squadron engaged the Bf 109 escorts. Three Bf 109s were shot down.
Disaster for StG 77
While most Ju 87 groups bombed without being stopped, 28 Stukas of I./StG 77 were attacked. They faced 18 Hurricanes from Nos. 43 and 601 Squadrons. The escorting Bf 109s were too far away to help. Three Ju 87s were shot down. The Bf 109s then came under attack themselves.
Some Ju 87s still managed to bomb. They hit hangars and caused much damage. As the Bf 109 escorts turned to fight, about 300 planes filled the sky. More British squadrons joined the battle.
The air battles cost the Ju 87 units heavily. I./StG 77 lost 10 Ju 87s and many crew members killed or captured. Other Stuka units also lost planes. In total, StG 77 lost 26 killed, six captured, and six wounded. These battles brought the total Ju 87 losses to 59. The price was too high. After "the Hardest Day," Ju 87s were mostly removed from the Battle of Britain.
German Bf 109s also lost fighters. They claimed many victories, but only a few were confirmed. The RAF lost five fighters destroyed and four damaged.
Aftermath of the Stuka Attacks
The damage to Ford airfield was severe. Fire brigades helped put out fires and clear the dead. Ford had less warning than other targets and suffered more casualties: 28 killed and 75 wounded. Many aircraft were destroyed or damaged. Two hangars and other buildings were destroyed.
At Gosport, five aircraft were lost and five damaged. Buildings were wrecked, but there were no casualties. The Ju 87 attack was accurate. Ten barrage balloons were shot down.
The attacks on Thorney Island were disrupted by British fighters. Two hangars and buildings were wrecked. Three aircraft were destroyed. Five civilian workers were injured.
The loss of the Poling radar station caused few problems. Other nearby radar stations provided cover. Mobile units were moved in quickly. Poling was repaired within a few days.
Evening and Night Raids
German Night Attacks
As night fell, the Luftwaffe sent bombers to attack targets across Britain. These included Sheffield, Leeds, Hull, and other towns. British records only noted damage at Sealand. Most bombs fell in rural areas. In one incident, a German bomber crashed into a British training plane, killing all five men on board.
British Night Attacks
While Germany attacked Britain, British bombers also flew missions. Thirty-six Bristol Blenheims attacked German airfields in the Netherlands and France. One attack damaged two German Bf 109s. Four Armstrong Whitworth Whitleys attacked factories in Italy and Germany. These planes had not reached their targets by the end of 18 August 1940.
What Happened Next
Overclaiming and Propaganda
Both sides often exaggerated their victories. For 18 August, British propaganda claimed 144 German planes destroyed, more than twice the real number. Germany claimed only 36 losses, about half the actual figure. German propaganda claimed to have destroyed 147 British planes, also more than twice the real number. Britain admitted losing only 23, but the actual number was around 68.
Flights and Losses
On 18 August 1940, German Luftwaffe units flew 970 flights over Britain. About half were bombers, and half were fighters. Less than half of Germany's available planes were used that day. This showed Germany still had many planes in reserve.
The Luftwaffe lost between 69 and 71 aircraft destroyed or damaged beyond repair. Most were lost to British fighters. Some fell to ground fire or collided. These losses represented seven percent of the force used. Ninety-four German crewmen were killed, 40 captured, and 25 wounded.
The RAF flew 927 flights, slightly fewer than the Germans. Most of these were day flights. The RAF's commanders underestimated Germany's strength. The British reaction was much stronger than expected.
Only 403 (45 percent) of the RAF's flights met the main German raids. The rest were patrols or engaged reconnaissance planes. This helped prevent Germany from getting good photos. This lack of good information often led Germany to attack non-fighter airfields.
Of the 403 RAF flights that met the main German attacks, 320 (80 percent) made contact with the enemy. This percentage would have been higher if the afternoon German raid had not turned back early.
Between 27 and 34 RAF fighters were destroyed. Most were lost to German fighters. Some were shot down by friendly ground fire by mistake. Twenty-six of the lost fighters were Hurricanes, and five were Spitfires. Ten British fighter pilots were killed, and 19 were wounded.
On the ground, eight fighters were destroyed. About 28 other types of aircraft were also destroyed on the ground. In total, 68 British aircraft were destroyed or badly damaged.
German Leaders' Concerns
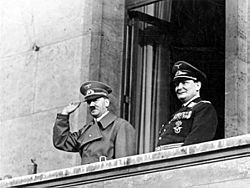
Hermann Göring spent "the Hardest Day" with two top German fighter pilots, Werner Mölders and Adolf Galland. He was giving them medals. But Göring also complained about the high number of bomber losses. He felt his fighter pilots were not aggressive enough. This criticism was not well received. Göring quickly promoted them to lead their own fighter wings. He believed younger leaders would motivate the force.
On 19 August, Göring read the loss reports from 18 August. He was unhappy. Hitler had ordered the Luftwaffe to gain control of the air, but also to stay strong for the invasion. Göring knew the Luftwaffe was his power base. A failure would hurt him. He told his commanders they must protect the Luftwaffe's strength.
The main topic was how to protect the bombers. Fighter leaders wanted to send fighters ahead to clear the skies. Others thought a mix of sweeps and close escort would work best. Göring agreed. He also ordered a change in leadership. Younger, skilled leaders would replace older ones. They would have more freedom in how they fought.
Göring also stressed the importance of fighters meeting up with bombers correctly. This had been a problem before. Longer-range bombers were told to fly directly to fighter airfields to pick up their escorts. For now, this would be the main way fighters and bombers worked together.
Battle Outcome
Germany's targets on "the Hardest Day" were well chosen. They aimed to destroy Fighter Command by bombing airfields, damaging control systems and radar, or attacking aircraft factories.
The attacks on Kenley, Biggin Hill, North Weald, and Hornchurch could have crippled Britain's defenses. But the attack on Kenley failed, and 9 Staffel KG 76 paid a high price. Bad weather stopped the raids on Hornchurch and North Weald. Germany's attacks on radar stations were also not effective. Even though Poling radar station was badly damaged, other stations nearby covered the gaps. The airfields Germany attacked at Ford, Gosport, and Thorney Island were not Fighter Command bases. They belonged to the Coastal Command and Navy. German commanders did not realize their intelligence was wrong.
The way Germany handled its forces was also not good. The fighters protecting the Stukas were too spread out. This allowed British fighters to attack one Stuka group with devastating results. If the targets had been closer, the German fighters could have protected the Stukas better.
Destroying the radar chain was hard. Radar stations were vulnerable, but Britain had mobile units and quick repair services. Stations were rarely out of action for more than a few days.
Despite heavy attacks on airfields, few British fighters were destroyed on the ground. This was because the RAF was always ready. Radar and the Observer Corps gave them enough warning to get airborne. The successful German attack on Manston was a rare stroke of luck.
The airfield attacks did not seriously threaten RAF Fighter Command. Biggin Hill was never out of service. Kenley was only out for two hours on 18 August. German bombers could carry many bombs, but it was not enough to destroy an airfield. If hangars were destroyed, work could be done outside in summer. If runways were too damaged, RAF units could use other fields. Important control buildings were often hidden underground.
Attacking fighter factories was another option, but not tried on 18 August. Only a few factories were within range of escorted bombers. Attacking factories further north would mean heavy losses for bombers without fighter protection.
Overall, both sides suffered more losses on this day than any other during the Battle of Britain. The British lost fewer planes in the air, but ground losses made the totals similar. Both air forces lost planes at a rate they could not keep up for long. Historian Alfred Price said: "The defenders won the day. The Luftwaffe wanted to wear down Fighter Command without losing too many planes, and they failed. For every British pilot lost, Germany lost five aircrew. For every three British Spitfires and Hurricanes destroyed, Germany lost five bombers and fighters. If the battle continued like this, the Luftwaffe would destroy Fighter Command, but it would also destroy itself."


