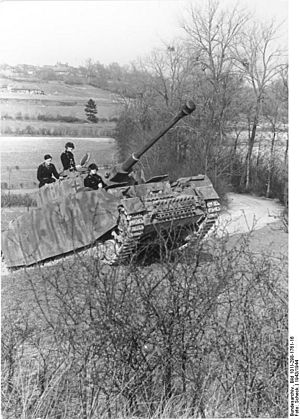
Capture of the Caen canal and Orne river bridges facts for kids
Quick facts for kids Capture of the Caen canal and Orne river bridges |
|||||||
|---|---|---|---|---|---|---|---|
| Part of Operation Tonga of the Normandy landings | |||||||
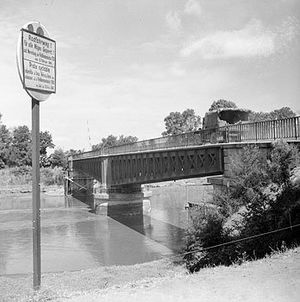
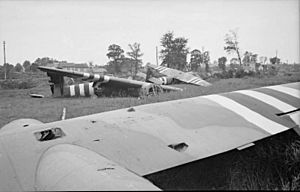
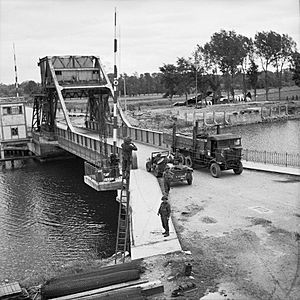 Caen canal bridge with Horsa gliders in the background, 9 June 1944 |
|||||||
|
|||||||
| Belligerents | |||||||
| Commanders and leaders | |||||||
| Units involved | |||||||
| Ox & Bucks Light Infantry 7th Parachute Battalion Glider Pilot Regiment |
736th Grenadier Regiment 21st Panzer Division |
||||||
| Strength | |||||||
| 180 6 aircraft |
12,400 127 tanks 40 self-propelled artillery 2 gunboats |
||||||
| Casualties and losses | |||||||
| 20 killed 50 wounded |
Unknown killed Unknown wounded 14 tanks destroyed 1 gunboat sunk |
||||||
The capture of the Caen Canal and Orne River bridges was a super important mission carried out by airborne forces (soldiers who jump from planes or land in gliders) of the British Army. It happened very early on June 6, 1944, as part of the huge Normandy landings during World War II.
The main goal was to grab two road bridges in Normandy, France, that crossed the River Orne and the Caen canal. These bridges were the only way for British forces to move east from their landing spot on Sword Beach. Spies had warned that the Germans heavily guarded both bridges and had set them up to explode.
Once captured, the British soldiers had to hold onto the bridges against any enemy attacks. They needed to keep them safe until more soldiers, called commandos, and other infantry troops arrived from the beach. This mission was super important for the success of Operation Tonga, which was the overall plan for British airborne landings in Normandy.
If the bridges weren't captured safely, or if the Germans blew them up, the British 6th Airborne Division would be stuck. They would be cut off from the rest of the Allied armies, with rivers behind them. Also, if the Germans kept control of the bridges, they could use their tank divisions to attack the Normandy landing beaches.
The special job of capturing these bridges went to 'D' Company, 2nd (Airborne) Battalion, Oxfordshire and Buckinghamshire Light Infantry. This group was part of the 6th Airlanding Brigade, which was part of the 6th Airborne Division. The attack team included a strong company of six infantry platoons and a special platoon of Royal Engineers (soldiers who build and destroy things).
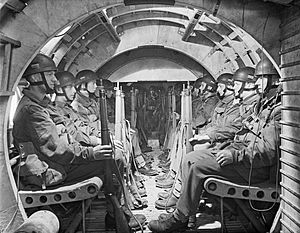
The British attack group flew from southern England to Normandy in six Airspeed Horsa gliders. The pilots of the Glider Pilot Regiment did an amazing job, landing the company right where they needed to be. After a quick fight, both bridges were captured. The soldiers then successfully defended them against German tank, gunboat, and infantry counter-attacks until help arrived.
Contents
Planning the Mission: British Forces Prepare
Why the Bridges Were So Important
During the planning for the Normandy invasion, it was decided that the 6th Airborne Division (led by Major-General Richard Gale) would land on the far left side of the invasion beaches. This area was between the River Orne and the River Dives. Their main job was to capture the two road bridges over the River Orne and the Caen Canal. This would stop the Germans from attacking the landing area from the side.
If the bridges weren't captured safely, the 6th Airborne Division would be stuck behind enemy lines. Because of this, the 5th Parachute Brigade was chosen to defend the bridges against any counter-attacks. General Gale decided that the only way to capture the bridges without them being blown up was with a surprise glider attack. He asked Brigadier Hugh Kindersley to pick the best company for this dangerous mission.
Choosing the Best Soldiers for the Job
'D' Company, 2nd (Airborne) Battalion, Oxfordshire and Buckinghamshire Light Infantry, led by Major John Howard, was chosen. This company had trained very hard and was known as the fittest in their battalion. They often practiced street fighting with real ammunition in bombed-out city areas.
Major Howard expected to fight at night during the invasion. So, he changed their daily routine to get his men ready. For weeks, they would wake up at 8 PM, do exercises and drills all night, and then go to bed at 1 PM.
General Gale tested the company in two exercises where they had to capture bridges. It became clear that 'D' Company couldn't do the mission alone. Howard was asked to pick two more platoons from his battalion. He chose two platoons from 'B' Company, led by Lieutenants Fox and Smith.
Any bombs found on the bridges were the responsibility of 30 Royal Engineers from the 249th (Airborne) Field Company. This group was led by Captain Jock 'Joe' Neilson. The plan was changed to include six platoons. Three platoons would attack each bridge at the same time. The infantry would deal with the guards, while the engineers would find and remove any explosives.
For six days and nights, the company practiced near Exeter, England. They found two bridges over the Exeter Ship Canal that looked very similar to their targets.
Gliders: The Silent Attack Vehicles
Six Airspeed Horsa gliders were used to transport the troops to Normandy. These gliders were flown by 12 non-commissioned officers (NCOs) from 'C' Squadron, Glider Pilot Regiment. The Horsa glider was large, with a wingspan of 88 feet and a length of 67 feet. It could carry a maximum load of 15,750 pounds. This meant it could carry two pilots and twenty-eight soldiers, or a mix of two jeeps, artillery guns, and trailers.
The glider pilots trained by practicing landings on small strips of land. They also learned to fly using only instruments at night. By May 1944, they had completed 54 training flights in all kinds of weather, day and night.
Major Howard didn't know the exact details of the mission until May 2, 1944. His orders were to capture the bridges over the River Orne and Caen Canal at Bénouville and Ranville without damaging them. They then had to hold them until help arrived. The first relief force would be a company from the 7th Parachute Battalion. When the rest of that battalion arrived, Howard would hand over command to their leader, Lieutenant-Colonel Richard Pine-Coffin.
The 3rd Infantry Division and the commandos of the 1st Commando Brigade were supposed to land at Sword at 6:00 AM on D-Day. They were expected to reach the bridges by 11:00 AM.
At the end of May 1944, 'D' Company moved from their camp to RAF Tarrant Rushton in Dorset. The base was made secure, and Howard briefed everyone on the mission. He showed them photos of the bridges and a model of the area. The glider pilot commander, Staff Sergeant Jim Wallwork, told Howard that with a full load of men, ammunition, and equipment, the gliders would be too heavy. Howard decided to take only one assault boat per glider and leave two men from each platoon behind. At the last minute, Doctor John Vaughan replaced an injured soldier in one of the platoons.
On June 5, 1944, the company made their final preparations. Each soldier received their weapons and ammunition, plus up to nine hand grenades and four Bren gun magazines. Each platoon also had a 2-inch mortar and a radio. Just before boarding the gliders, they were given secret codewords. 'Ham' meant the canal bridge was captured, and 'Jam' meant the river bridge was captured. If the canal bridge was captured and destroyed, the codeword was 'Jack'. 'Lard' would be used if the river bridge was destroyed.
The Bridges: Key Targets
The Ranville bridge crosses the River Orne, and the Bénouville bridge crosses the Caen Canal to the west. They are about 5 miles from the coast and were the only way to reach the city of Caen. The main road between the two towns goes over these bridges and then continues east to the River Dives.
The Caen Canal bridge is 190 feet long and 12 feet wide. It can open to let canal boats pass, and its controls are in a nearby cabin. The canal is 27 feet deep and 150 feet wide, with banks about 6 feet high. Small paved tracks run along both banks of the canal.
Between the two bridges, there's a marshy area about 550 yards wide, with ditches and small streams. The Ranville bridge over the River Orne is 350 feet long and 20 feet wide. It can also open for river traffic. The river is 160 to 240 feet wide and about 9 feet deep. It has muddy banks about 3.6 feet high, and its water level changes with the tides. Some small houses are west of the river, connected by a track 8 to 10 feet wide that runs along both banks.
German Defenses: What the British Faced
The bridges were guarded by 50 soldiers from the German 736th Grenadier Regiment, part of the 716th Infantry Division. This unit was led by Major Hans Schmidt and was based at Ranville, about 1.2 miles east of the River Orne. The 716th was a defensive division that had been in Normandy since June 1942. Its eight infantry battalions were spread out to defend 21 miles of the Atlantic wall.
This unit was not very well equipped, using a mix of foreign weapons. Many of its soldiers were conscripts from Poland, the Soviet Union, and France, led by German officers and senior non-commissioned officers (NCOs). Major Schmidt's soldiers had orders to blow up the two bridges if they were in danger of being captured.
A second German division, the 21st Panzer, moved into the area in May 1944. One of its regiments, the 125th Panzergrenadier, led by Colonel Hans von Luck, was staying at Vimont, just east of Caen. There was also a battalion of the 192nd Panzergrenadier Regiment based at Cairon, west of the bridges. Colonel von Luck trained his regiment for anti-invasion operations. He also identified likely invasion points and planned routes, rest areas, and anti-aircraft gun positions. The 21st Panzer Division was a new unit, but many of its officers were veterans from the old Afrika Korps unit, which had been destroyed in North Africa. Although it had older tanks and armored vehicles, 2,000 experienced men from the old division filled its ranks. Further away were the 12th SS Panzer Division at Lisieux and the Panzer Lehr Division at Chartres, both less than a day's march from the area.
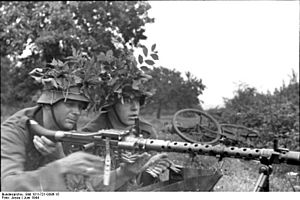
Defenses were set up at both bridges. On the west bank of the Caen Canal bridge, there were three machine-gun positions. On the east bank, there was a machine-gun and an anti-tank gun. To their north, there were three more machine-guns and a concrete pillbox. An anti-aircraft tower with machine-guns stood to the south. At the River Orne bridge, the eastern bank south of the bridge had a pillbox with anti-tank and anti-aircraft guns. To the north of the bridge were two machine-guns. Both bridges also had sandbagged trench systems along their banks.
The Daring Operation to Capture the Bridges
The Flight and Surprise Landings
At 10:56 PM on June 5, 1944, the six gliders, pulled by Halifax bombers, took off from RAF Tarrant Rushton. Horsa number one, the first of three heading for the Caen Canal, carried Major Howard and Lieutenant Den Brotheridge's platoon. Glider number two carried Lieutenant David Wood's platoon, and number three carried Lieutenant Smith's platoon. Captain Priday and Lieutenant Hooper's platoon were in number four, heading for the river bridge. Horsa number five carried Lieutenant Fox's platoon, followed by number six with Tod Sweeney's platoon. Each glider also had five Royal Engineers.
Flying over the English Channel at 7,000 feet, the bombers reached the Normandy coast at 12:07 AM on June 6, 1944. They then released their gliders. With Staff Sergeant Wallwork flying, glider number one crashed into the barbed wire around the canal bridge defenses at 12:16 AM. The other two gliders followed one minute apart. Glider number two broke in half and stopped at the edge of a large pond. One soldier, Lance-Corporal Fred Greenhalgh, was knocked out and thrown from his glider. He sadly drowned, becoming the first Allied soldier to die in the operation.
Brotheridge and Smith's platoons quickly moved towards the bridge. Wood's platoon headed for the trenches on its northeast side.
Taking Control of the Bridges
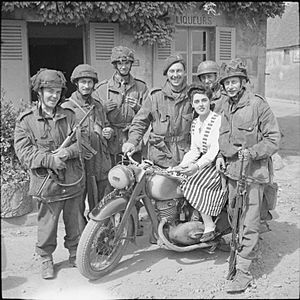
The Germans knew an invasion was coming, even if they didn't know exactly where. Major Schmidt, in charge of the bridges, had been told they were very important. However, the defenders were not on full alert, and only two guards were on duty when the gliders landed. The sound of a gunshot alerted the two guards on the canal bridge. As Brotheridge's platoon attacked, one guard ran off shouting "paratroops!" while the other fired a flare gun to warn nearby defenders. Brotheridge shot him, and other soldiers cleared the trenches and pillbox with grenades. Alerted by the flare, German machine gunners fired at the men on the bridge, wounding Brotheridge as he threw a grenade. The grenade silenced one machine-gun, and another was taken out by Bren gun fire.
The 1st Platoon crossed the bridge to set up a defensive position on the west bank. The Royal Engineers from glider number one searched for explosives and cut any wires they found. Smith's platoon crossed the bridge next, fighting with German defenders, and Smith was wounded by a grenade. Using grenades and sub-machine gun fire, the platoons cleared the trenches and bunkers. By 12:21 AM, German resistance on the west bank of the canal bridge was over. Checking the area, Brotheridge's platoon realized their leader was wounded. He soon died, becoming the first Allied soldier killed by enemy action during the invasion. On the east bank, Wood's platoon cleared the trenches and bunkers with little trouble. Wood was hit in the leg by machine-gun fire as he ordered his platoon to attack the German defenses. All three platoon commanders at the canal bridge were now either dead or wounded.
Around the same time, pathfinders from the 22nd Independent Parachute Company landed between the River Orne and the River Dives. Brigadier Nigel Poett, leading the 5th Parachute Brigade, was with a small team. Disoriented after landing, Poett heard Brotheridge's Sten gun and headed for the bridges with the only soldier he could find. A German soldier named Weber, the only one to escape 'D' Company's attack, retreated to Bénouville and reported that the bridge had been captured.
Fox's glider (number five) was the first to land, about 330 yards from the river bridge, at 12:20 AM. Glider number four was reported missing. When the Germans opened fire with an MG 34, the platoon fired back with a 2-inch mortar and destroyed the gun with a direct hit. They then crossed the bridge without more fighting. At 12:21 AM, glider number six landed 770 yards short of the bridge. Sweeney left one of his sections on the west bank, then moved the rest of his platoon across the bridge to take up defensive positions on the east bank.
From his new command post in the trenches on the eastern bank of the canal, Howard learned that the river bridge had also been taken. Captain Neilson of the engineers reported that the bridges had been prepared for demolition, but the explosives had not been attached. Howard ordered his signalman to send the codewords 'Ham' and 'Jam'. He then brought Fox's platoon across the canal bridge, placing them at the Bénouville to Le Port crossroads as the company's front line.
The 7th Parachute Battalion Arrives
At 12:50 AM, planes carrying the rest of the 6th Airborne Division appeared overhead. The paratroopers jumped onto drop zones marked by the pathfinders. Howard began blowing the morse code letter 'V' on his whistle to help guide the 7th Parachute Battalion to the bridges. The first paratroopers to arrive, at 12:52 AM, were Brigadier Poett and the soldier he had found. Howard briefed them on the situation, and they heard tanks and trucks moving in Bénouville and Le Port. On the drop zone, only about 100 men of the 7th Parachute Battalion had reached the meeting point, and all their signal equipment, machine guns, and mortars were missing. Pine-Coffin, knowing his battalion was the only unit assigned to defend west of the bridges, decided they couldn't wait any longer. At 1:10 AM, they left for the bridges.
Around the same time, Major Schmidt decided he needed to see what was happening at the bridges himself. He drove towards the bridge in his Sd.Kfz. 250 halftrack with a motorcycle escort. Traveling fast, they accidentally drove past 'D' Company's front line and onto the bridge. The British company opened fire. The soldier on the motorcycle was killed, and the halftrack was forced off the road. Schmidt and his driver were taken prisoner.
The commander of the 716th Infantry Division, Generalleutnant Wilhelm Richter, was told at 1:20 AM about the parachute landings and that the bridges had been captured safely. One of his first actions was to contact Generalmajor Edgar Feuchtinger of the 21st Panzer Division. Richter ordered the division to attack the landing areas. While Feuchtinger's tanks were supposed to support the 716th, they were also part of the German armored reserve. This meant they couldn't move without direct orders from the German High Command. All German tank units could only be moved if Adolf Hitler gave the order. Hitler was sleeping at the time, and his staff refused to wake him. When the 125th Panzergrenadier Regiment heard about the airborne landings at 1:30 AM, Luck ordered the regiment to gather north and east of Caen and wait for more orders.
The closest large German unit to the canal bridge was the 2nd Battalion, 192nd Panzergrenadier Regiment, based at Cairon. General Feuchtinger ordered them to recapture the bridges and then attack the parachute landing zones further west. At 2:00 AM, the 2nd Battalion headed for the bridges from the west. They were supported by the 1st Panzerjager Company and part of the 989th Heavy Artillery Battalion coming from the north. As the first Panzer IV tanks from the north reached the road leading to the bridge, the lead vehicle was hit by a shot from 'D' Company's only working PIAT anti-tank weapon. The tank exploded, setting off its stored ammunition, and the other tanks pulled back.
The first company of the 7th Parachute Battalion, led by Major Nigel Taylor, arrived at the bridges. Howard sent them to defensive positions west of the canal in Bénouville and Le Port. When Pine-Coffin arrived at the bridges, Howard briefed him. Pine-Coffin crossed into Bénouville and set up his headquarters near the church. Pine-Coffin had about 200 men in his three companies. He placed 'A' and 'C' Companies in Bénouville facing south towards Caen, and 'B' Company in Le Port facing Ouistreham. 'D' Company was now moved back to the area between the two bridges and kept as a reserve. They searched the trenches and bunkers again, capturing more Germans.
At 3:00 AM, the 8th Heavy Company, 192nd Panzergrenadier Regiment, with 75 mm SP guns, 20 mm AA guns, and mortars, attacked 'A' and 'C' Companies of the 7th Parachute Battalion from the south. The paratroopers were pushed back, and the Germans set up their own positions in Bénouville, but they couldn't break the British line. They dug in and waited for tank support before moving forward again. The Germans fired mortar bombs and machine guns at the paratroopers and tried small attacks on their positions throughout the night.
Just before dawn, Howard called his platoon commanders for a meeting. With their senior officers dead or wounded, 1st, 2nd, and 3rd Platoons were now led by corporals. Howard's second in command, Captain Priday, and 4th Platoon were missing. Only Lieutenants Fox and Sweeney of 5th and 6th Platoons had all their officers and NCOs. The landings at Sword Beach began at 7:00 AM, after a heavy naval bombardment from ships. At the bridges, daylight allowed German snipers to see targets, and anyone moving in the open was in danger. The men of 1st Platoon, who had taken over the 75 mm anti-tank gun on the east bank of the canal, used it to fire at possible sniper positions in Bénouville, the Château de Bénouville, and the surrounding area. At 9:00 AM, two German gunboats approached the canal bridge from Ouistreham. The lead boat fired its 20 mm gun, and 2nd Platoon fired back with a PIAT, hitting the wheelhouse of the leading boat. It crashed into the canal bank. The second boat retreated to Ouistreham. A single German aircraft bombed the canal bridge at 10:00 AM, dropping one bomb. The bomb hit the bridge but did not explode.
Afternoon Battles and Linking Up with Sword Beach
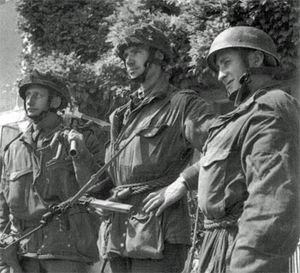
The German 2nd Battalion, 192nd Panzergrenadier Regiment, kept attacking Bénouville and Le Port. They were helped by their tanks, mortars, and infantry. This attack caused serious problems for the understrength 7th Parachute Battalion. But then, the leading tank was blown up with a Gammon bomb, blocking the road. During this attack, 13 of the 17 tanks trying to reach the bridge were destroyed. The paratroopers were then reinforced by 1st Platoon from 'D' Company. This platoon moved into Bénouville and cleared out the Germans in house-to-house combat. 5th and 6th Platoons also moved into positions across from the Gondrée Café, on the west bank of the canal. By midday, most of the missing men from the 7th Parachute Battalion had arrived at the bridges. The three glider platoons were moved back to their original positions.
Just after midday, the 21st Panzer Division finally got permission to attack the landing areas. Luck ordered the 125th Panzergrenadier Regiment, east of the River Orne, towards the bridges. The column was quickly spotted and attacked for the next two hours by Allied artillery and aircraft, causing heavy losses. The 1st Battalion, 192nd Panzergrenadier Regiment, and the 100th Panzer Regiment, attacking from west of the canal, had more success reaching the beaches between the British landing area of Sword and the Canadian Juno. At 1:30 PM, the men at the bridges heard the sound of bagpipes, played by Bill Millin of No. 4 Commando, 1st Special Service Brigade. As the commandos arrived, they crossed the bridges and joined the rest of the 6th Airborne Division defending the eastern area. Some of the tanks with the commandos moved into Bénouville to strengthen its defenses, while others crossed the bridges with the commandos. At 3:00 PM, a boat full of German infantry approached from Caen. It was attacked with the anti-tank gun manned by 1st Platoon, hit in the back by the second shot, and then retreated back towards Caen.
At 9:15 PM, the 2nd Battalion, Royal Warwickshire Regiment of the 185th Infantry Brigade, arrived from Sword Beach and began taking over the bridge defenses. Around midnight, Howard handed over command of the bridges to the Warwickshire Regiment. His company then left to join the rest of their battalion at Ranville. At 3:30 AM, they finally found the battalion's positions and discovered that Captain Priday and 4th Platoon had already joined the battalion. That platoon had landed near the River Dives, at Varaville, about 8 miles away. They had spent the previous day fighting their way towards the bridges to rejoin the company.
What Happened Next: The Legacy of the Bridges
Bénouville was the furthest point the British advanced on June 6, 1944. On June 9, the German Air Force attacked the bridges with 13 aircraft. The British had placed light and medium anti-aircraft guns around the bridges. Facing intense anti-aircraft fire, the attack failed, even though the Germans claimed one of the bridges was destroyed by a direct hit.
The area around the bridges, captured by the 6th Airborne Division, became a starting point for several later operations. The I Corps launched an attack from here, but was stopped by the 21st Panzer Division. A later plan, Operation Dreadnought, was canceled. It aimed for the VIII Corps to use the bridgehead to attack Caen from the side. Finally, Operations Atlantic and Goodwood attacked from the bridgehead, freeing the remaining parts of Caen and ending the Battle for Caen.
After the bridge capture, the engineers, glider pilots, and 'B' Company men returned to their original units. 'D' Company played a role in the 6th Airborne Division's defense of the Orne bridgehead and their advance to the River Seine. On September 5, when the division was pulled back to England, only 40 men remained from the company, with Howard as the only officer. The other officers, sergeants, and most of the junior NCOs had been lost.
The glider pilots were the first to leave 'D' Company because their skills were needed for other planned operations. One such plan, Operation Comet, involved another surprise attack where eighteen gliders would capture three bridges in the Netherlands. This mission would be carried out by the 1st Airborne Division, with a brigade assigned to defend each bridge. Comet was planned for September 8, 1944, but was delayed and then canceled. The plans were changed and became Operation Market Garden. This operation would involve three airborne divisions, but the surprise glider attacks were not carried out.
Soldiers Lost and Wounded
Out of the 181 men (139 infantry, 30 engineers, and 12 pilots) from 'D' Company who captured the bridges, two lost their lives and fourteen others were wounded. The 7th Battalion lost 18 soldiers and had 36 wounded during the defense of the bridges.
The total German losses in the area on June 6 are not fully known. Fourteen tanks were destroyed during the fighting: one during the night and the other 13 throughout the day. One gunboat on the Caen Canal was also sunk.
Awards for Bravery
Major Howard received the Distinguished Service Order, which was given to him on the battlefield by General Bernard Montgomery. Both Smith and Sweeney were awarded the Military Cross. The Military Medal was given to Sergeant Thornton and Lance-Corporal Stacey. Lieutenant Brotheridge was honored posthumously (after his death) with a mention in dispatches. Eight of the glider pilots received the Distinguished Flying Medal for their amazing flying skills.
The Bridges Today: A Lasting Memory
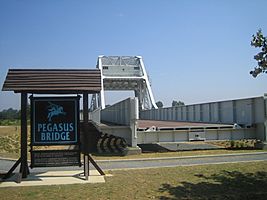
The Caen Canal bridge was renamed Pegasus Bridge after the flying horse emblem of the British airborne forces. The River Orne bridge became Horsa Bridge, named after the gliders. The road across them is now called "Esplanade Major John Howard." Since the war, Pegasus Bridge and the nearby Café Gondrée have become a special place where British veterans who fought in Normandy gather. In 1994, Pegasus Bridge was replaced by a new bridge. The old bridge was moved to the Pegasus Museum in Benouville, where it is now on display.
The original model of the area around the bridge, which was used to brief the troops before the attack, is kept at Airborne Assault: The Museum of The Parachute Regiment and Airborne Forces. This museum is located at the Imperial War Museum Duxford.


