Battle of Culloden facts for kids
Quick facts for kids Battle of Culloden |
|||||||
|---|---|---|---|---|---|---|---|
| Part of the Jacobite rising of 1745 | |||||||
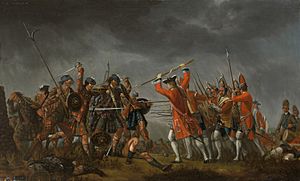 An incident in the rebellion of 1745, David Morier |
|||||||
|
|||||||
| Belligerents | |||||||
| Commanders and leaders | |||||||
| Strength | |||||||
| 8,000 | 7,000 | ||||||
| Casualties and losses | |||||||
| 300 killed and wounded | 1,500–2,000 killed and wounded 376 captured |
||||||
| Designated | 21 March 2011 | ||||||
| Reference no. | BTL6 | ||||||
The Battle of Culloden (Scottish Gaelic: Blàr Chùil Lodair) was the final big fight of the Jacobite rising of 1745. This was a rebellion where people tried to put Charles Edward Stuart, also known as Bonnie Prince Charlie, back on the British throne.
On April 16, 1746, Charles's Jacobite army was completely beaten. They fought against the British government forces. The battle happened on Drummossie Moor, near Inverness in the Scottish Highlands. This was the last major battle ever fought on British soil.
Charles was the oldest son of James Francis Edward Stuart, who believed he should be king. Charles thought people in Scotland and England would support him. He came to Scotland in July 1745 and gathered an army. They took Edinburgh and won a battle at Prestonpans.
The government brought back 12,000 soldiers from Europe to stop the rebellion. Charles's army went into England, reaching Derby. But not many English people joined them, so they turned back.
The Jacobites had some help from France. They tried to control Scotland, but a large government army was there. They won a small victory at Falkirk, but it didn't change much. Supplies and money were running out for the Jacobites. The government army, led by the Duke of Cumberland (King George II's son), was strong. The Jacobites had to fight.
The two armies met at Culloden. The flat, open land gave Cumberland's larger, well-rested army an advantage. The battle lasted only about an hour. The Jacobites suffered a huge defeat, with 1,500 to 2,000 killed or wounded. About 300 government soldiers were killed or wounded. Even though 5,000-6,000 Jacobites were still armed, their leaders decided to scatter. This ended the rebellion.
Culloden and what happened after still cause strong feelings today. The Duke of Cumberland was called "Butcher" by some. This was because of the harsh actions taken after the battle against Jacobite supporters. Laws were also made to bring the Scottish Highlands more under British control. The traditional Scottish clan system, which helped the Jacobites raise an army, was weakened.
Why the Battle Happened: The Background
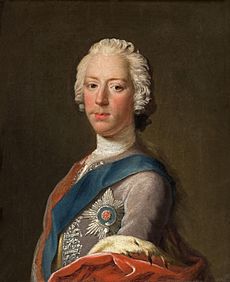
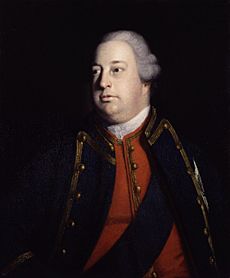
Queen Anne, the last ruler from the House of Stuart, died in 1714 without children. A law called the Act of Settlement 1701 said that George I of the House of Hanover would become king. He was related to the Stuarts through his grandmother.
But many people, especially in Scotland and Ireland, still supported Anne's half-brother, James Francis Edward Stuart. He was not allowed to be king because he was Catholic.
On July 23, 1745, James's son, Charles Edward Stuart, landed in Scotland. He came with only a few men, hoping to take back the throne for his father. Most of his Scottish supporters told him to go back to France. But Charles convinced Donald Cameron of Lochiel to join him. This encouraged others, and the rebellion began on August 19.
The Jacobite army entered Edinburgh on September 17. Charles was declared King of Scotland the next day. More people joined, and the Jacobites won a big victory at the Battle of Prestonpans on September 21. The government in London then called back the Duke of Cumberland, the King's younger son, and 12,000 soldiers from Europe.
Charles wanted to invade England. He thought removing the Hanoverian kings would make Scotland independent. He also believed the French would land in southern England and many English supporters would join him.
Despite their doubts, the Jacobite leaders agreed to invade England. They entered England on November 8. They captured Carlisle and reached Derby by December 4. But there was no sign of French help or many English joining them. They risked being trapped between two much larger government armies. So, the leaders decided to retreat back to Scotland.
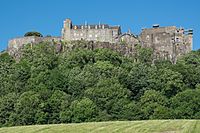
The Jacobite army managed to get back to Scotland by December 20. Their spirits were high. Their army grew to over 8,000 men. They got more soldiers from the northeast and French-trained Scottish and Irish troops. They used French cannons to try and capture Stirling Castle, a key fort. On January 17, they defeated a government force at the Battle of Falkirk Muir. But the siege of Stirling didn't go well.
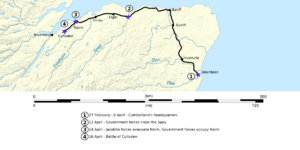
On February 1, the Jacobites gave up on Stirling and went back to Inverness. Cumberland's army moved along the coast and reached Aberdeen by February 27. Both sides waited for better weather. The Jacobites received some French supplies, but the British navy blocked many shipments. This led to shortages of money and food. When Cumberland left Aberdeen on April 8, Charles and his officers decided that fighting a battle was their best choice.
Who Fought: The Armies
The Jacobite Army
Many people think the Jacobite army was mostly Gaelic-speaking Catholic Highlanders. But actually, almost a quarter of the soldiers came from other parts of Scotland. Many who joined were also from a different Protestant church, not Catholic. Most of the army was Scottish, but there were also some English recruits. Plus, there were many experienced Irish, Scottish, and French soldiers who served France.
To quickly gather an army, the Jacobites used an old tradition. Landowners could call on their tenants (people who lived on their land) to fight. This worked for short fights. But a long war needed more trained soldiers. Some Highland leaders found their men hard to control. A typical 'clan' regiment had officers who were landowners. These officers fought in the front and suffered many casualties. Many Jacobite regiments, especially from the northeast, were organized more like regular armies. But they were still new and quickly trained.
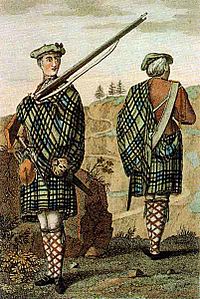
At the start, the Jacobites didn't have many good weapons. Even though Highlanders are often shown with broadswords and shields, most soldiers used muskets. As the war went on, France sent more supplies. By Culloden, many had French and Spanish muskets.
Later in the campaign, French regular soldiers joined the Jacobites. These were mostly small groups from the Irish Brigade and a French-Irish cavalry unit. About 500 men from the Irish Brigade fought. Many Jacobite cavalry units had been disbanded because they didn't have enough horses. The Jacobite cannons didn't play a big role in the battle.
The Government Army
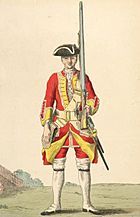
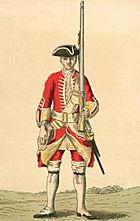
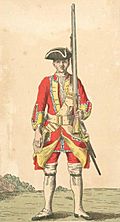
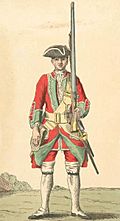
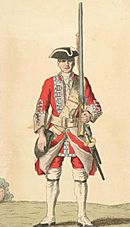
Cumberland's army at Culloden had 16 groups of infantry (foot soldiers). This included four Scottish groups and one Irish group. Most of these soldiers had fought at Falkirk. But they had been trained more, rested, and given new supplies.
Many infantry soldiers were experienced from fighting in Europe. When the Jacobite rebellion started, new recruits were offered extra money to join. For example, in September 1745, new soldiers joining the Guards got £6. A standard British infantry group was supposed to have 815 men. But at Culloden, they were often smaller, around 400 men.
The government cavalry (soldiers on horseback) arrived in Scotland in January 1746. Many had not fought in battles before. They had been stopping smugglers. Cavalry soldiers had pistols and carbines. But their main weapon was a sword with a 35-inch blade.
The Royal Artillery (cannons) of the government army performed much better than the Jacobite cannons at Culloden. Before this battle, their cannons hadn't been very good. Their main cannon was a 3-pounder, which could shoot 500 yards. It fired iron balls or small metal balls (canister). They also used small mortars called Coehorn mortars.
Getting Ready for Battle
After the defeat at Falkirk, Cumberland came to Scotland in January 1746 to lead the government forces. He decided to wait for winter to end. He moved his main army north to Aberdeen. About 5,000 German soldiers were placed near Perth to stop any Jacobite attacks there.
By April 8, the weather was better, and Cumberland started his campaign again. His army reached Cullen on April 11. Six more groups of soldiers and two cavalry regiments joined him there. On April 12, Cumberland's army crossed the River Spey. This river was guarded by 2,000 Jacobite soldiers. But their leader, Lord John Drummond, retreated instead of fighting. He was criticized for this later. By April 14, the Jacobites had left Nairn. Cumberland's army camped just west of Nairn.
Some important Jacobite groups were still on their way or fighting far north. But when they heard about the government's advance, their main army of about 5,400 men left Inverness on April 15. They lined up for battle at the Culloden estate, 5 miles (8 km) to the east. The Jacobite leaders couldn't agree whether to fight or leave Inverness. But most of their dwindling supplies were in the town, so they had to hold their army together.
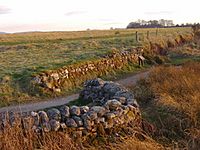
The Jacobite adjutant-general, John O'Sullivan, found a good place to fight. It was Drummossie Moor, an open area between stone walls. The Jacobite general, Lord George Murray, didn't like the flat, open ground. He suggested a different, sloped place. But others said it was not good because it was overlooked and too soft. The problem of where to fight wasn't fully solved. So, the Jacobites ended up lining up for battle a bit west of where Sullivan first chose.
Night Attack at Nairn
On April 15, the government army celebrated Cumberland's 25th birthday. Each regiment got two gallons of brandy. Murray suggested the Jacobites try a surprise night attack on the government camp, like they did at Prestonpans.
Murray planned for them to leave at dusk and march to Nairn. His right wing would attack Cumberland's rear. The Duke of Perth's left wing would attack the front. Lord John Drummond and Charles would bring up the second line. But the Jacobite force started much later than dark. This was partly because they worried about being seen by British navy ships.
Murray led them across the country to avoid government guards. One officer later wrote that the march was confusing in the dark. By the time the first group reached Culraick, they were still 2 miles (3 km) from where Murray's wing was supposed to cross the river. There was only one hour left before dawn.
After talking with other officers, Murray decided there wasn't enough time for a surprise attack. He called off the plan. Sullivan went to tell Charles, but missed him in the dark. Murray led his men left, down the Inverness road. In the darkness, about two-thirds of the Jacobite forces kept going towards their original target. They didn't know the plan had changed. Some even met government troops before realizing the rest of their army had turned back.
Not long after the tired Jacobite soldiers returned to Culloden, an officer arrived with news of advancing government troops. By then, many Jacobite soldiers had gone to find food or returned to Inverness. Others were sleeping. Several hundred of their army might have missed the battle.
The Battle on Culloden Moor
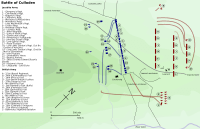
After the failed night attack, the Jacobites lined up for battle much like the day before. The Highland regiments were in the first line. They faced northeast on open grazing land. The Water of Nairn was about 1 km to their right. Their left side, near the Culloden Park walls, was led by the Duke of Perth. His brother, John Drummond, commanded the middle. The right side, next to the Culwhiniac walls, was led by Murray. Behind them, the 'Low Country' regiments were in columns, like French armies. In the morning, snow and hail fell heavily on the wet ground. Later, it turned to rain, but the weather became fair when the battle started.
Cumberland's army had packed up camp and started marching by 5 AM. They left the main Inverness road and marched across the country. By 10 AM, the Jacobites saw them approaching from about 4 km away. When they were 3 km from the Jacobite position, Cumberland ordered his army to form a battle line. The army marched forward in full battle order. One English soldier with Charles's army wrote that the Jacobites started to cheer and challenge them. But the government troops kept moving forward "like a deep sullen river." Once they were within 500 meters, Cumberland moved his cannons to the front.
As Cumberland's forces lined up, his right side looked exposed. So, Cumberland moved more cavalry and other units to strengthen it. In the Jacobite lines, Sullivan moved two groups of Lord Lewis Gordon's regiment. They were to guard the walls at Culwhiniac against a possible attack by government cavalry. Murray also moved the Jacobite right side slightly forward. This caused the Jacobite line to become uneven and created gaps. So, Sullivan ordered Perth's, Glenbucket's, and the Edinburgh Regiment from the second line to the first. The Jacobite front line now had more soldiers than Cumberland's. But their reserve was smaller, meaning they relied more on a successful first attack.
Cannon Fire Begins
Around 1 PM, the Jacobite cannons opened fire. This might have been because Cumberland sent an officer close to their lines to check their strength. The government cannons fired back soon after. Some Jacobite stories say they were under cannon fire for 30 minutes or more. But government accounts say it was much shorter. One officer timed it at 9 minutes, another at only 2 or 3 minutes.
This short time means the government cannons probably fired only about thirty shots from far away. Experts believe this would have caused only 20-30 Jacobite casualties at this point. This is much less than some stories suggest.
The Jacobite Attack
Shortly after 1 PM, Charles ordered his army to advance. An officer rode down the Jacobite line, giving the order to each regiment. Other officers were also sent to repeat the order. As the Jacobites left their lines, the government gunners switched to firing canister shot. This is like a giant shotgun blast. Small mortars behind the government lines also fired. Canister shot doesn't need careful aiming, so the firing rate increased a lot. The Jacobites found themselves running into heavy fire.
On the Jacobite right, the Atholl Brigade and other regiments charged towards the government's Barrell's and Munro's regiments. But after a few hundred yards, the middle regiments started to move to the right. They were either trying to avoid the canister fire or follow the firmer ground along a road. The five regiments got mixed up into one large group, heading towards the government's left side. The confusion got worse when the three largest regiments lost their leaders. They were all at the front of the attack and were killed or badly wounded.
The Jacobite left side moved much slower. They were slowed down by boggy ground and had further to go. One account says Lord John Drummond walked in front of the Jacobite lines. He tried to make the government soldiers fire early, but they kept their discipline. The three MacDonald regiments stopped and fired their muskets from far away, which wasn't very effective. They also lost their leaders. The smaller units on their right advanced into an area hit by cannon fire. They suffered heavy losses before falling back.
Fighting on the Government Left
The Jacobite right side was hit very hard by a volley of shots from the government regiments at close range. But many still reached the government lines. For the first time, a battle was decided by a direct clash between charging Highlanders and organized infantry with muskets and bayonets. Most of the Jacobite attack, led by Lochiel's regiment, hit just two government regiments: Barrell's 4th Foot and Dejean's 37th Foot. Barrell's lost 17 killed and 108 wounded out of 373 men. Dejean's lost 14 killed and 68 wounded. Barrell's regiment even lost one of its flags for a short time.
Major-General Huske, who led the government's second line, quickly organized a counterattack. He sent forward all of Lord Sempill's Fourth Brigade, which had 1,078 men. He also sent Bligh's 20th Foot to fill a gap. Huske's counterattack formed a horseshoe shape with five battalions. This trapped the Jacobite right wing on three sides.
One captain wrote: "Poor Barrell's regiment were sorely pressed by those desperadoes and outflanked. One stand of their colours was taken... We marched up to the enemy, and our left, outflanking them, wheeled in upon them; the whole then gave them 5 or 6 fires with vast execution, while their front had nothing left to oppose us, but their pistolls and broadswords..."

The Jacobite left, led by Perth, failed to advance further. So, Cumberland ordered two groups of cavalry to attack them. But the boggy ground slowed the cavalry. They then fought the Irish Picquets, who Sullivan and Lord John Drummond had brought up to help the struggling Jacobite left side. Cumberland later wrote that the Jacobites "came running on in their wild manner... firing their pistols and brandishing their swords, but the Royal Scots and Pulteneys hardly took their fire-locks from their shoulders, so that after those faint attempts they made off."
Jacobite Retreat
With the left side collapsing, Murray brought up the Royal Écossais and Kilmarnock's Footguards. But by the time they were in position, the Jacobite first line was already running away. The Royal Écossais fought with Campbell's 21st Regiment. Then they began an orderly retreat, moving along the Culwhiniac wall to protect themselves from cannon fire. But a group of Highland militia hiding inside the wall ambushed them. Their leader was killed along with five of his men. This forced the Royal Écossais and Kilmarnock's Footguards into the open. Three groups of cavalry attacked them. The fleeing Jacobites must have fought hard, as the cavalry lost at least 16 horses.
The Irish Picquets, led by Stapleton, bravely covered the Highlanders' retreat. This stopped the fleeing Jacobites from losing even more men. This action cost them half of their 100 casualties in the battle. The Royal Écossais seemed to retreat in two groups. One part surrendered after losing 50 killed or wounded. But their flags were not captured, and many escaped with the Jacobite Lowland regiments. A few Highland regiments also retreated in good order. The government cavalry let them go rather than risk another fight.
The brave stand by the French regular soldiers gave Charles and other senior officers time to escape. Charles seemed to be trying to rally some regiments when Sullivan told his bodyguard to "Seize upon the Prince & take him off." Charles yelled, "they won't take me alive!" and wanted to charge into the government lines one last time. But his bodyguard followed Sullivan's advice and led Charles away from the battlefield.
From this point, the fleeing Jacobite forces split up. The Lowland regiments went south towards Ruthven Barracks. The remains of the Jacobite right wing also went south. But the MacDonald and other Highland left wing regiments were cut off by the government cavalry. They were forced to retreat down the road to Inverness. This made them easy targets for the government cavalry. Major-general Humphrey Bland led the chase, giving "Quarter to None but about Fifty French Officers and Soldiers." This means they killed everyone they caught, except for about 50 French officers and soldiers.
Casualties and Prisoners
It's thought that 1,500–2,000 Jacobites were killed or wounded. Many of these deaths happened during the chase after the battle. Cumberland's official list of prisoners includes 154 Jacobites and 222 "French" prisoners. Another 172 of the Earl of Cromartie's men were captured the day before.
In contrast, the government reported only 50 dead and 259 wounded. Of Barrell's 4th Foot, 17 were killed and 104 wounded. However, many of those listed as wounded probably died later. Only 29 of the 104 wounded from Barrell's 4th Foot survived to claim pensions. All six artillerymen listed as wounded also died.
Several important Jacobite officers were killed or died of wounds. Others were captured. The only high-ranking government officer killed was Lord Robert Kerr. Sir Robert Rich, 5th Baronet, a senior officer, was badly wounded, losing his left hand. Many other captains and lieutenants were also wounded.
What Happened After: The Aftermath
The End of the Jacobite Campaign
As the first fleeing Highlanders reached Inverness, they met the 2nd battalion of Lovat's regiment. It's thought that their leader, the Master of Lovat, cleverly switched sides and attacked the retreating Jacobites. This might explain his success in the years that followed.
After the battle, the Jacobites' Lowland regiments went south to Ruthven Barracks. Their Highland units went north to Inverness and then to Fort Augustus. There, they were joined by other small groups. Some present at Ruthven wrote that the Highland troops were still in good spirits and wanted to keep fighting. At this point, the Jacobites still had enough men to continue. About a third of their army had missed or slept through Culloden. With the survivors, they could have had 5,000-6,000 men. However, the 1,500 men at Ruthven Barracks received orders from Charles to scatter. He said they should wait until he returned with French help.
Similar orders reached the Highland units at Fort Augustus. By April 18, most of the Jacobite army was disbanded. Officers and men from the French units went to Inverness and surrendered on April 19. Most of the rest of the army broke up, with men going home or trying to escape abroad. Some regiments, like the Appin Regiment, were still armed as late as July.
Many senior Jacobites went to Loch nan Uamh, where Charles Edward Stuart had first landed in 1745. On April 30, two French ships met them there. Two days later, three smaller British navy ships attacked the French ships. This was the last real fight of the campaign. During the six-hour battle, the Jacobites got back cargo that the French ships had brought, including £35,000 in gold.
With proof that the French had not abandoned them, a group of Jacobite leaders tried to continue the fight. On May 8, they agreed to meet on May 18. They planned to be joined by the remaining men from other regiments. However, things didn't go as planned. After about a month, Cumberland moved his army into the Highlands. On May 17, three groups of regular soldiers and eight Highland companies took over Fort Augustus. The same day, some Jacobite groups surrendered. On the day of the planned meeting, some leaders didn't show up. Others only brought about 300 men, most of whom immediately left to find food. The group broke up. The following week, the government launched harsh expeditions into the Highlands that continued all summer.
After fleeing the battle, Charles Edward Stuart went to the Hebrides islands with a small group of supporters. By April 20, Charles reached Arisaig on the west coast of Scotland. After a few days, he sailed to the island of Benbecula. From there, he traveled to Scalpay and then to Stornoway. For five months, Charles moved around the Hebrides. Government supporters constantly chased him. Local landowners were tempted to betray him for the £30,000 reward. During this time, he met Flora MacDonald, who famously helped him escape to Skye. Finally, on September 19, Charles reached Borrodale. His group boarded two small French ships, which took them to France. He never returned to Scotland.
Consequences and Punishment
The morning after the Battle of Culloden, Cumberland issued an order. He reminded his men that the rebels' orders had been "to give us no quarter." This meant to kill all government soldiers. Cumberland said these orders were found on dead Jacobites. In the days and weeks that followed, versions of these alleged orders were published. Today, only one copy of this "no quarter" order exists. But it's thought to be a fake, not written or signed by Murray. However, the orders Lord George Murray gave for the failed night attack on April 16 were also very harsh. They said to use only swords and bayonets, overturn tents, and "strike and push vigorously" where a tent bulged.
Cumberland's order was not fully carried out for two days. After that, reports say that for the next two days, the moor was searched. All wounded Jacobites found were killed. Also, over 20,000 farm animals were taken and sold. The soldiers split the money.
In Inverness, Cumberland emptied the jails that held people arrested by Jacobite supporters. He filled them with Jacobites instead. Prisoners were taken south to England to be tried for treason. Many were held on prison ships on the Thames. Executions happened in Carlisle, York, and Kennington Common.
Regular Jacobite supporters fared better than the leaders. In total, 120 common men were executed. One-third of them were soldiers who had left the British Army. The common prisoners drew lots, and only one out of twenty actually went to trial. Most who were tried were sentenced to death. But almost all these sentences were changed to being sent to the British colonies for life. In all, 936 men were sent away, and 222 more were banished. Still, 905 prisoners were released by a law passed in June 1747. Another 382 got their freedom by being exchanged for prisoners of war held by France. The fate of 648 prisoners is unknown. The high-ranking "rebel lords" were executed in London.
After their military success, the British Government passed laws to connect Scotland, especially the Highlands, more closely with the rest of Britain. Church leaders had to promise loyalty to the ruling Hanoverian family. A law in 1746 ended the right of landowners to judge people on their estates. Before this, feudal lords (including clan chiefs) had great power over their followers. Lords loyal to the government were paid a lot for losing these powers. For example, the Duke of Argyll got £21,000. Those who supported the Jacobite rebellion lost their lands. These lands were sold, and the money was used to help trade and farming in Scotland.
Laws were also made against Highland dress in 1746. Wearing tartan was banned. The only exceptions were for officers and soldiers in the British Army, and later for wealthy landowners and their sons.
Culloden Battlefield Today
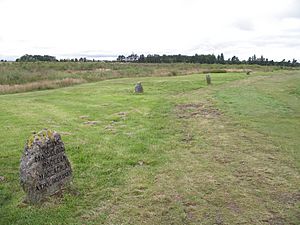
Today, there's a visitor centre near the battle site. It opened in December 2007. Its goal is to keep the battlefield looking like it did on April 16, 1746. One difference is that today it has shrubs and heather. But in the 1700s, it was used for grazing animals. Visitors can walk the site on footpaths and see it from a raised platform.
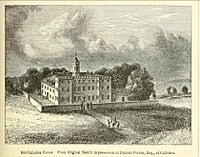
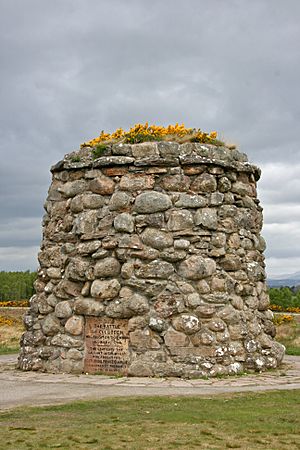
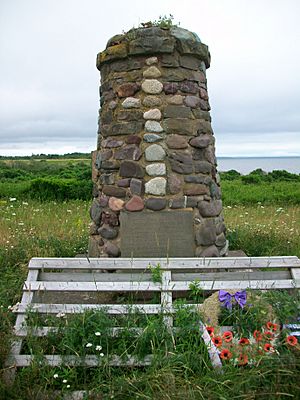
Perhaps the most famous feature is the 20-foot (6-meter) tall memorial cairn. Duncan Forbes built it in 1881. In the same year, Forbes also put up headstones to mark the mass graves of the clans. The thatched roof farmhouse of Leanach today dates from about 1760. But it stands where a turf-walled cottage likely served as a hospital for government troops after the battle.
A stone called "The English Stone" is west of the Old Leanach cottage. It's said to mark where government soldiers were buried. West of this is another stone, put up by Forbes. It marks where Alexander McGillivray of Dunmaglass was found after the battle. A stone on the eastern side of the battlefield is supposed to mark where Cumberland directed the battle. The battlefield is now protected by Historic Scotland.
Since 2001, the battle site has been studied using maps, ground scans, and metal detectors. Archaeologists have also dug up parts of it. Interesting things have been found where the fiercest fighting happened, especially where Barrell's and Dejean's regiments stood. For example, pistol balls and broken musket pieces have been found. This shows close-quarters fighting. Pistol balls were only used at close range. The musket pieces seem to have been smashed by bullets or heavy broadswords.
Finding musket balls seems to show where the lines of soldiers stood. Some balls were dropped without being fired. Some missed their targets. Others are bent from hitting human bodies. Sometimes, it's possible to tell if Jacobite or government soldiers fired certain shots. This is because Jacobite forces used many French muskets, which fired a slightly smaller caliber shot than the British Army's Brown Bess. Studies of the finds confirm that Jacobites used muskets more than people traditionally thought. Not far from the hand-to-hand fighting, fragments of mortar shells have been found.
Even though Forbes's headstones mark the Jacobite graves, the location of about sixty government soldiers' graves is unknown. The recent discovery of a 1752 silver coin might lead archaeologists to these graves. A ground scan where the coin was found seems to show a large rectangular burial pit. It's possible the coin was dropped by a soldier who had fought in Europe. He might have been visiting the graves of his friends.
The National Trust for Scotland is trying to make Culloden Moor look as much like it did during the battle as possible. They also want to expand the land they care for to protect the whole battlefield. Another goal is to restore Leannach Cottage so visitors can go inside again.
Culloden in Art and Stories
- An Incident in the Rebellion of 1745 (shown at the top of this page), by David Morier, is the most famous painting of the battle. It shows the Highlanders attacking Barrell's Regiment. Morier made sketches right after the battle to create it.
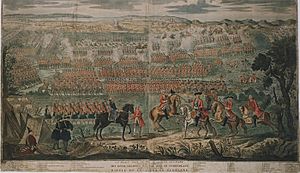
- David Morier actually made two paintings of the battle. The second (pictured right) is a colored woodcut that shows a map of the battlefield.
- Augustin Heckel's The Battle of Culloden (1746) is in the National Galleries of Scotland.
- Frank Watson Wood (1862–1953) painted The Highland Charge at the Battle of Culloden in oil.
- Handel's music piece Judas Maccabaeus was written to honor the Duke of Cumberland after the battle.
- The Czech Celtic rock band Hakka Muggies has a song about the Battle of Culloden.
- The Argentine band Sumo made a song called Crua Chan, which tells the story of the battle.
Culloden in Fiction
- The Skye Boat Song was written in the late 1800s. It remembers Bonnie Prince Charlie's journey from Benbecula to the Isle of Skye.
- The Battle of Culloden is an important part of D. K. Broster's book The Flight of the Heron (1925). This book was made into a TV show twice.
- Naomi Mitchison's novel The Bull Calves (1947) is about Culloden and what happened after.
- Culloden (1964) is a BBC TV show that tells the story of the battle like a modern news report.
- Dragonfly in Amber by Diana Gabaldon (1992) is a detailed fictional story based on history. It includes time travel, where the main character from the 20th century knows how the battle will turn out. The battle is also shown in the TV series Outlander, based on Gabaldon's books.
- The Highlanders (1966–67) is an episode of the TV show Doctor Who. The Doctor and his friends arrive in 1746, hours after the Battle of Culloden.
- Chasing the Deer (1994) is a movie that shows the events leading up to the battle.
- Drummossie Moor – Jack Cameron, The Irish Brigade and the battle of Culloden is a historical novel by Ian Colquhoun (2008). It tells the story from the point of view of the French-Irish soldiers who covered the Jacobite retreat.
- In Harold Coyle's novel Savage Wilderness, the first chapter is about the main character's experience at the Battle of Culloden.
- In the Star Trek novel Home Is the Hunter, Montgomery Scott is sent back in time to 18th-century Scotland. He takes part in the Battle of Culloden before returning to his own time.
- Portuguese author Hélia Correia's novel Lillias Fraser (2001) begins after the Battle of Culloden.
See also
 In Spanish: Batalla de Culloden para niños


