
Battle of Neville's Cross facts for kids
Quick facts for kids Battle of Neville's Cross |
|||||||
|---|---|---|---|---|---|---|---|
| Part of the Hundred Years' War and the Second War of Scottish Independence | |||||||
 Battle of Neville's Cross from a 15th-century manuscript |
|||||||
|
|||||||
| Belligerents | |||||||
| Commanders and leaders | |||||||
| Strength | |||||||
| 12,000 | 6,000–7,000 | ||||||
| Casualties and losses | |||||||
| 1,000–3,000 killed Many captured including King David II |
Few | ||||||
The Battle of Neville's Cross was a major fight during the Second War of Scottish Independence. It happened on October 17, 1346, near Durham, in England. A large Scottish army of 12,000 soldiers, led by King David II, was defeated. They lost badly to a smaller English army of about 6,000–7,000 men. The English army was led by Lord Neville.
The battle got its name from an old stone cross that stood on the hill where the Scottish army made its stand. After the English won, Lord Neville paid to have a new cross built to remember the victory. This battle was important because it helped England focus on its war with France, known as the Hundred Years' War. The Scottish King was captured, and this led to a long period of peace on the border between England and Scotland.
Contents
Why the Battle Happened
By 1346, England was fighting two big wars. One was the Second War of Scottish Independence against Scotland, which had started in 1332. The other was the Hundred Years' War against France, which began in 1337.
In 1343, France and England agreed to a temporary peace called the Truce of Malestroit. Scotland was part of this truce. But even with the truce, small fights kept happening. For example, King David II of Scotland led a quick raid into northern England in October 1345.
In 1346, Edward III of England (who ruled from 1327 to 1377) planned to invade northern France. So, Philip VI of France (who ruled from 1328 to 1350) asked King David II of Scotland for help. Philip VI wanted Scotland to attack England. This would force England to move its troops and supplies away from France. France and Scotland had an old agreement called the Auld Alliance. This alliance meant they would help each other if England attacked either country.
In June, Philip VI urged David II to attack England first. Edward III landed in Normandy with 15,000 soldiers in July. Philip VI kept asking David II for help. He told David II that northern England was "a defenceless void" because so many English soldiers were fighting in France. David II believed there would be few English troops left to defend the rich northern English cities.
However, when the Scots first tried to enter northern England, local defenders pushed them back. David II then agreed to a truce until September 29. This gave him time to gather his full Scottish army in Perth. By the time the truce ended, the French had lost badly at the Battle of Crécy. The English were also attacking Calais. The French were also struggling in southwest France, where their defenses had fallen apart.
Getting Ready for Battle
On October 7, 1346, the Scottish army, with about 12,000 men, invaded England. Many of their soldiers had modern weapons and armor given to them by France. A small group of French knights also marched with the Scots. Both Scottish and English writers at the time said this was the strongest and best-equipped Scottish army in many years.
The Scots first attacked a border fort called Liddell Peel. They captured it after a three-day siege and killed everyone inside. They then avoided Carlisle by getting a large payment from the city. The Scottish army moved east, destroying the countryside as they went. They looted Hexham Abbey for three days. Then, they marched to Durham. They arrived outside Durham on October 16 and set up camp at Beaurepaire Priory. The monks there offered the Scots £1,000 (a lot of money back then) to protect their priory.
The English had expected this invasion for a while. Two years earlier, the Chancellor of England had warned that the Scots would break the truce when France wanted them to. Once the Scots invaded, an English army quickly gathered at Richmond in north Yorkshire. This army was led by William de la Zouche, the Archbishop of York. He was also the Lord Warden of the Marches, meaning he was in charge of defending the border.
This English army was not huge. It had 3,000–4,000 men from northern English counties like Cumberland, Northumberland, and Lancashire. Lancashire alone sent 1,200 longbowmen (archers with powerful bows) and some lightly armed horsemen called hobelars. Another 3,000 soldiers from Yorkshire were on their way to join. This was possible because King Edward III had allowed the northern counties to keep their soldiers for defense when he raised his army to invade France.
On October 14, while the Scots were still looting Hexham Abbey, the Archbishop decided not to wait for the Yorkshire troops. He marched his army north-west and then quickly north-east towards Durham. The Yorkshire soldiers joined them on the way. Lord Ralph Neville then took command of the combined English force of 6,000–7,000 men.
The Battle Begins
The Scottish army at Beaurepaire only found out about the English army on the morning of October 17. The English were only about 6 miles (10 km) away. About 500 Scottish soldiers, led by William Douglas, ran into the English in the morning mist. This happened during a raid near Merrington, south of Durham. The English quickly pushed them back, causing about 300 Scottish deaths. Douglas rushed back to King David II's camp to warn the rest of the army.
That same morning, two monks from Durham tried to arrange a peace. But David II thought they were spies and ordered them to be killed. Luckily, the monks escaped in the confusion.

King David II led the Scottish army east from Beaurepaire. They went to a high piece of land less than half a mile (800 m) west of Durham. From there, they could see Durham Cathedral. Here, they got ready for battle. Both the Scottish and English armies were divided into three main groups, called "battles."
On the Scottish side, King David II led the second group. John Randolph, Earl of Moray, led the first group. Patrick Dunbar, Earl of March, led the third group. The Scots likely formed their traditional "schiltrons." These were tight, rectangular formations of soldiers. The front rows had axes, and long spears from the back rows stuck out past them. Knights and other armored soldiers dismounted (got off their horses) and stood in the front to make the formations stronger. Archers fought in front of the main army, and horsemen called hobelars protected each side.
As the mist cleared, it became clear that the Scots were in a bad position. The ground was uneven, and ditches and walls made it hard for them to move. They remembered their past defeats at Dupplin Moor and Halidon Hill. So, they decided to stay in a defensive position and wait for the English to attack.
The English also divided their forces into three groups. Lord Henry Percy led the first group. Lord Neville led the second, and the Archbishop of York led the third. Lord Neville was in overall command. All the English soldiers were on foot. Each group had armored soldiers in the middle and longbowmen on each side. The English also decided to stay in a defensive position. They knew they had a better spot and that time was on their side. Their spirits were high.
The battle became a standoff until the afternoon. Then, the English sent their longbowmen forward to shoot arrows at the Scottish lines. On the English left, the Scottish light cavalry and archers pulled back because of the arrow fire. This allowed the English to shoot arrows into the side of Moray's Scottish group. The Earl of Menteith tried to get rid of the English archers with a cavalry charge, but it failed, and he was captured. The archers successfully made the Scots attack.
Moray's group led the attack. But the rough ground and obstacles slowed them down and made it hard for them to stay in formation. The English longbowmen were able to fall back behind their armored soldiers. By the time the disorganized Scottish group reached hand-to-hand combat, they were easily defeated.
Seeing their first attack fail, and also being shot at by English archers, the third and largest Scottish group, led by the Earl of March and Robert Stewart, broke and ran away. The English kept their distance from the remaining Scots, who were with King David II, and shot many arrows at them. Then, the English armored soldiers attacked. After what was described as "fierce" fighting, the Scots tried to retreat but failed and were completely defeated. The English armored soldiers fought better than the larger number of Scottish foot soldiers. The English archers' performance was mixed. Many of them were fighting in their first big battle. Some groups of archers held back, but the Lancashire longbowmen received a special bonus after the battle.
King David II was badly wounded. He was captured after he tried to run away from the battlefield. The rest of the Scottish army was chased by the English long into the night. More than 50 Scottish nobles were killed or captured. Scotland lost almost all of its military leaders. Important Scots who died included the Constable, Lord David de la Hay; the Marischal, Robert de Keith; and two earls, John Randolph, Earl of Moray, and Maurice de Moravia, Earl of Strathearn. Many other Scots were taken prisoner. It is believed that only those who could pay a ransom were kept alive. Others were killed right away. Famous Scottish nobles who were captured included William Douglas, a skilled fighter, and four earls.
Scottish writers Andrew of Wyntoun and Walter Bower both said that a thousand Scots were killed in the battle. The Chronicle of Lanercost said "few English were killed." Modern historians think about 3,000 Scots died and fewer than a hundred were captured.
What Happened Next
Stories from that time say that after the battle, King David II was hiding under a bridge over the River Browney. A group of English soldiers saw his reflection in the water. David II was then captured by John de Coupland, who was leading the soldiers. The King even knocked out some of Coupland's teeth! During the battle, David II was shot twice in the face with arrows. Doctors tried to remove the arrows, but the tip of one stayed in his face. This caused him headaches for many years. King Edward III ordered David II to be brought to him. Edward III rewarded Coupland with a knighthood and a yearly payment of £500 for life.
Even though Robert Stewart had run away without fighting, he was made Lord Guardian. This meant he would rule Scotland while King David II was away.
All the Scottish captives were ordered to be sent to London. This upset their captors, who usually had the right to ask for ransom money for their prisoners. Many Scottish prisoners were secretly ransomed by their captors. Edward III was angry about this. Edward III refused to ransom any of the prisoners who were given to him. He also wouldn't release them on parole, which was a common practice. He wanted to weaken Scotland's ability to fight for as long as possible by taking away their leaders. In some cases, he paid large sums to the captors to buy their rights to the ransom. John Graham, Earl of Menteith, had previously promised loyalty to Edward III. So, Edward III saw him as a traitor. On the King's direct orders, he was put on trial, found guilty, and then executed.
In early 1347, two English forces made big raids deep into Scotland. They faced little resistance and destroyed much of southern Scotland. Border raids, often with destruction of the countryside, continued by both sides. The Battle of Neville's Cross removed the threat to Edward III's back while he was fighting in France. By 1349, the English border counties could defend themselves against Scotland without needing help from the main English army.
The Black Rood of Scotland, a holy relic believed to be a piece of the True Cross, was taken from David II. It was given to the shrine of Saint Cuthbert in Durham Cathedral. Edward III offered three times to release the childless David II for £40,000. This was if David II would agree to let one of Edward III's sons become the next King of Scotland. All three offers were refused.
Eleven years after the battle, David II was finally released. This was in exchange for a huge ransom of 100,000 marks. The ransom was to be paid over ten years, on June 24 each year. During this time, an Anglo-Scottish truce meant no Scottish citizen could fight against Edward III. This truce lasted for forty years and ended the Second War of Scottish Independence.
The battle is named after an Anglo-Saxon stone cross that marked a boundary on the ridge where the battle was fought. It is also named after Lord Ralph Neville, who led the winning English army. Lord Neville paid to have a new cross built to remember the day. This cross was destroyed in 1589. The battle site is now listed as a registered battlefield by Historic England.
In Literature
The story of King David II is mentioned in Shakespeare's play Henry V. In one scene, Henry talks about the Scottish invasion with the Archbishop of Canterbury. The last lines refer to an older play that Shakespeare's audience would have known, called The Reign of Edward III. At the end of that play, John de Coupland brings the captured David II to Edward III in Calais. There, David II meets the Black Prince, who has captured the French King.
Images for kids
-
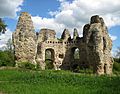
Odiham Castle in Hampshire, where David II was imprisoned from 1346 to 1357

See also
 In Spanish: Batalla de Neville's Cross para niños
