South African Wars (1879–1915) facts for kids
The South African Wars, also known as the Confederation Wars, were a series of conflicts in southern Africa between 1879 and 1915. These wars happened because of growing disagreements between European colonial powers and the local African people. Everyone wanted control over land and valuable resources like diamonds, found in 1867, and gold, found in 1862. These discoveries made tensions much worse.
Many people see conflicts like the First and Second Boer Wars, the Anglo-Zulu War, the Sekhukhune Wars, the Basotho Gun War, and the Xhosa Wars as separate events. However, they can also be seen as parts of a bigger period of change and fighting in the region. This period started with the Confederation Wars in the 1870s and 1880s. It grew more intense with the rise of Cecil Rhodes and the fight for control over gold and diamonds. It eventually led to the Second Anglo-Boer War and the creation of the Union of South Africa in 1910.
Contents
- Controlling the Land: European Powers in Southern Africa
- The Cape Colony: A British Stronghold
- Sekhukhune Wars: Fighting for Independence
- Orange Free State: A Boer Republic
- Natal: British Colony on the Coast
- Basutoland: A Mountain Kingdom
- Bechuanaland: A Strategic British Protectorate
- The Griqualands: Diamond Discoveries and British Annexation
- Other Important Areas
- Key Events and Military Conflicts
- Confederation Wars and the Rise of Imperialism
- Ngcayechibi's War (1877–79): Drought and Discontent
- Anglo-Zulu War (1879): A Shocking Defeat
- The First Boer War (1880–1881): Boers Regain Independence
- The Gun War (1880–1881): Sotho Victory
- The Pioneer Column Invasion (1890): Rhodes's Expansion North
- The First Matabele War (1893–1894): British Victory
- Malaboch War (1894): Resistance to Taxation
- The Second Ndebele Matabele War (1896–1897): A New Uprising
- The Second Boer War (1899–1902): A Long and Difficult Conflict
- The Bambatha Rebellion (1906–1907): Zulu Resistance to Taxes
- The Maritz Rebellion (1914): Boer Uprising in World War I
- Walvis Bay (1914–1915): German South-West Africa Campaign
- Confederation Wars and the Rise of Imperialism
- Technology and Economy in the Wars
- Diamond and Gold Rushes: Changing the Landscape
- Government and Politics: British Control and Local Resistance
- Who Fought in the South African Wars?
- Key Figures in the South African Wars
- The South African Wars in Books and Stories
- See also
Controlling the Land: European Powers in Southern Africa
As European powers, especially the Dutch Boers and the British, started claiming parts of southern Africa, they realized they needed to expand to keep their power. The relationships and borders between them became very complicated. This affected not only them but also the local African people and the land itself.
By 1880, there were four main European-controlled areas. The Cape Colony and Natal were largely under British control. The Transvaal (South African Republic) and Orange Free State were independent republics controlled by the Boers. These colonies and their leaders were very important at the time. All of them eventually joined to form the single Union of South Africa in May 1910.
The Cape Colony: A British Stronghold
The Cape Colony was started by the Dutch East India Company in 1652. The British took it over in 1795 and officially gained control from the Netherlands in 1815. At this time, the Cape Colony was about 260,000 square kilometers. It had about 26,720 European people, mostly of Dutch background. Others were from German soldiers and sailors, and many French Huguenot refugees who had fled religious persecution.
Some colonists became semi-nomadic farmers called trekboers. They often moved beyond the Cape's border. This led to the colony expanding and caused fights with the Xhosa people over grazing land near the Great Fish River. Starting in 1818, thousands of British immigrants arrived. The government wanted them to boost the European workforce and help settle the border as a defense against the Xhosa.
By 1871, the Cape was the largest and most powerful state in the region. Its northern border was set at the Orange River. Britain also gave it control of Basutoland. The Cape was unique because it officially gave equal rights to people of all races. It had a voting system where people could vote based on land ownership, no matter their race. This was unusual in the 1800s. However, it was still mostly controlled by Europeans.
In 1872, the Cape gained some independence from the British Empire by setting up its own responsible government. At first, its government wanted to focus on developing the colony internally and avoid taking more land. But the South African Wars led it to annex several nearby regions: Griqualand East in 1874, Griqualand West in 1880, and Southern Bechuanaland in 1895.
At the end of the South African Wars, the Cape Colony, Natal, Orange Free State, and the Transvaal joined together. The Cape Colony became part of the Union of South Africa in 1910. Today, it is divided into three of South Africa's modern provinces.
Sekhukhune Wars: Fighting for Independence
These wars happened in the homeland of the Northern Sotho people. There were three separate campaigns against Sekhukhune, the Paramount King of Bapedi. The first was the First Sekhukhune War in 1876, fought by the Boers. Then came two separate campaigns of the Second Sekhukhune War from 1876 to 1879, fought by the British.
Sekhukhune believed Sekhukhuneland was independent and not under the Transvaal Republic. He refused to let miners from the Pilgrim's Rest goldfields search for gold on his land, especially on his side of the Steelpoort River.
The Zuid-Afrikaansche Republiek (ZAR), or 'Transvaal Republic', under President Francois Burgers, could not win a clear victory in the Sekhukhune War. This gave the British a chance to take over Transvaal in 1877. Soon after, Britain declared war against Sekhukhune. After three tries, he was finally defeated by two British regiments led by Sir Garnet Wolseley. They were helped by 8,000 Swazis and other allies. Many Bapedi soldiers were killed, including Sekhukhune's heir, Morwamotshe, and three of his brothers. Both the British and Boer armies also suffered many losses.
By the 1870s, the Transvaal was struggling under Boer rule. In 1877, at the start of the South African Wars, the British, led by Theophilus Shepstone, took over the state. The Boers had to give up their independence for a small payment. When the British defeated local tribes in 1879 to gain more land, it meant less competition for the Boers. This allowed them to focus on getting the Transvaal back.
In 1881, the Boers rebelled, starting the First Anglo-Boer War. In this war, the Boers regained power. However, the British blocked any chance for them to expand or form alliances. When diamonds were discovered around 1885 in Griqualand West, Transvaal tried to claim land from the Cape and the Free State, but it didn't work.
At the end of the South African Wars, the Transvaal became part of the 1910 Union of South Africa.
Orange Free State: A Boer Republic
At the start of the South African Wars, the Orange Free State was an independent Boer republic. Its borders were mostly defined by rivers: the Orange River to the south, the Vaal River to the west and north, and the Caledon River to the east. Its northeastern border was shared with its British neighbor, Natal. The Caledon border was disputed with Moshoeshoe I's Sotho people, leading to two main conflicts in 1858 and 1865. Before the Boers settled, indigenous groups like the Sotho, San, and various Nguni clans lived in the Free State area.
In the 1870s, the Free State Boers began moving into Griqualand West looking for farmland, pushing out the Griqua. However, they did not officially claim the land, which was also claimed by Britain and the Griquas themselves. In 1890, there were about 77,000 white people and 128,000 Africans in the Free State. Many Africans worked on white farms. In 1900, Bloemfontein, the capital, came under British control.
At the end of the South African Wars, the Free State joined the 1910 Union of South Africa.
Natal: British Colony on the Coast
Natal is on the Indian Ocean coast of southern Africa, just northeast of the Cape Colony. It was home to the local Nguni and later the Zulu. This region played a key role in European colonization. It was first called the Natalia Republic, set up in 1839 by Boer Voortrekkers during their "Great Trek" to escape the British in the Cape. When the British established the colony four years later, as a strategic move, the border was extended to the Tugela and Buffalo Rivers.
In the 1870s, Natal was a British Colony. It had some local control but was directly managed by the appointed British Governor. Its political system was stricter than the nearby Cape Colony. Its small (mostly British) white population had a difficult relationship with the powerful independent Zulu Kingdom on their northern border. The Anglo-Zulu War (1879) later led to Zululand being added to Natal in 1897.
At the end of the South African Wars, the colony became part of the 1910 Union. Today, it is known as Kwazulu-Natal, a province of South Africa.
Basutoland: A Mountain Kingdom
Basutoland, home to the indigenous Khoi Khoi and Sotho people, was located between the Cape Colony, Orange Free State, and Natal. Basutoland was taken over by Britain in 1868 because Moshoeshoe I, King of the Sotho, was threatened by Free State (Boer) settlers. Three years later, it was given to the Cape Colony.
In the 1870s, Basutoland was still quite peaceful and doing well. The Cape Colony's weak, indirect rule did not threaten the traditional Sotho government. The Cape preferred not to interfere much in Basutoland. However, by the end of the 1870s, Britain and the new Sprigg Government of the Cape tried to have more direct control and influence the state's internal affairs. This led to a Sotho rebellion. In the resulting Gun War, the Sotho sharpshooters won several victories. In the final peace agreement of 1884, Basutoland returned to indirect rule. The British kept indigenous rule, planning to use the state's farming resources.
At the end of the South African Wars, Basutoland was still under British rule. Attempts to include it in the 1910 Union of South Africa failed. Because of this disagreement, Basutoland became one of three colonies left outside the Union, along with Bechuanaland and Swaziland. Today, Basutoland is a small independent nation called Lesotho, surrounded by South Africa.
Bechuanaland: A Strategic British Protectorate
After the Bechuanaland Expedition of 1884–85, Britain settled Bechuanaland in 1885. The northern part became a Protectorate, and the southern part became the Crown Colony of British Bechuanaland. This region was created between German Southwest Africa and the Transvaal. It was a strategic move to stop those two colonies from joining, which would have given them access to the Great North Road.
Along with taking over the Crown Colony in 1895, Cecil Rhodes pushed hard for the northern Protectorate. But the local Tswana chiefs resisted. They successfully convinced the British to stop the annexation attempt.
At the end of the South African Wars, the Bechuanaland Protectorate was one of three states not included in the 1910 Union of South Africa. It gained its independence in 1966 as the modern state of Botswana.
The Griqualands: Diamond Discoveries and British Annexation
In the 1870s, there were two Griqualands – West and East. Both were founded by the Griqua people who had moved out of the Cape Colony in the early 1800s, mainly due to racial discrimination.
The Griqua, a semi-nomadic group of mixed Khoi Khoi and Boer origins, moved north to lands just north of the Cape, east of southern Bechuanaland, and west of the Orange Free State. They were led by Adam Kok I. This new land was established as Griqualand West by Andries Waterboer.
When diamonds were discovered in the area, many white people moved in, outnumbering the Griqua. This led to the British taking over the region in 1871. This forced 2,000 Griqua to travel east from 1871 to 1872. They eventually established Griqualand East in 1873, only for Britain to take it over the following year. Griqualand East was located between the Cape Colony and Natal on the eastern coast. At this point, white people considered the Griqua as part of the larger Coloureds group.
Other Important Areas
Other political areas included Swaziland, Zululand, Portuguese East Africa, German Southwest Africa, and Matabeleland (now Zimbabwe).
Key Events and Military Conflicts
Confederation Wars and the Rise of Imperialism
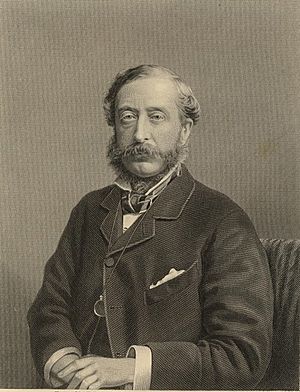
The first series of wars, called the "Confederation Wars" in the late 1870s and early 1880s, were largely caused by the British Colonial Secretary, the Earl of Carnarvon. He had a plan to unite the different states of southern Africa into one British-controlled federation. This plan was strongly opposed by the Cape Colony, the Boer republics, and the independent African States.
The Anglo-Zulu War and First Anglo-Boer War happened because of these attempts to take over land. The Gun War and Ngcayechibi's War were partly caused by new policies that came from the confederation plan, affecting the Cape and its neighbors.
The discovery of diamonds near Kimberley and gold in the Transvaal made these conflicts worse. These discoveries caused huge social changes and instability. Most importantly, they helped the ambitious imperialist Cecil Rhodes gain power. When he became the Cape Prime Minister, he quickly expanded British influence inland. He especially wanted to conquer the Transvaal. Even though his failed Jameson Raid brought down his government, it led to the Second Anglo-Boer War and British control at the turn of the century.
Ngcayechibi's War (1877–79): Drought and Discontent
Several things led to Ngcayechibi's War, also known as the "9th Frontier War" or the "Fengu-Gcaleka War." One major factor was the worst drought in the region's history. As historian de Kiewiet noted, "In South Africa, the heat of drought easily becomes the fever of war." The severe droughts across the Transkei threatened the peace that had lasted for ten years. They started in 1875 in Gcalekaland and spread to other parts of the Transkei, Basutoland, and the British-controlled Ciskei.
In 1877, tensions grew between different ethnic groups, especially the Mfengu, the Thembu, and the Gcaleka Xhosa. Another factor was centuries of unfair treatment and unhappiness. This was made worse by the new British Colonial Secretary, the Earl of Carnarvon, who tried to force the states of southern Africa into a British-ruled confederation.
This led the British Governor and High Commissioner for Southern Africa, Henry Bartle Frere, to use the fighting as an excuse to overthrow both the Gcaleka Xhosa state (1877–1878) and the Cape Government (February 1878). The conflict began with tensions and violence between Gcaleka Xhosa and Cape Mfengu police. It quickly grew when Bartle Frere declared the Xhosa King removed from power. This resulted in the last independent Xhosa state being taken over and the Cape's elected government being overthrown by the British Governor. The confederation attempt failed, but the wars that resulted from it continued for decades.
Anglo-Zulu War (1879): A Shocking Defeat
Foreign settlers first clashed with the Zulu in the 1830s as they moved into Zulu land. For most of the next 40 years, there was a shaky peace between the British and the Zulu. The relationship between the Boers and Zulu remained very tense, from the Battle of Blood River in 1838 to Boer movements into Zulu land in the 1860s. The British supported the Zulu against the Boers and backed the Zulu leader Cetshwayo during his crowning in 1873.
Cetshwayo expected this support to continue when the British took control of the Transvaal in 1877. However, the British cared more about pleasing the Boers than the Zulu. When the Zulu started putting pressure on them, the British, led by Sir Theophilus Shepstone, turned against the Zulu. Shepstone began telling London that Cetshwayo's rule needed to be removed and Zululand taken over.
In July 1878, High Commissioner Henry Bartle Frere, using Shepstone's claims, started saying that Natal was threatened by a possible Zulu invasion. He pushed for war, even though London wanted patience and to avoid conflict. London's slow communication meant Frere and Shepstone could push their plans faster than London could react. Frere believed the technological advantage of Lord Chelmsford's British Army would quickly end the conflict.
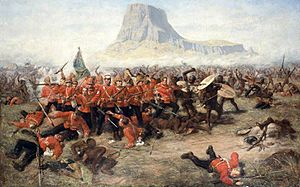
Frere provoked war with an ultimatum to Cetshwayo that he knew would be rejected. He demanded the Zulu army be immediately disbanded and their military system abolished within 30 days to remove Cetshwayo's power base. Chelmsford crossed the Blood River on January 11, 1879, with 4,700 men and set up camp at Isandlwana. They did not set up defenses around their camp because Chelmsford thought a Zulu attack was unlikely. He took most of his force from camp on January 22 to search the countryside. While he was away, the Zulu surrounded the remaining forces at Isandlwana and killed most of the British troops. It was one of the worst defeats in British Army history.
The shock of the British defeat made them want to crush the Zulu and destroy their nation. After five months of fighting, the British used their advanced technology to overpower Cetshwayo's remaining forces at the Battle of Ulundi. The British brought in General Sir Garnet Wolseley to deal with the "native problems" around the Boer Transvaal.
The First Boer War (1880–1881): Boers Regain Independence
The British success in removing many "native problems" from the Boer Transvaal's borders had unexpected negative effects. With less British focus on them, the Boers could concentrate on the ongoing British control of the Transvaal. General Wolseley was openly against Boer independence. He warned that protests against British rule could lead to charges of treason. The Boers continued to push for their independence. Even the Boer leader Paul Kruger, who had first advised caution, began to accept that war was unavoidable.
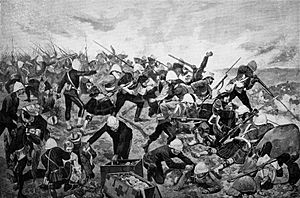
Even though there were clear signs of conflict, Wolseley suggested reducing British troops in the region. The British continued to ignore Boer protests, and increasing demands on the Boers led to a full rebellion in late 1880. The final trigger was the seizure of a farm wagon over unpaid taxes. The Boers argued that the British seizure was illegal because they had never recognized the annexation of the Transvaal.
On December 8, 5,000 Boers gathered at a farm to decide what to do. On December 13, they declared the Transvaal's independence and their intention to form a republican government. They raised the Vierkleur, their old republican flag, and began the "war of independence." This war had few large-scale battles. The first was a Boer victory against a British column that was not ready for a real fight. The Boers demanded the column stop, but the British commander, Colonel Philip Anstruther, insisted on continuing to Pretoria. The Boers then overwhelmed and forced the column to surrender.
The new High Commissioner, General Sir George Pomeroy Colley, gathered troops to get revenge for the British defeat. Colley lacked experience in the field. He marched against the Boer forces who were surrounding British garrisons and demanding their surrender. His aggressive tactics in attacking the Boers led to the loss of a quarter of his troops in battles in late January and early February 1881. Colley was determined to make up for his losses. He led forces in the Battle of Majuba Hill to take the hill, even though there was a chance for a peace agreement to end the war.
He attacked with a small force that did not know the original plan, had no proper scouting, and no heavy weapon support. They took the hill and set up camp without setting up defenses. When the British announced their position, the Boers were initially scared. But then they secretly climbed the hill from the north, reached the Highlander lines, and attacked. The Highlanders tried several times to warn Colley of the attack, but he ignored the reports. Colley was killed in the final assault as the British lines broke apart due to a lack of leadership. This defeat shocked the British in South Africa and in Britain. While many demanded revenge, the British quietly made a deal that gave the Boers independence. They only paid lip service to the Crown's authority, allowing the British to withdraw "with minimum embarrassment."
The Gun War (1880–1881): Sotho Victory
The Gun War was a conflict between the Sotho people and the Cape Colony. It started when the Cape government tried to disarm the Sotho, who had many firearms. The Sotho resisted strongly and used their sharpshooting skills to win several battles. This war showed the Sotho's determination to keep their independence and their weapons.
The Pioneer Column Invasion (1890): Rhodes's Expansion North
This invasion was driven by Cecil Rhodes and Britain's desire to expand further north through Bechuanaland into Matabeleland. Despite many messages and letters from Queen Victoria to Lobengula, the leader of the Matabele nation, no progress had been made on opening the "road."
In December 1889, Cecil Rhodes took action. He hired Frank Johnson and Maurice Haney to recruit 500 mercenaries to overthrow Lobengula. Rhodes wanted to attack the main towns and military posts to cause chaos in the Matabele (or Ndebele) nation. He also wanted to stop the Amandebele from raiding nearby villages and create general confusion in their state. Rhodes believed this would give the British South Africa Company a safe way to start mining the land. This plan never happened after Rhodes spoke with Fred Selous, who warned him it would be a huge disaster for traders and England.
Rhodes decided, based on Selous's advice, to go around Lobengula and take a different route to Mashonaland from the south, near Mount Hampden. Johnson's new mission was to find 120 'miners' to travel with Selous as their guide. The plan was approved locally. But when London received the report, they saw it as a provocation designed to get Britain into a war with Lobengula. This led to more talks with Lobengula to try and open the "road." Lobengula complained about dealing with subordinates and told Jameson to bring Rhodes before him. Jameson cleverly told Lobengula that he would inform Rhodes of his decision to keep the "road" closed. Lobengula replied that he had "not refused you the road, but let Rhodes come." Using this and reports that the Boers were exploring Mashonaland, the High Commissioner could not stop the force from moving into the territory.
Johnson had his "pioneers" at camp, getting ready to cross. Rhodes insisted that prominent Cape members join them in case they were cut off. His reason was that Imperial Forces would be more likely to rescue important Cape members than miners. As the pioneer column left camp and prepared to cross, false assurances were sent to Lobengula about the number of white men in his country. However, Lobengula did not attack. The column, after a 580-kilometer journey, arrived at Mount Hampden on September 12 and named the surrounding area Fort Salisbury.
The First Matabele War (1893–1894): British Victory
During the second annual meeting of the South Africa Company, Rhodes claimed the company was friendly with Lobengula, the last king of the Ndebele people. All the while, he knew war was coming. Eventually, Jameson gave Lobengula's commanders an ultimatum to leave Mashonaland. At the end of his meeting with Lobengula, who refused to move from the border, Jameson sent for Captain Lendy and Boer transport riders to find the Ndebele. If they refused to leave, they were to be moved by force.
When confronted, Captain Lendy followed orders and fired upon the Ndebele. After the men returned to Fort Victoria, Jameson sent word to Rhodes and Loch that they must go to war. By October, Jameson had gathered 650 volunteers and 900 Shona allies. Jameson kept sending messages that Lobengula had troops planning to attack. The war was an easy win for Jameson. As his troops advanced into Matabeleland, they easily defeated the Ndebele defenders with their machine guns and artillery. Once defeated, Lobengula destroyed his capital and fled north. Jameson's advancing troops followed him, reaching Bulawayo on November 4, but they could not find Lobengula.
In a desperate attempt to escape, Lobengula spoke to a council of his indunas near the Shangani River. He asked them to give all hidden gold to the white men for peace. Ultimately, the gold was given to messengers and never reached Jameson or his troops. Matabeleland was eventually divided among the volunteers and several of Rhodes's officials.
Malaboch War (1894): Resistance to Taxation
In April 1894, Chief Malaboch (Mmaleboho, Mmaleboxo) of the Bahananwa (Xananwa) people refused to leave his traditional mountain kingdom of Blouberg. He also refused to pay taxes, as ordered by the South African Republic (ZAR) Government. The authorities took action through forced removal, which led to the "Malaboch War." The chief and his people defended their territory.
As it became clear that the Bahananwa people were losing the war against the soldiers of Commandant-General Piet Joubert, they began surrendering. Their chief followed suit on July 31, 1894, after being surrounded for over a month. He was tried by a council of war on August 2, 1894, and found guilty of all charges. He was never sentenced but kept as a prisoner of war until the British authorities released him in 1900 during the Second Anglo-Boer War. The chief returned to his people and ruled until his death in 1939.
The Second Ndebele Matabele War (1896–1897): A New Uprising
When Jameson's forces were defeated by the Boers, the Ndebele saw a chance to rebel. In March 1896, white people were attacked first at farms, mining camps, and stores outside the main towns. As people fled, and when news reached Bulawayo, the capital, people panicked and rushed for weapons. Since the Ndebele had attacked the outskirts first, the element of surprise was lost, giving white people time to gather and move.
As volunteers arrived, Rhodes came from Fort Salisbury. After naming himself colonel, he rode into battle with the troops. In June, it seemed that the Ndebele forces were retreating from Bulawayo to the Mambo Hills. But white people were surprised again when the Shona joined the revolt. By the end of the week, over 100 men, women, and children were killed, which was about 10 percent of the white population.
Eventually, there was a stalemate in the Matopo Hills. Attacks continued until Rhodes sent a captured royal widow, Nyamabezana, to the rebels. He stated that if they waved a white flag, it would be a sign for peace, because the cost of the war was becoming too much for the British South Africa Company. Ultimately, Rhodes rode with several others to meet the rebels. After meeting with them and agreeing to some of their demands, Rhodes met with other Ndebele leaders, and the details of the agreement were finalized in October.
The Second Boer War (1899–1902): A Long and Difficult Conflict
The exact reasons for the Second Anglo-Boer War in 1899 have been debated ever since. Both sides have been blamed for different reasons. The Boers felt that the British wanted to take over the Transvaal again. Some believe the British were forced into war by mining leaders. Others think the British government manipulated these leaders to create conditions that started the war. It seems the British did not initially plan to annex the Transvaal. They simply wanted to ensure British power and the economic and political stability of the British Empire remained strong in the region.
The British worried about public support for the war. They wanted to push the Boers to make the first move towards actual fighting. This happened when the Transvaal issued an ultimatum on October 9. It demanded that the British withdraw all troops from their borders and recall their reinforcements. Otherwise, they would "regard the action as a formal declaration of war."
Over time, the war has been seen as a "White Man’s War." However, recent studies show this is not true. Black people were involved on both sides, mostly in non-fighting roles, like laborers. The British used armed black men as scouts or message carriers. They had planned to use unarmed black scouts but decided to keep arming them when the Boers started shooting at them as spies. The Boers also used black men during the war, who mainly helped dig defenses and build roads for moving weapons. They served in this way mostly during the early, traditional phase of the war.
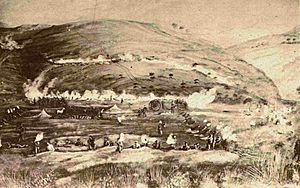
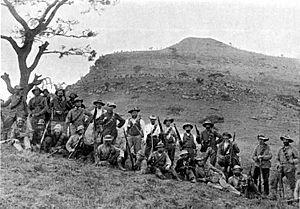
The Second Boer War had three phases. It began with a Boer attack to surround the garrisons at Ladysmith, Mafeking, and Kimberley. This happened after their commando units quickly gathered 30,000 to 40,000 men from each district. The Boers used a fast, mobile style of warfare, based on their experiences fighting the British in the First Boer War and lessons from the American Civil War. Early British attempts to relieve these surrounded garrisons had mixed results. The British thought the war would end quickly. They were not ready to face the well-equipped Boers, losing many men in their first attempts to push into places like Magersfontein, Stormberg, and Colenso.
The second phase began with Britain recovering from defeats and sending the largest British force ever sent overseas to South Africa. The British commander, Sir Redvers Buller, and his subordinate Major General Charles Warren, started the British attack with an assault on the hill of Spion Kop. Although the British won this battle, they later realized the hill was overlooked by Boer gun positions and suffered many casualties. Buller suffered another defeat at Vaal Krantz and was removed as commander of British forces due to questions about his leadership. His replacement was Field Marshal Lord Frederick Roberts.
Roberts won a series of battles by using overwhelming numbers of British forces against the Boers. He pushed into and captured the Orange Free State in May 1900 and then moved into the Transvaal to capture Johannesburg on May 31. Roberts declared the war over after capturing the Orange Free State and Johannesburg. He announced the formation of the Transvaal Colony and the Orange River Colony, which were officially incorporated in 1902. At this point, the Boers, initially discouraged by the huge number of British troops, began the third phase of the Second Boer War: the guerrilla campaign.
After regrouping into smaller units, the Boer commanders started using guerrilla tactics. They destroyed railways, bridges, and telegraph wires. Their leaders included Louis Botha in the eastern Transvaal, Koos de la Rey and Jan Smuts in western Transvaal, and Christian de Wet in the Orange Free State. The British were not ready for this type of fighting. They had too few mounted troops and no intelligence officers. They moved against the civilian population that supported the Boers, burning their houses and barns. Still, support for the Boers remained strong.
To deal with families wandering without shelter, the British decided to set up what they called refugee camps in September 1900. In December 1900, Herbert Kitchener of Khartoum took command of the British army, continuing the scorched-earth policy. He believed that women provided information to the Boers, so he put them in concentration camps. He also set up blockhouses and barbed wire fences to limit the Boers to certain areas. In January 1901, Kitchener raided the countryside, putting Africans and Boer civilians into concentration camps.
When he learned that Louis Botha was interested in peace, he quickly took the opportunity, using Botha's wife as a go-between. Nothing came of the talks, because Sir Alfred Milner insisted that only full surrender would be acceptable to the British. The Boers wanted independence. In June 1901, Boer leaders met and stated that no proposal would be considered unless it included their independence.
Conditions in the concentration camps worsened. The problem was not widely known until an Englishwoman, Emily Hobhouse, investigated. She sailed back to England to expose what Kitchener was allowing. The war minister, Brodick, dismissed the complaints of Hobhouse and her supporters in parliament. He stated that Boer guerrilla tactics had led to the methods being used. The military situation for the troops of De Wet, Botha, and De la Rey had worsened. Kitchener's blockhouses and fences were a serious problem. Also, three-quarters of the Boers' cattle had been killed or taken, and they were struggling just to survive.
Although De la Rey captured General Lord Paul Methuen and 600 troops in March 1902, he had to let them go because he had nowhere to keep them. At this time, many decided it would be best to accept British rule. Some even served as guides. These "joiners," as they were called, disagreed with those Boers who continued fighting at great risk, even though they knew military success was impossible.
By this time, Kitchener had built an army of 250,000 troops, constructed 8,000 blockhouses, and had 5,950 kilometers of commandos (?). He also changed his tactics towards women and children. Instead of sending them to concentration camps, he told his troops to leave them where they found them. This meant the burden of caring for them fell on the Boers. This further pushed the Boers towards negotiations.
Negotiations to end the war began in April 1902. Proposals were exchanged and rejected by both sides as unreasonable. At times, it looked as if the negotiations would fail, and the war would continue. The Boers were given some concessions on how Cape Afrikaner rebels would be treated and the rights of black Africans. Perhaps the most surprising outcome of the negotiations was that the Transvaal and Orange Free State would have to recognize King Edward VII as the ruler of their land. Many people in the Orange Free State and Transvaal saw this as a betrayal of one of their main reasons for fighting in the first place.
The Bambatha Rebellion (1906–1907): Zulu Resistance to Taxes
The Rebellion happened because of a Poll Tax of £1 on all Native male members over 18 years old, imposed by the Natal House of Assembly. After the magistrate and a small group were threatened by gunshots from Bambata and his followers, the group quickly retreated to a small hotel. Joined by the people at the hotel, the magistrate's group hurried to the police station at Keates Drift.
As news spread to Greytown, a Natal police force was sent to deal with the fugitives. But they saw no sign of the enemy after reaching the Drift. At sunset, they continued marching until they were ambushed in the Impanza Valley by Bambata's men. After fighting off the enemy and returning to camp with the dead and wounded, more troops were gathered for an attack on Bambata's location. However, the morning before, he had escaped to Zululand by crossing the Tugela River.
The Kranskop reserves followed Bambata along the same route until they made a wrong turn. They camped under the Pukunyoni until May 28, 1906. Then, scouts were shot at by a Zulu impi (regiment) marching toward the camp. After returning with news of the approaching Zulu, the camp prepared for attack. The Zulu made an initial rush but were turned away. Using a herd of cattle as cover, the Zulu drove the herd through the North-East corner of the camp. Many Zulu were shot only 5 yards from the defense line. The rest were then driven back or withdrew. The Zulu continued to fire on the camp from a "very bushy" hillside about 300 yards away. Several troops were killed and wounded.
The rebellion ended when Col. Barker arrived from Johannesburg with 500 soldiers. Along with local troops, they trapped and killed Bambata and the other Zulu chiefs, ending the uprising.
The Maritz Rebellion (1914): Boer Uprising in World War I
The Maritz Rebellion, also known as the Boer Revolt, started in South Africa in 1914 at the beginning of World War I. Men who wanted to bring back the old Boer republics rose up against the government of the Union of South Africa. Many government members were former Boers who had fought with the Maritz rebels against the British in the Second Anglo-Boer War twelve years earlier.
The rebellion failed. The leaders were given large fines and, in many cases, imprisoned. Compared to the fate of leading Irish rebels in the 1916 Easter Rising, the leading Boer rebels were treated lightly. They received prison terms of six and seven years and heavy fines. Two years later, they were released from prison, as Louis Botha recognized the importance of reconciliation. After this, the "bitter enders" focused on working within the political system. They built up the National Party, which would control South African politics from the late 1940s until the early 1990s, when the apartheid system they had built also fell.
Walvis Bay (1914–1915): German South-West Africa Campaign
Before an attack into South West Africa, the Boers had initially objected to any assault on German forces. This was because the Germans had supported them in the Second Boer War. Martial Law was declared on October 14, 1914. The Boer rebellion was quickly stopped. At the start of World War I, South West Africa (modern Namibia) was under German control. It had been passed back and forth during border talks in previous years. After the Maritz Rebellion was put down, the South African army continued its operations into German South-West Africa and conquered it by July 1915 (see the South-West Africa Campaign for details).
Troops took much of the territory, including Walvis Bay in the north, in 1915. In early 1915, the South African troops began moving into German South-West Africa. South African forces quickly moved through the country. But the Germans fought until they were cornered in the far north-west before surrendering on July 9, 1915.
Technology and Economy in the Wars
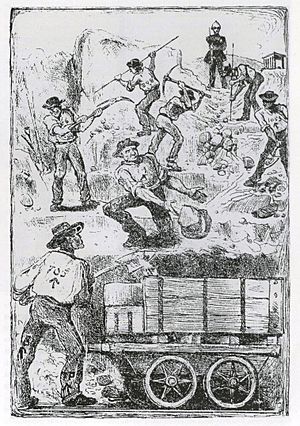
New technologies in southern Africa changed mining, guns, and transportation, and also affected the course of the war. Mining challenges led to the creation and use of new technology in the Kimberley mines, where new ways of extracting diamonds were needed.
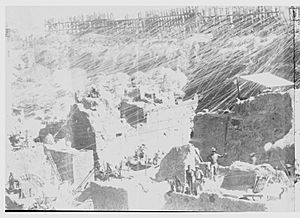
Originally, many small mines created a complex network of larger mining claims. By 1873, Kimberley miners had to build a cable transport system because roads leading into the mines kept collapsing. The cables in the Kimberley mines were held up by support beams placed around the mine's edge. Each level of the mine had two to three platforms. At first, the ropes were made of animal hides or hemp. Within a year, the cable system grew very quickly. The natural materials for cables were replaced with wire. After just one year, the mines had become so complex with this system that they amazed people. As mines were dug deeper, water removal became a problem. Miners brought in electric pumps to help pump out the water. Cecil Rhodes even started a pumping business during this time. The growth in the mines allowed large business owners to take control.
One of the major players in the South African economy was Cecil Rhodes. Rhodes helped create the British South Africa Company and De Beers Mining Corporation. Rhodes used his power and influence through these companies to expand the British Empire and his own business interests. This expansion was not welcomed by the non-British people living in the area. Through economic means, the British tried to expand their empire into Boer areas, which eventually led to a series of wars in South Africa.
The expansion of British lands led to an interest in gun manufacturing. Gun technology greatly improved during the 1870s. One major invention was the repeating rifle. With these new improvements, companies sent large amounts of older gun models to Africa to sell for big profits. This flood of guns greatly influenced and helped to make the war worse. Historians estimate that by the end of the 19th century, about 4 million pounds of gunpowder were sold in the German- and British-occupied regions of Africa. Around 1896, the Shona and Ndebele had about 10,000 guns between them. By 1879, the Zulu tribes had about 8,000 guns. The Shona were even taught how to make ammunition and repair broken guns. Guns were also used to attract miners because they were sold at and near mining camps. Around 1890, a ban was placed on importing guns and ammunition into tropical southern Africa. Other technologies helped the British Military stay in touch with London.
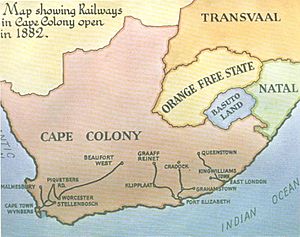
Other technologies also affected the Cape Colony. The telegraph was important for communication between the Cape Colony and Griqualand West. The 1873 Cape Government Railways plan to connect Kimberley and Cape Town by railway was completed in 1881. Years later, during the Second Anglo-Boer War, these trains became targets for Boer guerrilla warfare. Boers blew up trains, lines, and bridges with soldiers on them. New technology was developed to handle these new military tactics. Eventually, Hilton, a Boer guerrilla leader, gave up on attacking the Pretoria Delagoa Bay Railway Line. It was too difficult because of blockhouses, barbed wire, ditches on both sides, armored trains, and frequent checks. Technological developments came to the Cape Colony as they were needed.
Diamond and Gold Rushes: Changing the Landscape
The Diamond Rush: A Spark for Conflict
A small western area of the Orange Free State is home to many of South Africa's diamond mines. Before the rush to find diamonds, many indigenous people in Africa already used these diamonds as simple tools. John O’Reilly finding diamonds in the 1850s started what is known as the diamond rush. By 1869, thousands of people went to the Vaal River hoping to find their fortunes.
As a result, mining communities appeared across the region, including Klipdrift, Pniel, Gong Gong, Union Kopje, Colesberg Kopje, Delport's Hope, Blue Jacket, Forlorn Hope, Waldek's Plant, Larkins's Flat, Niekerk's Hope, and many other smaller settlements. The Cape Government made plans in 1873 to connect these diamond fields with the three ports of Cape Town, Port Elizabeth, and East London. This led to the creation of the Cape Government Railways.
The later part of the diamond rush happened on a 2,400-hectare farm called Dutoitspan. Because of this discovery, the mining towns of Old De Beers developed, as did Kimberley, also known as "New Rush." Kimberley proved to be one of the richest mines on Earth. These new mines within the Orange Free State and their great wealth caught the attention of the British Empire. Their new interest eventually led to a heated debate between the Orange Free State, the Griqua leaders, and the British Government.
In 1871, the discovery of diamond deposits by prospectors in Griqualand led to a struggle for control between Britain, the Orange Free State, the Griqua state, and the Transvaal. A Griqua chief claimed the land where the mines were located belonged to him and asked for the protection of the British Government. This resulted in the British taking over the region, which became known as Griqualand West. This land had originally been given to the Orange Free State by the British in 1854.
The Orange State was pressured by the Earl of Carnarvon to join the plan to unite the countries of Southern Africa under British rule, but it refused. Eventually, the Orange Free State was paid $525,000 as compensation. Although it attended some meetings about confederation, it still rejected the plan. In 1880, Griqualand West was given by the British to the Cape Colony, where it became a separate province. This allowed for Cecil Rhodes to enter Cape Colony politics and further his goals as one of the mining leaders when he ran for parliament in Barkly West.
The Gold Rush: A New Wave of Wealth and Conflict
In 1886, George Harrison discovered gold in Witwatersrand, in the Transvaal. This led to a rush of gold diggers from Australia, California, London, Ireland, and Germany. The arrival of so many gold diggers brought a huge amount of wealth into the previously poor region. However, severe health problems also appeared at dig sites, caused by dust from the dry digging and unsanitary conditions. Other diseases, deaths, and crime also increased. The gold industry, known for being controlled by a few powerful groups and being very political, would be at the center of controversies, such as the conflicts of the Jameson Raid of 1895 and the Anglo-Boer War in 1899.
Social Changes from Riches
With the discovery of diamonds in Griqualand West, gold in Witwatersrand, and coal in the Transvaal, the ability to produce goods changed South Africa's political and economic structure. "The growth of industrial capitalism in the region sped up greatly. The long period of taking land from independent African chiefdoms finally ended, paving the way for many African laborers to provide cheap labor for this industrial revolution."
Government and Politics: British Control and Local Resistance
The main goals of British policy in southern Africa were economic management. The British decided to take control of the Cape Colony in 1806 as a temporary measure against the French, to protect the trade route between Europe and Asia.
It was only decades later, in 1871, that the British took control of the separate state of Griqualand West. As time went on, British policies in the Griqualand West Colony, such as Proclamation 14 and the Black Flag Revolt, caused tension between the British Cape Colony leaders and Southern African groups like the Boers. Similar effects later resulted from the Franchise Dispute in the Transvaal.
Proclamation 14: Controlling Black Labor
Griqualand West, after the diamond rush, was filled with many new settlers. Severe discriminatory laws appeared under the independent "Diggers Republic" of Stafford Parker (1870–71) and direct British rule (1871–1880). Proclamation 14, issued on August 14, 1872, was a rule by British Imperial officials to calm the Kimberley diggers and control black labor. It stated that a "servant" could be black or white. However, all black people had to carry a pass with them at all times to cross the Kimberley pass point. These could be day passes to find work or work passes (labor contracts). The labor contract had to be signed by the "master" and show the black worker's name, wage, and length of employment. These contracts had to be carried on their person at all times, or they could face imprisonment, fines, or a whipping. Colonial officials did excuse some black people from this rule if they considered them "civilized."
Black Flag Revolt: White Diggers vs. British Rule
"The Black Flag Revolt" in 1875 was a conflict between white diggers and the British colonial government of Griqualand West. The British official in charge of the Griqualand West Colony was Sir Richard Southey, who wanted to limit the independence of the diggers. The revolt was led by Alfred Aylward. Other major figures were William Ling, Henry Tucker, and Conrad von Schlickmann.
The diggers were angry about high taxes, increased rent, and unrest among colored people. Aylward pushed for a republican form of government and spoke of revolution. He formed the Defense League and Protection Association, which promised action against taxation. Aylward inspired the diggers to take up arms in March and formed the Diggers' Protection Association, which was a paramilitary group. A black flag was the signal for Aylward's supporters to revolt.
William Cowie, a hotel owner, was arrested without bail for selling guns to Aylward without a permit. Aylward raised the "black flag," the signal to revolt, in response to Cowie's arrest. The rebels blocked the prison when Cowie arrived with a police escort. Cowie was eventually found not guilty. Southey asked for British troops to be sent to help control the situation. Volunteers from the Cape also gathered to assist. The rebels controlled the streets for ten weeks. They surrendered when the British Red Coats arrived on June 30, 1875. The rebel leaders were arrested and put on trial but were found not guilty by a jury of their peers. London was not happy with how Southey had handled the situation and the costs of sending troops, so he was removed from his position. The "Black Flag Revolt" was a victory for white interests, ended independent diggers, and marked the rise of diamond magnates.
Proclamation 14 and The Black Flag Revolt greatly increased hostility between Southern Africa's native people and the British leaders.
Swaziland: Losing Independence to Gold
Swaziland had managed to stay independent even as other native tribes around it fell one by one. Swaziland was promised independence by both the Transvaal and Britain through treaties. All this changed after gold was discovered in the De Kaap Valley in 1884.
The Swazis had historically helped Europeans and played a role in both Boer and British conflicts against their enemies, the Pedi and the Zulu. Boer farmers gained grazing rights, followed by mining rights. To handle the growing demand for concessions from white settlers, the Swazi Chief Mbanzeni hired Offy Shepstone of Natal to manage the concession administration. Upon his arrival, Shepstone formed the white governing committee to oversee taxes and law enforcement for white settlers. Shepstone soon proved to be corrupt, and concessions were being sold off at an alarming rate. Soon, the Transvaal had acquired railway, telegraph, and electricity concessions. In an attempt to slow down the concessions, Mbanzeni gave the White Governing Committee authority over all white people in Swaziland. This proved disastrous, and the rapid selling off of Swaziland continued.
On May 3, 1889, Kruger informed the British he would give up all claims to the North if he could gain political rights to Swaziland. The White Governing Committee agreed to the deal, and Mbanzeni's country was sold out from under him. Following Mbanzeni's death, the Transvaal and Britain divided the remaining territory until sole control fell to the Transvaal in 1894.
The Franchise Dispute: Voting Rights and Tensions
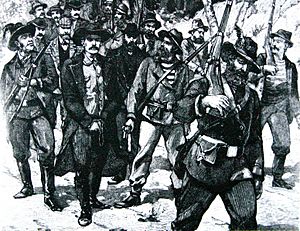
With many foreign workers entering the Transvaal after gold was discovered in Witwatersrand, the debate over foreigners' rights became a major problem for the Kruger government. Originally, foreigners could vote after living in the Transvaal for one year. In 1882, to counter the growing foreign population, the requirement was raised to five years, plus a twenty-five-pound fee.
After the Second Volksraad was established in 1891, the requirements were raised again. This time, it was fourteen years, and voters had to be over forty years old. However, to vote in the newly established Second Volksraad, residents only needed to live in the Republic for two years and pay a five-pound fee. This Second Volksraad, however, could be overruled by the First. This basically created a two-class society.
During the tense times after the Jameson Raid, the voting rights dispute was central to talks aimed at avoiding war. During talks in Bloemfontein between Kruger and Sir Alfred Milner in 1899, Milner suggested giving full voting rights to every foreigner who had lived in the Transvaal for five years, as well as seven new seats in the Volksraad. Since the foreign population was much larger than the Boers, Kruger believed this would mean the end of The Transvaal Republic as an Afrikaner state.
Kruger countered with a "sliding scale" offer. Foreigners who had settled before 1890 could get voting rights after two years. Settlers of two or more years could apply after five years, and all others after seven years. This proposal would also include five more seats in the Volksraad. Milner's ultimate desire, however, was immediate voting rights for a large number of foreigners to better British interests in the Transvaal. A telegram to Milner to accept the terms arrived too late, and the discussions were canceled without a solution.
In a final attempt to avoid war, Kruger proposed giving voting rights to any foreigner who had lived in the Transvaal for five years, plus ten new seats in the Volksraad. In return, Britain would have to drop all claims to the Transvaal and no longer interfere in the republic's internal affairs. The British government sent a letter to Kruger accepting the voting concessions but refusing the other parts of the deal. The failure to solve these issues was one of the main causes of the Second Boer War.
Who Fought in the South African Wars?
Many different groups took part in the South African Wars from 1879 to 1915. These included colonial settlers like the British and the Boers, as well as local tribes and clans.
Boers: Independent Farmers and Fighters
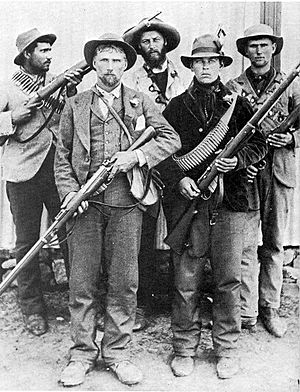
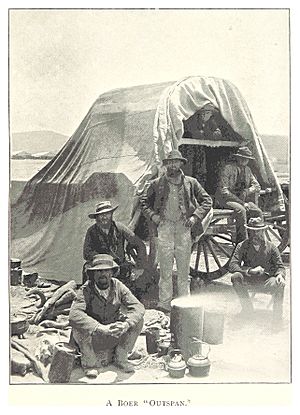
The Boers were descendants of Dutch, German, and French settlers who came to South Africa. They were known for their independent spirit and farming lifestyle. They often moved inland to escape British rule and establish their own republics.
The Boers had a difficult relationship with the British colonial government. They were unhappy with new laws, the abolition of slavery, and taxes. This led thousands of Boers to undertake the Great Trek and found their own Boer republics inland. Despite the distance, British attempts to control them continued, leading to the First and Second Anglo-Boer Wars.
During World War I, some former Boer fighters launched an unsuccessful attempt to reestablish the Boer republics in the newly independent Union of South Africa. This event was known as the Maritz Rebellion.
Zulu: A Powerful Kingdom Resists
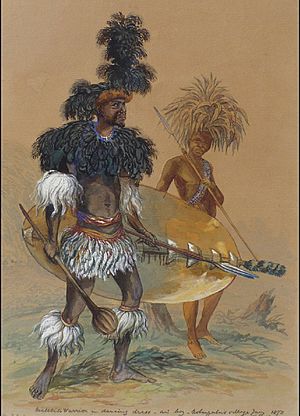
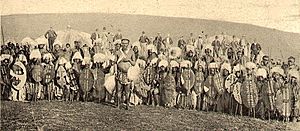
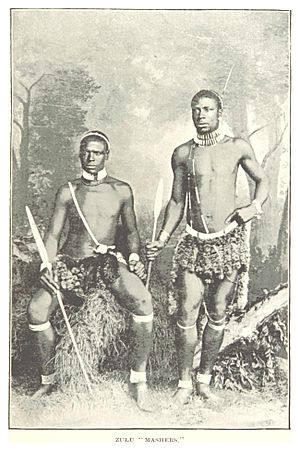
The Zulu people came from the Nguni clans who moved down the east African coast during the Bantu migrations. The Zulu tribe traditionally lived in the Natal province on the eastern side of South Africa. The Zulu were involved in two major wars. They fought against the British colonials in the Anglo-Zulu War in 1879. The Zulu were eventually overpowered by superior British technology. The Anglo-Zulu War resulted in traditional Zululand being absorbed into the British Cape Colony. The second conflict also involved Zulu and British colonials. Bambatha, a leader of the Zondi clan, led a rebellion against British authority in the Natal province. The rebellion was stopped by British colonial forces.
Colonial British: Expanding the Empire
The British took control of the Cape Colony in 1795. It was first used as a naval port on the way to the more established British colonies of India and Australia. In 1820, the British government moved many settlers to the new South African colony. The colony now had two distinct groups of European settlers: the British colonials and the Dutch Boers. The British settlers usually lived in towns and had urban jobs like trade and manufacturing.
The British colonials had conflicts with a strong and organized tribe in the Natal Province, the Zulu. There were two major conflicts with these indigenous people: the Anglo-Zulu War and the Bambatha Rebellion. British colonials also had two conflicts concerning the independence of Boer republics. In the First Boer War, the Boers became independent from British colonial control. Later, in the Second Boer War, the Boers declared war on the Cape Colony over the placement of British troops. The British colonial forces eventually captured all major Boer cities, and the formerly free South African Republic came under British control.
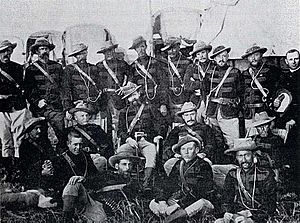
Several conflicts were started by British colonial settlers that the British government and army had to finish. Cecil Rhodes was involved in many of these conflicts, including the Jameson Raid and Pioneer Column Invasion. Two conflicts occurred with the Ndebele people, or Matabele as the British colonials called them. These were two rebellions against British colonial authority that were quickly stopped by notable individuals such as Leander Starr Jameson and Colonel Baden-Powell. The British colonials faced another rebellious threat in 1914 when General Maritz and a number of South African forces declared independence from the British. Maritz allied himself with the Germans at the nearby German South-west Africa colony. Walvis Bay was an area first captured by the Germans at the outbreak of World War I. Walvis Bay was later recaptured by British colonials.
Ndebele: A Branch of the Zulu
In the 1820s, a group of the Zulu led by Mzilikazi separated from the main tribe to form the Ndebele people. They moved west from Zululand and settled near what is now Pretoria. They would eventually move slightly north to present-day Zimbabwe, causing land pressure with the Shona people.
Conflict with the British colonials erupted in 1893 when their leader sent warriors to attack and plunder the Shona people living near Fort Victoria. An accidental confrontation broke out between Ndebele warriors and British soldiers at the fort. Although outnumbered, the British eventually stopped the Ndebele. A second Ndebele war broke out in 1896 when they rebelled against the authority of the British South Africa Company. This war, like the previous one, eventually ended with the death of the rebellion's leader. Even today, this war is celebrated as the First War of Independence in Zimbabwe.
Xhosa: Fighting for Their Land
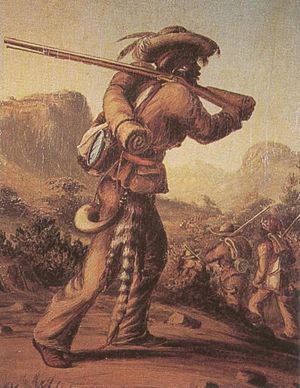
The Xhosa people were a group of Bantu-speaking chiefdoms driven out of the Zuurveld grasslands by the British colonists in 1811. In 1819, the Xhosa attacked the frontier village of Graham's Town with 10,000 warriors but were defeated and lost even more land. In 1834, the Xhosa again invaded the colony but were again driven back and lost more land to the British.
These wars between the Xhosa and Dutch and British colonists took place along the east coast of Cape Colony between the Great Fish and Great Kei rivers. In 1811, the British began a policy of clearing the land of Xhosa people to make way for more British colonists. Nearly an entire year of fighting (1818–19) followed.
After the battle, about 4,000 British colonists moved to the area along the Great Fish River. The further the colonists pushed east, the more resistance they met. In the war of 1834 to 1835, the colonists took over 60,000 cattle. From 1846 to 1853 was a longer struggle. In the war of 1877 to 1879, the colonists took over 15,000 cattle and about 20,000 sheep. In the end, all Xhosa territory was lost to the colonists of the Cape Colony.
Key Figures in the South African Wars
Throughout the South African Wars, people on both sides became well-known. Some supported the British colonizing South Africa, while others fought against these efforts.
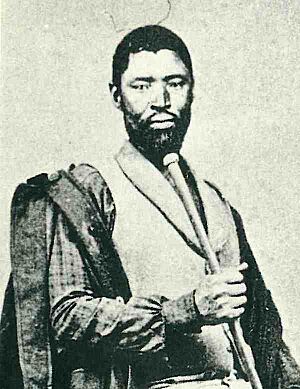
Mgolombane Sandile was the strong and inspiring chief of the Rharhabe House of the Xhosa Kingdom. He led his army in many wars until he was killed by Fengu sharpshooters in 1878. Although he acted independently, he usually recognized the authority of King Sarhili (Kreli) of the Gcaleka, whose country was to the east and who was the main chief of all the Xhosa people. Sandile's soldiers used modern firearms (along with their traditional weapons for close combat) and were skilled in guerrilla warfare. His tragic death was a turning point. It ended the last of the Xhosa Wars (1779–1879) and marked the beginning of the larger South African Wars (1879–1915), which now covered the entire subcontinent.
The Earl of Carnarvon was the colonial secretary in London from 1874 to 1878. He was very concerned about protecting the British Empire's interests at the Cape. He felt it was a crucial point for trade and future security. For this reason, he wanted to bring all the different states of southern Africa into one British-controlled Confederation. He had recently united Canada, creating a single, British-controlled government that blended two cultures and created a bilingual society. He wanted to repeat that success in southern Africa. The South Africa Act 1877 was based on the British North America Act concerning draft confederation. Carnarvon felt that if it worked for Canada, it could also work for southern Africa. Many southern African states strongly resisted this interference. His attempt to force this system of confederation onto southern Africa was a main cause of the first set of the South African Wars.
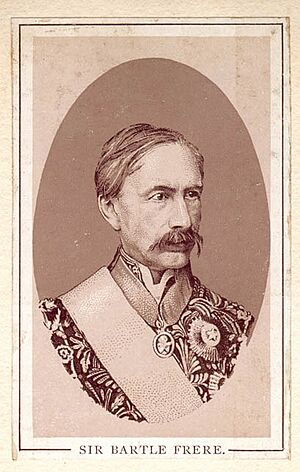
Sir Henry Bartle Frere was the new British Governor whom Carnarvon sent to southern Africa in 1877. His mission was to enforce the confederation plan, bring the various states of southern Africa into the united British federation, and prevent what he believed would be a "general and simultaneous rising of Kaffirdom against white civilization." For this purpose, Frere started the Anglo-Zulu War, the 9th Frontier War, the Gun War, and overthrew the elected government of the Cape Colony. He replaced it with the pro-federation Sprigg puppet government. He greatly underestimated the Zulu State as "a bunch of savages armed with sticks" and also miscalculated by going to war with the Boers and the Basotho. The British suffered serious setbacks and defeats against all of them before sheer military power helped them escape. Back in London, the new British Government was shocked by Frere's actions. "What was the crime of the Zulu?!" became the rallying cry of liberal leader William Gladstone. In 1880, Bartle Frere was called back to London to face charges of misconduct, but the conflicts he started effectively began the South African Wars.
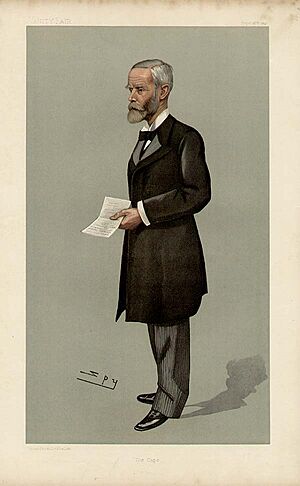
John Gordon Sprigg was the local puppet Prime Minister of the Cape (1878–81). Bartle Frere put him in power to lead the Cape Colony into Confederation after he had removed the previous elected government. At first, Sprigg had opposed confederation (like most local Cape leaders). But he wisely changed his mind, and Frere offered him the Cape government if he promised to help the confederation plan. His government then followed expansionist military policies and tried to separate and disarm the Cape's Black soldiers and allies. His unfair policies shocked many of the Cape's liberal political leaders and turned away the Cape's traditional allies, such as the Sotho and Fengu nations. A series of defeats followed, including from the superior strategies of the Sotho army. Facing military defeat and financial ruin, Sprigg became more and more unpopular. Once his imperial protector Bartle Frere was called back to London, the Sprigg government was overthrown by opposition movements in the Cape Parliament.
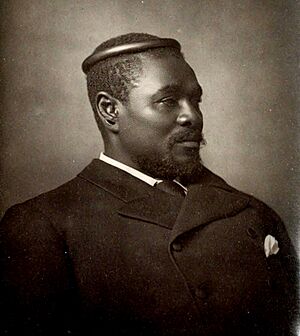
The Zulu King Cetshwayo kaMpande was a key figure in resisting British imperialism in Southern Africa. His name means 'The Slandered One'. Cetshwayo was the last independent Zulu King. Bartle Frere felt he needed to conquer the Zulu Kingdom for the confederation plan to succeed. He attacked the Zulus using the excuse of Cetshwayo's ordering a raid in Natal to seize two Zulu women who were wives of Cetshwayo's favorite chief, Sihayo kaXongo. On December 11, 1878, Frere's representative Sir Theophilus Shepstone told the Zulu leader that he could either turn in the two men who led this raid into Natal and disarm his army, or face war. The disarmament conditions were deliberately impossible to fulfill. Cetshwayo refused them, and the British attacked the Zulu on January 22, 1879. The British attacked with only 1,700 troops, while the Zulu brought 24,000. The battle was almost a complete massacre of the British, with only sixty Europeans surviving. Cetshwayo and his army were eventually defeated at oNdini on July 4, 1879. He escaped but was recaptured a month later and held as a prisoner of war. In 1882, Cetshwayo was allowed to travel to England and meet with Queen Victoria. While in England, he was treated as a public hero by the liberal opposition for his resistance to Britain. Cetshwayo was secretly returned to Zululand on January 10, 1883. On February 8, 1884, Cetshwayo died (likely from poison). His son Dinizulu was proclaimed king on May 20, 1884.
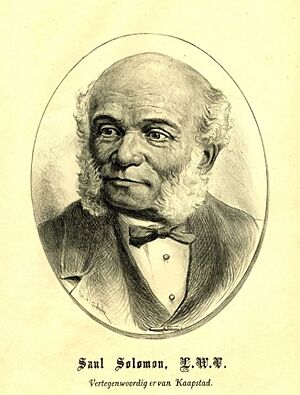
Saul Solomon was a personal friend of the Zulu King and a powerful anti-war Member of Parliament in the Cape Parliament. He was a leader of the "Cape Liberal" movement. Originally, he had been an ally and supporter of the Cape's locally elected Prime Minister John Molteno, who had opposed British control. Then, after Frere arrived and the government changed, Solomon initially trusted Sprigg when he came to power. But once he realized the nature of Sprigg and Bartle Frere's policies, he became their greatest political enemy in the Cape. When he led the liberal campaign against the Sprigg government, he was targeted in several high-profile political trials, which tried (unsuccessfully) to silence him. He was key in bringing about Sprigg's downfall in 1881, but Solomon was elderly and retired from politics soon afterward.
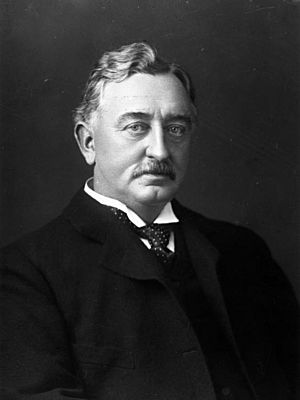
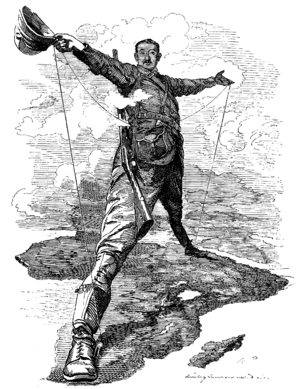
The mining leader and British imperialist Cecil Rhodes caused the second wave of the South African Wars. He wanted to control the continent and its diamond and gold resources. Rhodes first gained power through his control of the mining industries. He founded the Diamond Company De Beers, which today sells 40% of the world's rough diamonds and once sold 90%. He used his power in the diamond fields to get elected to parliament. Finally, in 1890, he became Prime Minister of the Cape Colony. He then put in place laws that would benefit mine and industry owners. He introduced the Glen Grey Act to push black people from their lands and make way for industrial development.
Rhodes wanted control over the Boer Republic of the Transvaal, where the gold mines were located. He launched the Matabele wars to surround the Boer republics. Then, in 1895, he planned the infamous Jameson Raid into the Transvaal. The raid failed and ended in humiliation, but this skirmish eventually led to the Second Anglo-Boer War. Through his conquests inland, Rhodes also founded Rhodesia, which later became Zambia and Zimbabwe.
Dr. Leander Jameson was a supporter and admirer of Cecil Rhodes. Rhodes appointed him director of the De Beers Company. Rhodes also used Jameson to launch the notorious "Jameson raid" into the Transvaal. The raid was meant to overthrow the Boer government of Paul Kruger in 1895 and allow Rhodes to take control. The raid failed, and Jameson was found guilty of breaking the foreign enlistment act and sentenced to 15 months in prison. After Rhodes's fall, Jameson continued Rhodes's legacy. He became leader of the pro-imperialist "Progressive Party" and, in 1904, became Prime Minister of the Cape.
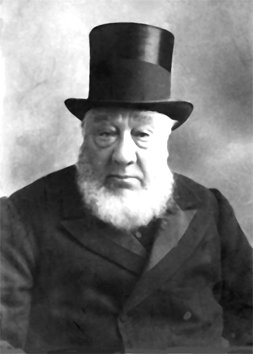
Paul Kruger fought against the British colonization efforts. He was born Stephanus Johannes Paul Kruger on October 10, 1825. Later in life, he earned the nickname "Old Lion of the Transvaal" because of his appearance. Kruger was against the British taking over the Transvaal region in 1877. He was named the Commandant-general of the Transvaal army before the age of 30. In 1880, Kruger joined Piet Joubert and M. Pretorius to fight for independence. The Boers won the war in 1883, and Kruger became state president. He remained president for many years. When the Anglo-Boer War broke out, Kruger again led the Boers. In 1900, the British forces advanced on Kruger and his men. Kruger escaped and settled in the Netherlands for the rest of the war. He never returned to the Transvaal. Kruger died on July 14, 1904, in Switzerland. His body was shipped back to the Transvaal and buried in Pretoria, in Heroes Ace.
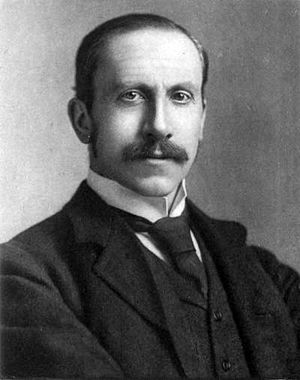
Lord Alfred Milner was High Commissioner for Southern Africa (1897–1905). He called himself a "race patriot" and started the Second Anglo-Boer War. His aggressive style of imperialism was clear to locals even when he first arrived. Upon meeting him, Jan Smuts correctly predicted that Milner would be "a second Bartle Frere" and "... more dangerous than Rhodes."
Milner was key in pressuring the Boers into war by supporting the cause of the British Uitlanders in the Transvaal. However, he greatly underestimated the cost and length of the war. The British suffered a series of humiliating defeats at the hands of the much smaller Boer forces. Towards the end of the war, he tried to push through humiliating treaties that would force the Boers to become more English.
General Herbert Kitchener was the famous British military leader sent by Milner to complete the defeat of the Boers in 1899. Unable to defeat the Boer commandos and their guerrilla warfare tactics, Kitchener used systematic burning of Boer civilian settlements and homes. This "Scorched Earth" tactic was meant to cause famine. He also made large-scale use of concentration camps for the Boer civilian population. Roughly 26,370 Boer women and children (81% were children) died in these concentration camps. About 20,000 Black African prisoners died in similar camps. However, in 1902, they eventually succeeded in pressuring the Boer commandos to surrender and sign the Treaty of Vereeniging.
The famous writer Rudyard Kipling strongly supported the British colonization of Africa. He was also a personal friend of Cecil Rhodes. When the Boer War broke out, Kipling joined campaigns to raise money for the troops and reported for army publications. While involved in this campaign, Kipling saw the tragedies of war. He witnessed people dying from typhoid and dysentery and also saw the bad barrack conditions. He wrote poetry supporting the British cause in the Boer War. In early 1900, Kipling helped start a newspaper called The Friend for British troops in Bloemfontein. Kipling eventually left South Africa and returned to England, where he was already highly regarded as the poet of the empire.
Women's Voices in the War: Speaking Out and Investigating
Women had a very limited role in 19th-century society. But despite this, several women became important voices during the South African Wars.
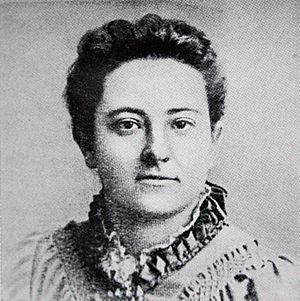
Olive Schreiner sympathized with the Boers. She was a writer and strongly opposed British Imperial policy. She focused on the human side of the war, sympathizing with Boer women who had to send their men to war despite their lack of military training. Boer men younger than 16 and older than 60 faced a well-trained and supplied British military (England, with Canada and Australia). Schreiner also admired the Orange Free State's long resistance to the British occupation.
Elizabeth Maria Molteno was a writer, a suffragette (someone who fought for women's right to vote), and an early civil rights activist. She was also a prominent anti-war campaigner. She helped found the South Africa Conciliation Committee (1899) and organized large protests against British policies. She felt a strong connection to the continent of Africa and its peoples. She urged all races in South Africa to feel the same. She later worked with Gandhi, Sol Plaatje, and John Dube in their different struggles for civil and political rights.
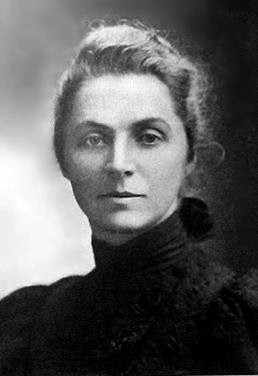
Emily Hobhouse was without a doubt the most influential woman's voice during the Anglo-Boer War. She was a founding member and Secretary of the South Africa Conciliation Committee (1899) and one of the first female investigative journalists in a war zone. She traveled to the South African war zone on behalf of the South African Women and Children Distress Fund. In her report, she exposed the mistreatment of women and children in the Boer refugee camps. As a result, she was arrested and deported. She was probably the most powerful voice against the conditions in the Boer concentration camps.
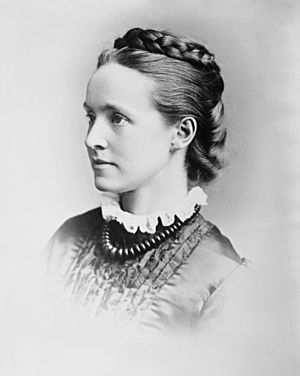
Millicent Garrett Fawcett was an investigative journalist who supported the war. Fawcett justified the mistreatment of Boer women and children in the concentration camps. She claimed they participated in the war by giving their men vital British military information, making them part of the war effort and therefore deserving of the same treatment as fighters. She also blamed Boer mothers for their children's deaths in the concentration camps. She often emphasized "race" and described the unhygienic conditions as if they were natural for Boer women. She failed to mention that they were clearly not given soap in the concentration camps. She compared Boers to ignorant English peasants from the 17th century.
The South African Wars in Books and Stories
The Boer War has been a popular topic in fiction, with over two hundred novels and at least fifty short stories in English, Afrikaans, French, German, Dutch, Swedish, and even Urdu. For historians and literary experts, it provides over a hundred years of how literature and history are connected.
Most novels and short stories about the Anglo-Boer conflict were published around the time of the war. They show the strong patriotic feelings that appeared in print. Some titles from that time give a good idea of this patriotic passion: B. Ronan, The Passing of the Boer (1899); E. Ames, The Tremendous Twins, or How the Boers were Beaten (1900); C.D. Haskim, For the Queen in South Africa (1900); F. Russell, The Boer's Blunder (1900); H. Nisbet, For Right and England (1900) and The Empire Makers (1900).
Some notable writers of the time who were closely linked to the Anglo-Boer conflict include Rudyard Kipling (1865–1936); Winston Churchill (1874–1965); H. Rider Haggard (1856–1925); Sir Arthur Conan Doyle (1859–1930); Sir Percy Fitzpatrick (1862–1931); Edgar Wallace (1875–1932); and John Buchan (1875–1940).
Some interesting authors who made fun of the Anglo-Boer conflict include H.H. Munro (Saki) (Alice in Pall Mall, 1900); G.K. Chesterton (The Napoleon of Nottinghill, 1904), Hilaire Belloc (Mr. Clutterbuck's Election, 1908) and Kipling: "Fables for the Staff," published in The Friend in 1900, where he mocked the British general staff's incompetence. Douglas Blackburn's A Burgher Quixote (1903) is one of the most underrated works in South African literature.
After World War I, there was a shift in ideas from imperialism to a focus on the Union of South Africa. Conflicts after World War I are often shown as a civil war where family members who fought on opposite sides must now make peace for their common good. This idea was already seen in Francis Bancroft's (Mrs. Francis Carey Slater's) early novels The Veldt Dwellers (1912) and Thane Brandon (1913). It is also a major theme in Daphne Muir's A Virtuous Woman (1929), Norman McKoewn's The Ridge of White Waters (1934), F.A.M. Webster's African Cavalcade (1936), as well as Kathleen Sinclair's series which includes Walking the Whirlwind (1940), The Sun Rises Slowly (1942), and The Covenant (1944).
From the 1930s, there was less focus on showing the causes and effects of the Boer War as fixed ideas to be attacked or defended. Coincidentally, there has been a trend to show the struggle from the Boer point of view, as in W C Scully's The Harrow (1921), Daphne Muir's A Virtuous Woman (1929), and Manfred Nathan's Sarie Marais (1938).
Within the broader context of South African literature, the issue of race, which had largely been quiet in Boer War fiction during the imperial phase, now began to become more central. Only one novelist who wrote about the war during the imperial phase, George Cossins in A Boer of To-day (1900), admitted to a black-white problem.
Since 1948, the call for unity between Afrikaner and English has remained, but the race issue has become more and more important. Race relations are a major focus in Henry Gibb's four-book series: The Splendour and the Dust (1955), The Winds of Time (1956), Thunder at Dawn (1957), and The Tumult and the Shouting (1957), and Daphne Rooke's Mittee (1951).
Most writers since 1948, with some notable exceptions, have treated the war largely as a background for historical romance: Stuart Cloete, Rags of Glory (1963); Sam Manion, The Great Hunger (1964); Wilbur Smith, The Sound of Thunder (1966); Dorothy Eden, Siege in the Sun (1967); Josephine Edgar, Time of Dreaming (1968); Daphne Pearson, The Marigold Field (1970); Jenny Seed, The Red Dust Soldiers (1972); Desiree Meyler, The Gods Are Just (1973); and Ronald Pearsall, Tides of War (1978). At the same time, there is a greater interest in discussing difficult questions like concentration camps, the effects of martial law, the 'Handsuppers' (Boers who surrendered), and the results of the scorched earth policy.
The South African conflict was in many ways a civil war. Not only did many Boers from the Cape, and later the two republics, join the National Scouts and fight for the British, but many Cape Boers joined the commandos. This aspect of the war produced some of its best responses in fiction, for example, Herman Charles Bosman's short stories "The Traitor's Wife" and "The Affair at Ysterspruit," and Louis C. Leipoldt's novel Stormwrack (1980). The question of divided loyalties is a big issue in Boer War fiction.
The conflict did not end with the war. As late as 1980, a successful Australian film Breaker Morant was based on Kenneth Ross's play and Kit Denton's novel The Breaker (1973). The Boer War has continued to be a popular subject for escape fiction. While writers at the height of the Empire were mostly British, with the decline of imperialism, the field is now dominated by South African writers.
See also
- Boer Wars
- Anglo-Zulu War
- Military history of South Africa


