
Sinai and Palestine campaign facts for kids
Quick facts for kids Sinai and Palestine campaign |
|||||||||
|---|---|---|---|---|---|---|---|---|---|
| Part of the Middle Eastern theatre of World War I | |||||||||
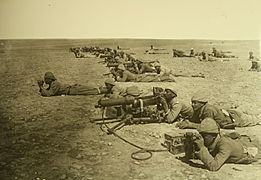
 10.5 cm Feldhaubitze 98/09 and Ottoman artillerymen at Hareira in 1917 before the Southern Palestine offensive |
|||||||||
|
|||||||||
| Belligerents | |||||||||
|
|||||||||
| Commanders and leaders | |||||||||
| Units involved | |||||||||
|
Force in Egypt (to March 1916)
|
Fourth Army
Yildirim Army Group
|
||||||||
| Strength | |||||||||
|
1,200,000 (total)
|
Estimated 200,000–400,000
|
||||||||
| Casualties and losses | |||||||||
|
5,981+ died of disease French and Italian casualties: unknown Total: 168,000+ casualties |
~40,900 died of disease
|
||||||||
The Sinai and Palestine campaign was a major part of the Middle Eastern fighting during World War I. It involved the British Empire and the Arab Revolt fighting against the Ottoman Empire and its allies, Germany. The campaign started in January 1915 when the Ottoman Empire tried to attack the Suez Canal. It ended in October 1918 with the Armistice of Mudros, which led to the Ottoman Empire losing control of Ottoman Syria.
The fighting began when a German-led Ottoman force tried to raid the Suez Canal in the Sinai Peninsula. The British controlled this area as part of their "Protectorate" over Egypt. After the Gallipoli campaign, many soldiers from both sides were sent to fight for the Sinai Peninsula. The British forces were called the Egyptian Expeditionary Force (EEF). In January 1917, the EEF took back the Sinai at the Battle of Rafa.
After this success, the EEF tried to advance into Palestine. However, they lost two battles at Gaza and Gaza in March and April 1917. This led to a period where neither side could gain much ground.
In October 1917, General Edmund Allenby took charge of the EEF. His forces captured Beersheba and then won more victories at the Battle of Mughar Ridge and the Battle of Jerusalem. In March 1918, the British had to send many soldiers from the EEF to the Western Front in Europe because of a big German attack. This slowed down the fighting in Palestine.
Allenby's forces started attacking again in September 1918 during the Battle of Megiddo. They broke through the Ottoman lines, allowing their cavalry to surround the enemy. The EEF destroyed three Ottoman armies and captured many prisoners and supplies. They then captured Damascus and Aleppo. The Ottoman Empire finally agreed to stop fighting on October 30, 1918.
This campaign was not very well known during the war. People in Britain thought it was a small operation. After the war, the Partitioning of the Ottoman Empire happened. France gained control over Syria and Lebanon, while the British Empire took control of Mesopotamia and Palestine. The Republic of Turkey was formed in 1923. Later, the countries of Iraq, Lebanon, Israel, Jordan, and Syria became independent.
Contents
- Why the Suez Canal was Important
- Defending the Suez Canal (1915–16)
- Arab Revolt
- Sinai Campaign: Moving Forward
- Palestine Campaign Begins
- Gaza Campaign
- Southern Palestine Offensive
- Winter 1917–18
- Judean Hills Operations
- Jordan Valley Operations
- Focus Shifts to the Western Front
- Arab Attacks
- Megiddo Offensive
- Syrian Campaign
- Summary of the Campaign
- Images for kids
Why the Suez Canal was Important
Since 1805, Egypt had been mostly independent, but it was still officially part of the Ottoman Empire. The British took control of Egypt in 1882, but Egypt remained legally part of the Ottoman Empire. When World War I started, the leader of Egypt, Khedive Abbas II, sided with the Ottoman Empire. Because of this, Britain removed him and declared Egypt a British protectorate.
The Suez Canal was super important for Britain. It was a shortcut for ships traveling between Europe and places like India, New Zealand, and Australia. This made Egypt a key base during the war. For Germany and the Ottoman Empire, the canal was a weak spot in Britain's communication lines. Defending the canal was hard because it was so big. There was only one railway line across the desert from Cairo to Ismaïlia on the canal. Controlling the area around Ismaïlia was vital because three canal towns got their fresh water from the Nile River through the Sweet Water Canal.
When fighting began in November 1914, the British moved their defenses to the western side of the canal. They had about 30,000 soldiers. The Ottoman Empire, with about 25,000 men, showed their interest in taking back Egypt by attacking British forces in 1915. Germany also helped stir up trouble among the Senussi people in what is now Libya, who attacked western Egypt.
Egypt's Role in the War
Egypt was not an independent ally or part of the British Empire. Its role was unique. British leaders decided that Egypt would only provide its railway and Egyptian workers for the war effort. However, as the war continued, more Egyptian workers were needed. Many felt the war no longer concerned them once the fighting moved beyond Egypt's borders.
By 1917, about 15,000 Egyptian volunteers were in the Egyptian Army. They were mostly in Sudan, but three battalions helped the EEF. Also, 98,000 laborers, with 23,000 working overseas, helped out. It was hard to get more Egyptians to join because it could hurt food and cotton production. The Egyptian Labour Corps and the Egyptian Camel Transport Corps were very helpful during the Sinai campaign.
Defending the Suez Canal (1915–16)
From January 26 to February 4, 1915, a large Ottoman Army force attacked the Suez Canal. Smaller Ottoman groups made attacks in the northern and southern parts of the canal. The main attacks happened on February 3 and 4. The Ottoman force, led by Kress von Kressenstein, reached the canal on February 2 and managed to cross it near Ismailia on February 3.
Only two Ottoman companies successfully crossed the canal. The rest of the attackers gave up because of the strong British defense. The British had 30,000 men, including the Imperial Service Cavalry Brigade and the Bikaner Camel Corps. They were supported by Egyptian and Indian artillery. The Ottoman companies held their positions until the evening of February 3, then retreated.
After this, Ottoman troops stayed in the Sinai Peninsula, with forces at Gaza and Beersheba. For several months, Kress von Kressenstein led small attacks to disrupt traffic on the Suez Canal. For example, on April 8, 1915, a mine was placed in the canal, but it was found and removed. These attacks stopped during the Gallipoli campaign.
-
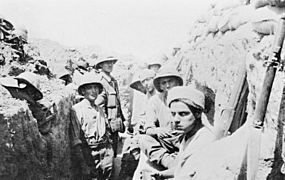
1st Herts. Yeomanry in the Suez Canal trenches, 1915
-
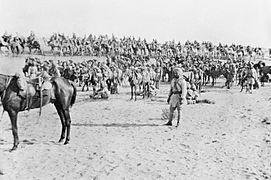
Mysore and Bengal Lancers with Bikanir Camel Corps in the Sinai Desert 1915.
-
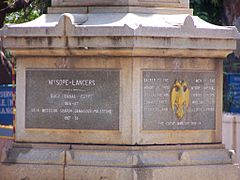
Mysore Lancers Memorial at Bangalore for lives lost in Suez & Palestine
-
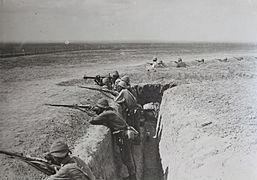
Ottoman soldiers in the trenches.
-
Ottoman soldiers with machine gun


,_Bangalore.jpg)


Expanding British Defenses

The Ottoman raids showed that defending the Suez Canal only from the western side was not practical. By the end of 1915, after the Gallipoli campaign, the British decided to build new defenses in the desert, about 11,000 yards east of the Canal. This would protect the canal from long-range guns.
Port Said became the main headquarters for these new defenses. In March 1916, Sir Archibald Murray took command of all British forces in Egypt, forming the new Egyptian Expeditionary Force. Murray believed that moving into the Sinai and occupying the Qatiya/Katia area would be better than just staying on the defensive. The British War Office agreed to this plan.
Murray planned to have 50,000 soldiers in the Katia area. He got permission to build a pipeline to bring fresh Nile water and a railway to transport soldiers and supplies. These projects started in February 1916.
Raids to Secure Water Sources
.jpeg)
The Ottoman Army could still threaten the Canal using water wells in central Sinai. Between April 11 and 15, 1916, a British force traveled 52 miles to destroy a well-boring plant and pumping equipment at Jifjafa. They captured an Austrian officer and 33 men, and killed six Ottoman soldiers.
Later, in June, another British group drained five million gallons of water from pools and cisterns in the Wadi Mukhsheib. They sealed the cisterns to stop them from refilling. With the central Sinai route now blocked, Ottoman forces could only advance along the northern coast.
Taking Control of Romani

Kress von Kressenstein launched a surprise attack on April 23, 1916, east of the Canal. The British yeomanry were guarding the water pipeline and railway being built towards Romani. Ottoman forces surprised and overwhelmed some British squadrons at Katia and Oghratina.
This fighting showed how important the oasis area was to both sides. A large Ottoman force based there could threaten the Suez Canal. The Australian and New Zealand mounted brigades were ordered to occupy the Romani area the day after the fighting.
Until the railway and water pipeline reached Romani, all supplies had to be carried by the Egyptian Camel Transport Corps. Soldiers had to patrol constantly despite poor food, harsh weather, and little shelter.
In May 1916, Ottoman aircraft bombed Port Said. In response, British planes bombed the Ottoman aerodrome at El Arish. By mid-May, the railway reached Romani, allowing more troops and supplies to be brought up. The British began digging trenches, creating a defensive line.
Ottoman units responded with air raids on Romani in June, killing eight Australian soldiers and wounding 22. About 100 horses were also lost.
Scouting the Sinai (May-June 1916)

The ANZAC Mounted Division carried out long scouting missions from Romani. The longest raid was 100 km in 36 hours. The heat in the Sinai desert was extreme during May, June, and July. Soldiers suffered from heatstroke and thirst during these early patrols. One patrol lost 160 men who collapsed from heat exhaustion.
In June, the 1st Light Horse Brigade scouted several areas. On July 9, another scouting mission found El Salmana occupied by Ottoman Army units. By mid-June, the No. 1 Squadron, Australian Flying Corps began active service, helping with reconnaissance.

The Battle of Romani
The Battle of Romani took place near the town of Romani, 23 miles east of the Suez Canal, from August 3 to 5, 1916. The Central Powers (Austrians, Germans, and Ottomans), led by Kress von Kressenstein, wanted to stop the British from taking back the Sinai Peninsula and to bring the Suez Canal within artillery range. They had 12,000 soldiers.
The battle began early on August 4. The Ottoman forces pushed back the Australian brigades. However, the British 52nd (Lowland) Division and the New Zealand Mounted Rifle and 5th Mounted Brigades arrived. The Ottoman advance was stopped by combined Allied fire, deep sand, and the intense summer heat.
The British infantry could not effectively chase the retreating Ottoman columns the next day. The Anzac Mounted Division alone could not capture Von Kressenstein's large force, which retreated in an orderly way. Bir el Abd was abandoned on August 12, 1916, after fierce fighting. This was the first major Allied victory against the Ottoman Empire in World War I. The Suez Canal was never threatened by land forces again during the war.
Arab Revolt
In June 1916, the Sharifian Army of Sherif Hussein, the leader of Mecca, attacked Ottoman garrisons in Mecca and Jeddah in the Arabian Peninsula. Jeddah fell quickly. Fighting in Mecca lasted three weeks. The British wanted to expand the Arab Revolt by causing trouble along the Hejaz Railway, which ran from Istanbul to Damascus and on to Medina. This railway was important for Ottoman communications. The British encouraged Sherif Hussein to seek support for his revolt further north.
Sinai Campaign: Moving Forward
After the Battle of Romani, the Ottoman Army moved back to Bir el Abd. Their main forward base then became El Arish, with a fortified post at Bir el Mazar. El Arish was bombed by British aircraft on June 18, 1916.
The Egyptian Expeditionary Force needed huge amounts of supplies and water to advance to El Arish. To get this, the British Royal Engineers built a railway and pipeline across the Sinai Peninsula. From mid-August to December 1916, British forces waited for this infrastructure to be built. The mounted troops were busy protecting the construction and scouting new areas.

During one patrol on August 19, the 5th Light Horse Regiment found 68 Ottoman soldiers half-dead from thirst. Instead of attacking, they gave them water and helped them.
British infantry moved forward to guard the railway. The movement of infantry across Sinai was made easier by building wire netting roads. These roads provided a stable surface for light vehicles and ambulances.
By September 1916, Germany and the Ottoman Empire had agreed to send more German and Austrian aid to strengthen the Ottoman army in Palestine. German planes bombed Port Said on September 1, 1916. Australian and British airmen responded by bombing Bir el Mazar.
Medical Care in the Desert
Military medical care improved during the war. Doctors learned to clean wounds better and stabilize broken bones. They also started using intravenous saline and blood transfusions to help with shock. Wounded soldiers were moved from aid posts near the front lines to dressing stations in the back. They were then taken to the railway line by horse-drawn ambulances, sand sledges, or cacolets on camels. Traveling by camel was very painful for wounded men.
Horse Care
Horse care improved during 1916. Few animals were lost from the Anzac Mounted Division, even after long marches and battles. Veterinary officers regularly inspected the horses. On average, about 640 sick horses and mules were lost per week from the Sinai front. They were transported by train. Animals that died were buried or burned after their skins were removed and sold.
Eastern Frontier Force
In September 1916, General Murray moved his headquarters to Cairo to deal with threats from the Senussi in the Western Desert. Major-General Sir Charles Dobell was put in charge of all troops on the canal and in the desert, called the GOC Eastern Frontier Force. His headquarters was at Ismailia. He organized his command into two parts: Canal Defenses and Desert Column.
In October, Eastern Force began operations into the Sinai desert. They focused on building the railway and waterline. The railway was built at about 15 miles a month, and the British front moved eastward at the same speed. By October 19, the Anzac Mounted Division Headquarters was at Bir el Abd.
Raid on Bir el Mazar

On September 16–17, 1916, a scouting force attacked Bir el Mazar. The Ottoman garrison of 2,000 men was well-defended and fought back strongly. The British forces showed their strength and then withdrew. The Ottoman force abandoned Bir el Mazar soon after.
Raid on Maghara Hills
As the Allies advanced, an Ottoman position at Bir El Maghara, 50 miles southeast of Romani, became a threat. A column of Australian Light Horse, City of London Yeomanry, and Mounted Camelry attacked the Maghara Hills between October 11 and 15. They surprised the defenders but could not capture the main position.
Bombing Beersheba

By October 2, aerial photos showed that German aircraft hangars at El Arish had disappeared. By October 25, there was less anti-aircraft fire over El Arish. No. 1 Squadron was photographing El Arish and Magdhaba, and No. 14 Squadron was scouting Rafah.
On November 11, British planes bombed Beersheba. They hit the aerodrome, tents, and the railway station. Two days later, a German plane bombed Cairo in return.
Railway Building in Sinai
By November 17, the EEF railway reached 8 miles east of Salmana, 54 miles from Kantara. The water pipeline reached Romani. Bir el Mazar, an old Ottoman base, was taken over by the Anzac Mounted Division on November 25. By December 1, the railway was 64 miles from Kantara. The Ottomans also built a railway line from Ramleh to Beersheba.
Battle of Magdhaba, December 1916
On December 21, after a 30-mile night march, part of the Imperial Camel Corps Brigade and the Anzac Mounted Division entered El Arish. The Ottoman forces had abandoned it and retreated to Magdhaba.

Magdhaba was 18 miles southeast of El Arish. It was the last obstacle before the Allies could advance into Palestine. General Chetwode's Desert Column also arrived that day. Chauvel decided to attack Magdhaba with the Anzac Mounted Division.
The Anzac Mounted Division was in position by 3:50 AM on December 23. Chauvel sent the New Zealand Mounted Rifles Brigade and the 3rd Light Horse Brigade to cut off the Ottoman retreat. The Imperial Camel Corps Brigade followed the telegraph line directly to Magdhaba.
Fighting was fierce. Aerial reconnaissance helped a lot, even though the six Ottoman redoubts were well hidden. By 3:30 PM, the Turks began to surrender. By 4:30 PM, the entire garrison had surrendered. The victory cost the EEF 22 dead and 121 wounded.
Battle of Rafa, January 1917
On the evening of January 8, 1917, mounted units of Desert Column, including the Anzac Mounted Division, rode out of El Arish. They planned to attack a 2,000 to 3,000-strong Ottoman Army garrison at Rafa (also known as Rafah) the next day.
On January 9, four British aircraft bombed the German aerodrome at Beersheba. They saw a large Ottoman force nearby on their way back. The British had taken back the northern part of the Egyptian Sinai Peninsula. However, the new British government wanted to go on the offensive against the Ottoman Army in Palestine. This was to support the Arab revolt and build on the victories at Romani and Magdhaba.
The next target was on the border of Egypt and the Ottoman Empire, about 30 miles away. This was too far for infantry, so the Desert Column was to attack the Ottoman position along the coast. The Allied troops captured the town and the fortified position by nightfall. The British lost 71 killed and 415 wounded. The Ottoman garrison lost 200 killed and 1,600 taken prisoner.
End of the Sinai Campaign

After the capture of El Arish and Magdhaba, reconnaissance planes saw Ottoman forces moving their headquarters back. Before the victory at Rafa, air reconnaissance reported Ottoman forces still at El Auja and El Kossaima. But between January 14 and 19, Beersheba was bombed several times by No. 1 Squadron Australian Flying Corps. After these raids, the German airmen moved their aerodrome to Ramleh. On January 19, air reconnaissance reported the Ottoman Army had left El Kossaima.

By the end of January, both sides were carrying out heavy air attacks. German and Ottoman pilots bombed the main British base at El Arish. British squadrons bombed Beersheba and Ramleh. The Germans also bombed the Egyptian Labour Corps, slowing down the railway construction. On February 3, Major General Chauvel ordered Allied bombing to stop, hoping the Ottoman attacks would also stop. The pipeline reached El Arish on February 5.
In February 1917, the Ottoman Army was also building a light railway line from Tel el Sheria to Shellal. Sheria became the main Ottoman base along the Gaza–Beersheba defensive line.
The last actions of the Sinai campaign happened in February 1917. General Murray ordered attacks on the Ottoman garrisons at Nekhl and Bir el Hassana. The 11th Light Horse Regiment raided Nekhl on February 17. The Imperial Camel Corps raided Bir el Hassana, which surrendered easily on February 18.
Palestine Campaign Begins

The Palestine campaign started in early 1917. It involved continuous fighting from October to December 1917, leading to the capture of Ottoman territory. Operations in the Jordan Valley and Transjordan happened between February and May 1918. The final Palestine offensive began in mid-September, and the war ended with the Armistice on October 30, 1918.
With the victory at Rafa, Murray had achieved all his goals. He had secured the Suez Canal and Egypt and controlled the Sinai Peninsula. However, just two days after the victory at Rafa, on January 11, 1917, General Murray was told to send the 42nd (East Lancashire) Division to reinforce the Western Front in Europe.
But a week later, a meeting in Calais on February 26, 1917, decided to encourage attacks on all fronts. So, the British War Cabinet agreed to Murray's plan to attack Gaza, but without sending him more troops. The attack could not happen until March 26.
While these decisions were being made, the Anzac Mounted Division returned to El Arish. They rested and recovered after the tough desert campaign. They enjoyed sea bathing, football, and boxing.

By the end of February 1917, the British had built 388 miles of railway, 203 miles of metal roads, and 300 miles of water pipeline. The pipeline needed three huge pumping plants working 24 hours a day. With the railway at Rafa, Gaza was only 20 miles away.
Agreements for Palestine
When a British invasion of Palestine became possible, it was important to reach an agreement with France, who also had interests in Palestine and Syria. In May 1916, Sir Mark Sykes and M. Picot agreed that Britain would occupy Palestine and France would occupy Syria. They also agreed that a French military group would join the Egyptian Expeditionary Force.
Italy also wanted to be involved. In a secret agreement, her allies promised to include her in talks about Palestine after the war. In April 1917, Italy was allowed to send about 500 infantry soldiers to Palestine. Their main role was political, to assert Italy's religious rights in Jerusalem and Bethlehem.
Changes to Eastern Force
When the 42nd (East Lancashire) Division went to the Western Front, the 53rd (Welsh) Division took its place at El Arish. The 54th (East Anglian) Division also moved east to El Arish. The new 74th (Yeomanry) Division was being formed in Egypt.
The arrival of new brigades from the Salonika front led to changes in the Desert Column. By March 1917, General Charles Macpherson Dobell commanded Eastern Force. It included the 52nd (Lowland) and 54th (East Anglian) Divisions, the Imperial Camel Corps Brigade, and the Desert Column. The Desert Column included the 53rd (Welsh) Division, the Anzac Mounted Division, and the Imperial Mounted Division.
Ottoman Army Strength

In February, British intelligence reported that two new Ottoman Army divisions had arrived. Along the 30 km long Gaza–Beersheba line, the Fourth Army had about 18,000 soldiers. Kress von Kressenstein placed some troops at Gaza and Beersheba, but kept most in reserve. By mid-March, the Ottoman Army's 53rd Infantry Division was also on its way.
The garrison at Gaza had 3,500 rifles, machine gun companies, and five batteries of 20 guns. They were supported by new German fighter aircraft, which were better than the Allied planes.
Between the victory at Rafa and the end of February, 70 Ottoman deserters entered British lines. Most Arabs and Syrians disappeared into towns and villages.

Gaza Campaign
First Battle of Gaza, March 26

The Ottoman Army retreated to Gaza on the Mediterranean coast. They held large garrisons spread across the area to Beersheba. On March 26, the 53rd (Welsh) Division, supported by a brigade from the 54th (East Anglian) Division, attacked the strong defenses south of Gaza.
In the afternoon, after being reinforced by the Anzac Mounted Division, the attack began to succeed quickly. Most objectives were captured. However, night stopped the attack, and a withdrawal was ordered before commanders fully knew what had been gained.
The British government believed reports that a major victory had been won and ordered Murray to capture Jerusalem. But the British were not in a position to attack Jerusalem yet, as they had not fully broken through the Ottoman defenses at Gaza.
A Pause in Fighting
Deir el Belah was 5 miles northeast of Khan Yunis and 8 miles southwest of Gaza. Active patrols continued towards Sharia and Beersheba. Here, the 1st Light Horse Brigade rejoined the Anzac Mounted Division. They received new machine guns, increasing their firepower. Deir el Belah became the headquarters of Eastern Force after the railway reached there on April 5.
General Murray had given the impression that the First Battle of Gaza was more successful than it was. The British War Cabinet agreed to Murray's plan to attack Gaza, but without replacing the infantry division that had left.
Second Battle of Gaza, April 17–19
The First Battle of Gaza was a fast "encounter battle." But in the three weeks between the two battles, Gaza was quickly turned into a very strong defensive position. The Ottoman defenders increased the width and depth of their front lines. They built strong, mutually supporting forts on ideal defensive ground.
These new defenses changed the Second Battle of Gaza, fought from April 17 to 19, 1917. It became a frontal infantry attack across open ground against well-prepared trenches. Mounted troops played a supporting role. The infantry were helped by eight Mark I tanks and gas shells. The tanks were used for shelter, but they also became targets.
The strong Ottoman defenses and their soldiers' determination defeated the EEF. Murray and Dobell were removed from their commands and sent back to England.
Stalemate
From April to October 1917, the Ottoman and British forces held their lines from Gaza to Beersheba. Both sides built extensive trenches, especially strong where the lines were close, at Gaza and Beersheba. In the center, defenses at Atawineh, Sausage Ridge, Hareira, and Teiaha supported each other. The land was flat and open, making a frontal attack almost impossible.

Both sides reorganized their armies and appointed new commanders. The Yildirim Army Group was formed in June, led by German General Erich von Falkenhayn. General Edmund Allenby replaced Archibald Murray in June to command the Egyptian Expeditionary Force. Allenby reorganized the force into two infantry and one mounted corps. By October 28, 1917, the EEF had 50,000 fighting troops.
Raid on Ottoman Railway

On May 23, 1917, British Royal Engineers destroyed large parts of the railway line south from Beersheba to Hafir el Aujah. This raid was covered by the two mounted divisions.
Battle of Buqqar Ridge
The Allies occupied Karm on October 22, 1917, making it a key point for supplies and water. This threatened the Ottoman defenses at Hareira Redoubt and Rushdie System. General Erich von Falkenhayn planned an attack from Beersheba on October 27, followed by a full attack from Hareira on October 31, the same day the Battle of Beersheba began.
Southern Palestine Offensive
Battle of Beersheba, October 31

The Southern Palestine Offensive began with the attack on Beersheba. The town was defended by 4,400 rifles, 60 machine guns, and 28 field guns. These were in well-built trenches with wire, and strong defenses on surrounding hills. One key defense was Tel el Saba east of Beersheba.
The British had 47,500 rifles and about 15,000 cavalry. The infantry attacked Beersheba from the west. The Anzac Mounted Division attacked from the east after riding 25 to 35 miles around the town. The infantry attacks began with heavy shelling. Intense hand-to-hand fighting continued until 1:30 PM, when the Ottoman trenches on the western side were captured.
Meanwhile, the Anzac Mounted Division circled Beersheba to cut off the road north. They attacked Tel el Saba. The defenders on Tel el Saba were strong, but after reinforcements, a general attack began at 2:05 PM, capturing Tel el Saba at 3:00 PM.
Orders were given for a general attack on Beersheba by the dismounted 1st and 3rd Light Horse Brigades and the mounted 4th Light Horse Brigade. The 4th Light Horse Regiment attacked the fortifications dismounted. Most of the 12th Light Horse Regiment rode through a gap in the defenses and galloped into Beersheba to capture the garrison.
After Beersheba's Capture


From November 1 to 7, strong Ottoman rearguards fought hard at Tel el Khuweilfe, Hareira, Sheria, Sausage Ridge, and Gaza. This allowed the Ottoman Armies to retreat in good order. The British cavalry Charge at Huj happened on November 8 against an Ottoman rearguard. Allenby ordered the EEF to chase the retreating Ottoman armies, but the strong rearguards stopped them.
The battle at Tel el Khuweilfe was important because it pulled Ottoman reserves away from the center of their line. This made it possible for the British to attack the remaining Ottoman forces at Sheria and push them north towards Jaffa.
Advance to Jaffa and Judean Hills

On November 12, four divisions of the Ottoman 8th Army tried to counterattack near the important Junction Station on the Jaffa–Jerusalem railway. The Australian Mounted Division, with two extra brigades, held them back.
On November 13, the Egyptian Expeditionary Force attacked a 20,000-strong Ottoman force. The main attack was by the XXIst Corps's 52nd (Lowland) and 75th Divisions in the center. The Australian Mounted Division was on the right, and the Anzac and Yeomanry Mounted Divisions were on the left. The infantry succeeded, supported by a cavalry charge. On November 14, the New Zealand Mounted Rifles Brigade defeated a large rearguard. The Ottoman 8th Army gave up Jaffa and retreated, while their 7th Army withdrew into the Judean Hills to defend Jerusalem. They had lost 10,000 prisoners, 100 guns, and many soldiers.
Capture of Jerusalem

Operations to capture Jerusalem began with the Battle of Nebi Samwill from November 17 to 24. These battles were fought by the XX, XXI, and Desert Mounted Corps against the Ottoman 7th Army in the Judean Hills. The fighting continued until early December, when Jerusalem was occupied by the British.
After the Ottoman Army left Jerusalem, the city was occupied on December 9, 1917. This was a very important event for the British government. It was one of their few real successes after a year of disappointments on the Western Front.
On the Ottoman side, this defeat led to Djemal Pasha leaving. He had already given command to German officers. Falkenhayn was also replaced in March 1918.
Winter 1917–18
Managing Captured Lands
When Allenby took command, he focused on the army in the field. He left the political and administrative issues of Egypt to a government official. The newly captured Ottoman territory also needed to be managed. Allenby appointed a Chief Administrator for Palestine. He divided the country into four districts: Jerusalem, Jaffa, Majdal, and Beersheba, each with a military governor.
Under this administration, the immediate needs of the people were met. Seeds and livestock were imported, and money was made available. A stable currency was set up, and postal services were restored.
On January 15, 1918, Allenby reported on how people felt about the occupation of Jerusalem. Muslims were mostly neutral. Supporters of Sherif Hussein were happy but worried about Jewish influence. Jews were overjoyed by the Balfour Declaration's support for Zionism. Christians were happy with the occupation.
Allenby faced pressure to set up foreign administrations in Palestine. The French representative, Picot, wanted a share in governing a French Protectorate in the Holy Land. Allenby insisted that military administration must be under the British Commander in Chief alone.
Strengthening British Gains
.jpg)
The weather was improving, and railways and roads were being repaired. A new railway line was built. Allenby wanted to extend his right flank to include Jericho and the northern part of the Dead Sea. On January 3, two Australian aircraft found boats carrying corn and hay for Ottoman forces. The planes bombed the boats until the service stopped.
Allenby's next moves were to capture Jericho, cross the Jordan River, and advance to Amman. He wanted to destroy parts of the Hedjaz railway to isolate Ottoman forces and encourage more Arab uprisings.
The main British base moved north to the new railhead. By March 1918, ambulance trains ran to Kantara from Ludd.
Westerners vs. Easterners
By the end of 1917, the goals of capturing Jerusalem were met. Ottoman-German plans against Baghdad were stopped, and British morale was boosted.
British Prime Minister David Lloyd George wanted to knock the Ottoman Empire out of the war in 1918. Some worried that sending too many troops from the Western Front to Palestine might protect colonies but lose the war.
Those who favored the "Western Front" argued that the heart of the Ottoman Empire, Istanbul, was still far away. They believed that if Germany defeated France, it wouldn't be enough to force the Ottoman Empire out of the war. With Russia out of the war, the Dardanelles were no longer important.
Those who favored the "Eastern Front" agreed that forces in France and Belgium were essential. But they argued that the Palestine theater was less wasteful of lives than the Western Front. They believed a decisive victory could be won in Palestine.
On December 13, 1917, the War Cabinet considered two plans: conquering Palestine or advancing to Aleppo to cut Ottoman communications. Allenby reported that the rainy season would prevent attacks for at least two months.
The Supreme War Council approved a decisive offensive to destroy Ottoman armies. They believed this would have a big impact on the war. In February 1918, General Jan Christiaan Smuts met with Allenby. Smuts said the EEF would be reinforced with Indian cavalry divisions and more artillery and planes. Smuts also suggested crossing the Jordan and using the Hejaz Railway to outflank Damascus.
Judean Hills Operations
This action, fought between March 8 and 12, pushed the EEF's front line northwards from the Mediterranean Sea to the Jordan Valley. Allenby's right flank was secure, but he needed more territory to support planned operations across the Jordan. During this operation, the XX and XXI Corps advanced, pushing the 7th and 8th Ottoman Armies north.
Battle of Berukin, April 9–11

General Allenby planned to attack Tulkarm after cutting the Hedjaz Railway at Amman. The attack on Berukin, from April 9 to 11, was planned to begin with the 75th Division capturing villages and high ground. The 7th (Meerut) Division would then advance and prepare gun positions.
The 75th Division's attack on April 9 met fierce Ottoman resistance. German battalions counterattacked with mortars and machine guns. All three infantry brigades successfully captured their initial targets. However, delays allowed German and Ottoman defenders to strengthen their positions. Fighting continued all day and night with counterattacks. On April 11, it was clear that continuing the attack would be too costly. A long artillery duel continued for seven days.
This battle showed that in the Judean Hills, German and Ottoman machine guns made any advance slow and expensive. The British suffered 1,500 casualties, while the Ottomans lost about 200 dead and 27 prisoners.
Summer in the Judean Hills

During the summer of 1918, the main focus of the war was on the Western Front. The British Chief of the General Staff could only offer Allenby railway construction workers and more shipping.
The front line stretched from the Mediterranean Sea to the Dead Sea. Temperatures varied greatly. The coastal plain was almost sub-tropical. In the Judean Hills, temperatures could change by 20 degrees Fahrenheit in a day. The Jordan Valley had shade temperatures between 100–120°F with high humidity. Dust and insects, including malarial mosquitoes, were common.
The Palestine front was relatively quiet during the summer of 1918. There were some small British raids to improve positions and one minor Ottoman attack.

On June 8, 1918, the 7th (Meerut) Division attacked two hills near the sea. They quickly took their objectives, but the Ottoman defenders counterattacked. British casualties were 63 killed and 204 wounded. The two hills remained under British control.
On July 13, an Ottoman attack on the Ra-fat salient was preceded by one of the heaviest bombardments in Palestine. The attack continued until after dark, killing 52 soldiers.
On July 27, five platoons of the 53rd Sikhs successfully raided Ottoman trenches. They surprised the garrison, capturing 33 prisoners for only four casualties.
On the night of August 12–13, the 10th (Irish) Division carried out a large raid. They attacked Ottoman defenses on the Burj–Ghurabeh Ridge, west of the Jerusalem to Nablus road. The Ottoman defenses were strong, but the British and Indian infantry fought fiercely and succeeded. They inflicted heavy losses on the Ottomans and captured 250 prisoners.
Jordan Valley Operations
Capture of Jericho, February 1918
Allenby wanted to extend his right flank to include Jericho and the northern Dead Sea. In mid-February, the 53rd (Welsh) and 60th (2/2nd London) Divisions, with the 1st Light Horse and New Zealand Mounted Rifles Brigades, attacked German and Ottoman defenses east of Jerusalem. As the infantry attacked, the mounted brigades moved towards the Jordan Valley. The 1st Light Horse reached the Jordan Valley and entered Jericho.
Occupation of the Jordan Valley
In February, the occupation of the valley began. The Auckland Mounted Rifles Brigade stayed to patrol the area after the Capture of Jericho. During the two Transjordan attacks, the Jordan Valley was guarded by the Anzac and Australian Mounted Divisions, the 4th and 5th Cavalry Divisions, and the 20th Indian Brigade.
First Transjordan Advance
Before Jericho was captured, Allenby planned to cross the Jordan River and raid the Hedjaz Railway. The First Attack on Amman took place between March 21 and 30.
_Infantry_Division_Jerusalem.jpeg)
Shea's Force, including the 60th (2/2nd London) and Anzac Mounted Divisions, successfully crossed the Jordan River. They occupied Es Salt, attacked Amman, and partly destroyed sections of the Hedjaz Railway.
The Ottoman 48th Infantry Division and German battalions successfully defended Amman. With his supply lines threatened, Shea's Force was ordered to retreat. The main goal, destroying a large bridge at Amman, was not achieved. This was the first defeat for the EEF since the Second Battle of Gaza in April 1917.
Second Transjordan Advance
After the first unsuccessful attack on Amman, Allenby ordered another attack on Shunet Nimrin and Es Salt. However, German and Ottoman forces in the area had doubled in the five weeks between the two operations.
The second Transjordan attack was also unsuccessful. It risked the capture of one of Allenby's mounted divisions. However, it is believed to have achieved his goal of making his opponents focus on the Transjordan area, away from the Mediterranean coast where he planned a successful breakthrough later.
German and Ottoman Attack
On July 14, German and Ottoman forces launched two attacks. One attack in the hills was routed by Australian Light Horse. A second operation east of the Jordan River was also routed by Indian lancers.
Focus Shifts to the Western Front
The German spring offensive began on the Western Front on the same day the First Transjordan attack on Amman started. This huge attack completely overshadowed the failure in Palestine. The German assault caused the British front in Picardy to collapse. On March 23, German forces advanced 12 miles and captured 600 guns. In total, the British lost 1,000 guns and 160,000 men.
The British War Cabinet realized that defeating the Ottoman Empire had to be postponed. Allenby described the effect on the Palestine campaign on April 1, 1918: "Here, I have raided the Hedjaz railway 40 miles East of Jordan & have done much damage but my little show dwindles now into a very insufficient [insignificant] affair in comparison with events in Europe." Palestine went from being the British government's top priority to a "side show."
Changes to EEF Infantry
The 52nd (Lowland) Division was sent to France in early April. The 74th (Yeomanry) Division and nine British infantry battalions were also sent to France between May and August 1918. What remained of these divisions were reinforced by British Indian Army battalions. Infantry brigades were reformed with one British battalion and three British Indian Army battalions.
By April 1918, 35 Indian infantry and two Indian pioneer battalions were preparing to move to Palestine. Many of these battalions were formed by taking experienced companies from regiments in Mesopotamia. Not all Indian battalions served in infantry divisions; some defended supply lines.
The reorganization was complex. Of the 54 British Indian Army battalions in Palestine, 22 had recent combat experience but had lost experienced companies. Ten battalions were formed from experienced troops who had never fought together. The other 22 had no prior war service. Almost a third of the troops were new recruits. Many junior British officers were new and could not speak Hindustani.
Two British Indian Army divisions arrived from the Mesopotamia campaign in January and April 1918: the 7th (Meerut) Division and the 3rd (Lahore) Division. Only the 54th (East Anglian) Division remained an all-British division.
Changes to EEF Cavalry

The British Indian Army's 4th and 5th Cavalry Divisions, which had fought on the Western Front, were disbanded and reformed in the Middle East. Yeomanry regiments replaced British regular cavalry regiments. Nine British yeomanry regiments were sent to France.
Three remaining yeomanry regiments, along with new British Indian Army units from France, formed the 4th Cavalry Division. Two other yeomanry regiments, with new British Indian Army units and the renamed 15th (Imperial Service) Cavalry Brigade, formed the 5th Cavalry Division. The 15th (Imperial Service) Cavalry Brigade had served in the Sinai and Palestine since December 1914.
Five of the six brigades in the 4th and 5th Cavalry Divisions had one British yeomanry and two Indian cavalry regiments. The sixth brigade had three regiments of Imperial Service Troops from Indian Princely states. Eight of the 18 regiments were armed with lances. The Australian Mounted Division's 5th Mounted Brigade was also sent to France. It was replaced by the new 5th Light Horse Brigade, formed from Australians from the Imperial Camel Corps Brigade and French cavalry.
Yildirim Army Group
| Rifles | Sabres | Machine guns |
Art.Rifles [sic] | |
|---|---|---|---|---|
| Fourth Army | 8,050 | 2,375 | 221 | 30 |
| Seventh Army | 12,850 | 750 | 289 | 28 |
| Eighth Army | 15,870 | 1,000 | 314 | 1,309 |
| North Palestine Line of Communications | 950 | – | 6 | – |
The Ottoman armies in the Yildirim Army Group had suffered many losses between October and December 1917. The Seventh Army lost 110 officers and 1,886 men killed, and many more wounded, missing, or captured. The Eighth Army also had many wounded. Total Ottoman casualties were 25,337, while British losses were 18,000. Despite being outnumbered, Ottoman units survived the attacks.
The Yildirim Army Group was still a strong fighting force in early 1918. All infantry divisions that fought at Beersheba were still active, though smaller. Reinforcements arrived in December 1917. Ottoman soldiers seemed tough and professional. Training continued, and in February, the 20th Infantry Regiment received intense training.
Ottoman armies remained aggressive. Their front line was held by the Eighth Army (headquarters at Tul Keram), the Seventh Army (headquarters at Nablus), and the Fourth Army (headquarters at Amman). German air superiority ended with the arrival of new British planes in January 1918.
The Ottoman high command was unhappy with von Falkenhayn, the commander of the Yildirim Army Group. He was blamed for the defeat at Beersheba. Enver Pasa replaced him on February 19 with General Otto Liman von Sanders. The new leader changed the defense style to be more unyielding.
New German Commander Arrives
Liman von Sanders took command of the Ottoman Army in Palestine on March 1, 1918. He saw that the Ottoman front line was weak west of the Jordan. He immediately strengthened both flanks by moving his forces around.
In May 1918, Liman reorganized the Ottoman army forces in Palestine from his headquarters at Nazareth. The Eighth Army held the line from the Mediterranean coast into the hills. The Seventh Army held the rest of the Ottoman line eastwards to the Jordan River.
The 48th Infantry Division continued training, including battle tactics and machine guns. When the 37th Infantry Division arrived, its troops took a two-week course on using stick grenades.
Arab Attacks
Arab attacks were made on Maan between April 15 and 17. They captured 70 prisoners and two machine guns. They temporarily occupied the railway station but failed to capture the main position.
Megiddo Offensive

As the dry season approached, Allenby planned to secure Tiberias, Haifa, and the Yarmuk Valley towards Damascus. The people in the Sharon battlefield area had diverse backgrounds and beliefs. In Haifa, about half the population was Muslim. In Acre, almost all were Muslim. The Esdraelon Plain had Sunni Arabs and some Jewish settlements. Northern Galilee had Muslims, Christians, and Jews.
Allenby launched his attack on September 19, 1918. This campaign is called the Battle of Megiddo. The British tried hard to trick the Ottoman Army about their target. This worked, and the Ottoman Army was surprised when the British suddenly attacked Megiddo. As the Ottoman troops retreated, the Royal Air Force bombed them from the air. Within a week, the Ottoman army in Palestine was no longer a fighting force.
The actual battlefield of the Battle of Megiddo (1918) was far from the Biblical city. The name "Megiddo" was used to link the victory to well-known Bible locations and boost British morale.
Historians have noted similarities between the Gaza to Beersheba offensive and the Megiddo operation. Both involved cavalry surrounding the Ottoman flank, and breakthroughs happened in unexpected places. At Gaza–Beersheba, the breakthrough was at Beersheba, not Gaza. At Megiddo, it was on the Mediterranean coast, not across the Jordan.
Syrian Campaign
Chasing the Enemy to Damascus
_(IWM_Q012379).jpg)
The war in Palestine was over, but in Syria, it lasted another month. The final goal for Allenby's and Feisal's armies was Damascus. Two Allied columns marched towards Damascus. The first, mostly Australian and Indian cavalry, came from Galilee. The other column, with Indian cavalry and T.E. Lawrence's militia, traveled north along the Hejaz Railway. Australian Light Horse troops marched into Damascus unopposed on October 1, 1918. Major Olden received the city's official surrender at 7 AM. Later that day, Lawrence's irregulars entered Damascus.
The people in this region were very diverse. The Eastern Hauran had mostly Druses. The Jaulan had Circassians, Metawala, and some Algerian colonists. The southern Jaulan was poor and rocky, with few people. The northern part was more fertile.
The advances to Amman and Damascus led to the highest number of malaria cases ever seen by Australian forces.
Capturing Aleppo
Aleppo, the third largest city in the Ottoman Empire, was captured on October 25. The Ottoman government was ready to give up these non-Turkish provinces without surrendering completely. While this battle was happening, the Ottoman Empire sent an expeditionary force into Russia. Only after Bulgaria surrendered, which put the Ottoman Empire in a vulnerable position, did they sign an armistice at Mudros on October 30, 1918. They surrendered two days later.
Summary of the Campaign
The British and their allies had 51,451 battle casualties. This included 12,873 killed or missing, 37,193 wounded, and 1,385 captured. Another 503,377 soldiers were hospitalized for non-battle reasons, mostly diseases. Of these, 5,981 died. Indian battle casualties were 10,526, with 3,842 dead.
Total Ottoman losses are harder to know but were likely much higher. An entire army was lost, and the Ottoman Empire sent many troops to the front. Historian Edward J. Erickson estimated Ottoman battle casualties. He did not estimate disease deaths, but noted that the Ottomans had 2.66 times more disease deaths than soldiers killed in action throughout the war.
Erickson's estimates for Ottoman battle casualties by battle:
- Sinai 1915: 1,700 (192 killed, 381 wounded, 727 missing, 400 captured)
- Sinai 1916: 1,000 (250 killed, 750 wounded)
- 1st Gaza 1917: 1,650 (300 killed, 750 wounded, 600 captured)
- 2nd Gaza 1917: 1,660 (82 killed, 1,336 wounded, 242 missing)
- 3rd Gaza/Jerusalem 1917: 28,057 (3,540 killed, 8,982 wounded, 9,100 missing, 6,435 captured)
- 2nd Jordan 1918: 3,000 (1,000 killed, 2,000 wounded)
- Megiddo/Syria 1918: 101,300 (10,000 killed, 20,000 wounded, 71,300 captured)
The total battle casualties were about 138,367. If we include all wounded and disease deaths, the total casualties could be around 230,500.
Despite the uncertainty of exact numbers, the historical impact of this campaign is clear. The British conquest of Palestine led directly to the British mandate over Palestine and Trans-Jordan. This, in turn, paved the way for the creation of the modern states of Israel, Jordan, Lebanon, and Syria.
Images for kids
-
Map of improved defenses
-
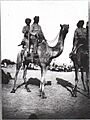
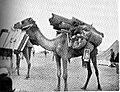
Bikaner Camel Corps, El Arish 1918
-
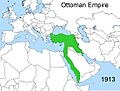
Ottoman Empire in 1913 (in green)
-
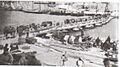
New Zealand Mounted Rifle Brigade transport crossing Pontoon Bridge at Serapeum 6 March 1916
-
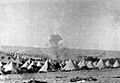
Romani 1 June 1916 bombs falling on B Squadron, 3rd Light Horse Regiment, 1st Light Horse Brigade tent lines 8 men killed 22 wounded, 36 horses killed 9 wounded, 123 missing
-
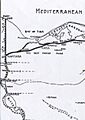
Suez Canal to El Arish
-
Brigade Headquarters Office Ready for the Road
-
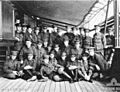
Reinforcements to No. 1 Squadron Australian Flying Corps on 25 July 1916 on board P & O "Malwa" on their way to Egypt
-
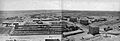
Ottoman military town of Hafir el Aujah, the principal desert base
-
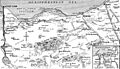
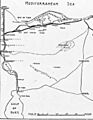
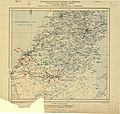
Map of north and central Sinai, 1917
-
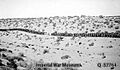
February 1917 Infantry marching on the wire road across the desert between Bir el Mazar and Bardawil
-
Part of 15 miles of railway line blown up in May 1917 by the Anzac and Imperial Mounted Divisions' and the Imperial Camel Corps Brigade' engineers assisted by troopers.
-
Military situation immediately prior to the release of the Balfour Declaration.
-

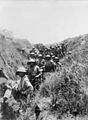
November 1918 British officer questioning the inhabitants of a captured village during the advance
-
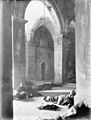
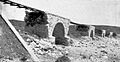
Wounded of the 5th Battalion Somerset Light Infantry and 4th Battalion Wiltshire Regiment in a Dressing Station located in the monastery at Kuryet el Enab which the 75th Division captured on 20 November 1917
-

Gaza in ruins, February 1918
-
2nd Battalion Black Watch in trenches on Brown Ridge after the action at Arsuf on 8 June 1918
-
British and Indian officers of the 18th Lancers at Tel el Kebir on arrival from France in April 1918
